
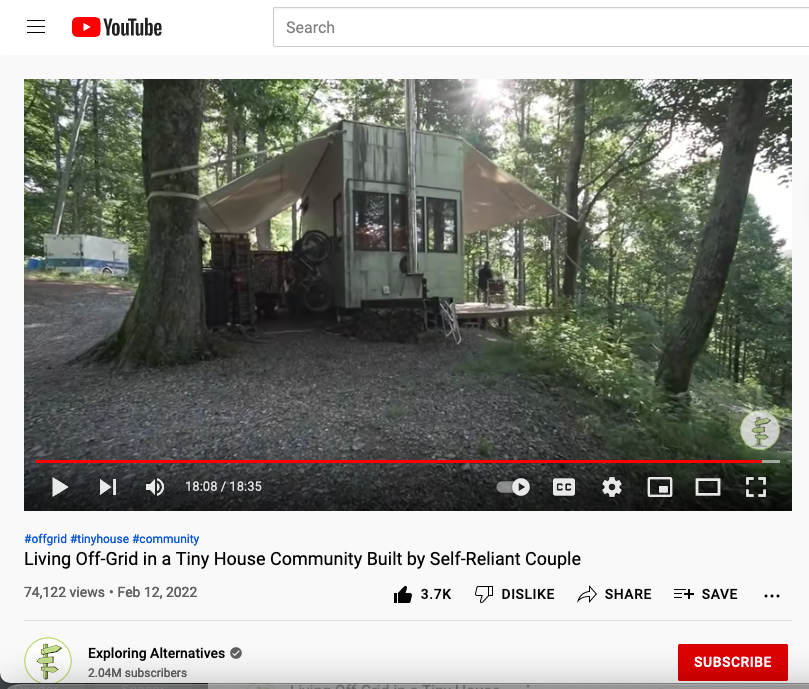
Tiny House Community featured on Exploring Alternatives
We are huge fans of the YouTube channel Exploring Alternatives and this year we had the opportunity to work with Danielle and Mat to create a short video featuring our project here in Boone and the experiences that we are having living off the grid in community with students. Check out the video here:
https://www.youtube.com/watch?v=71F0XK1_u0I
https://www.youtube.com/watch?v=71F0XK1_u0I
|
|
|
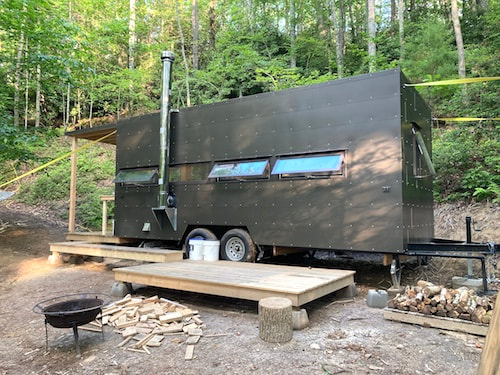
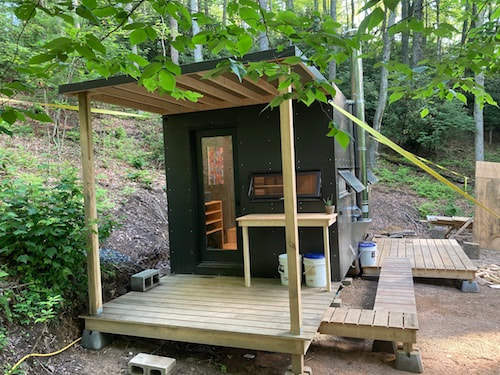
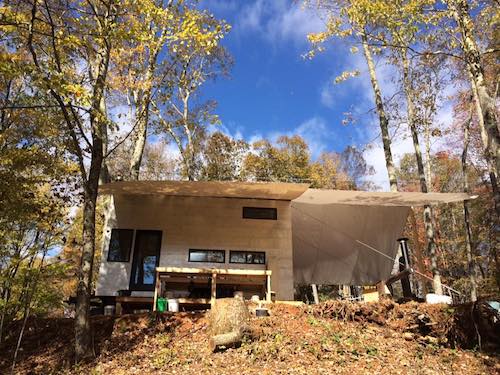
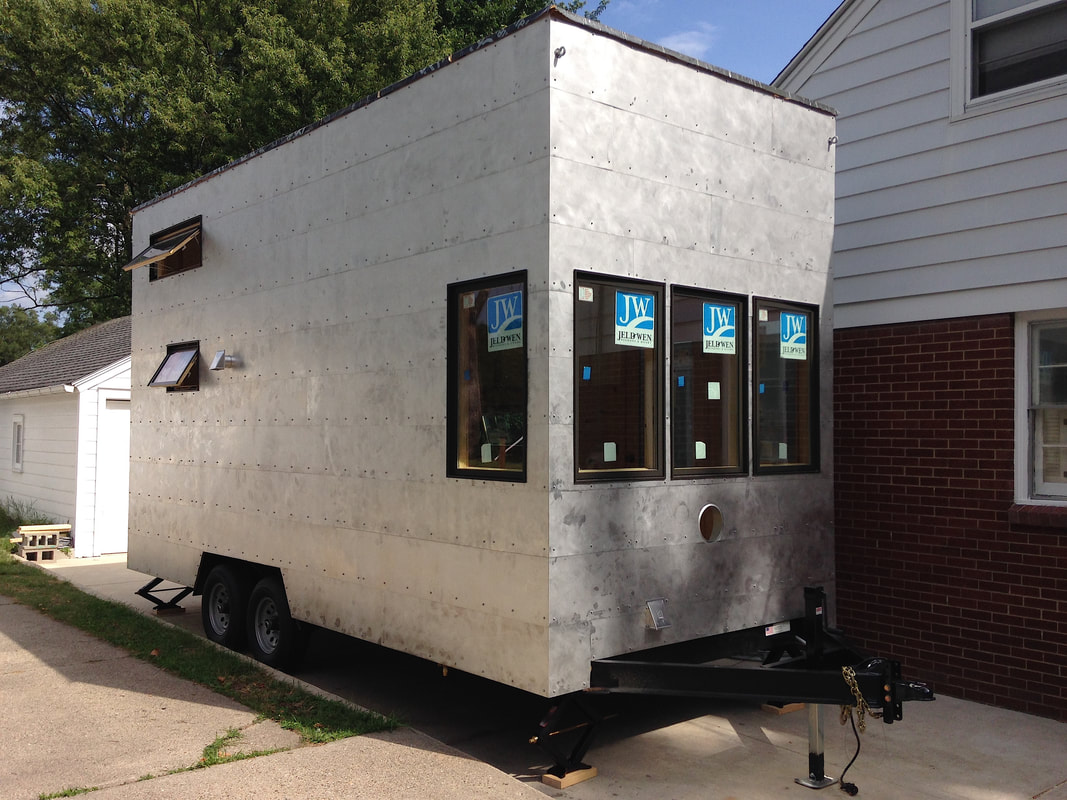
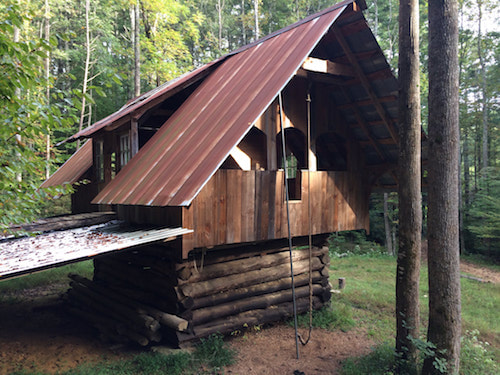
Tiny Dwelling for Students: Exterior Completed
The dwelling is now complete and ready for two students to move in for the school year. The exterior features two decks, a walkway, and an outdoor kitchen area. A canopy has been ordered that will stretch over the top and shelter both the front porch and the rear windows.
|
|
|
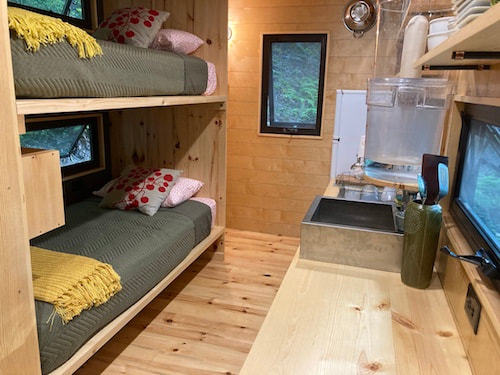
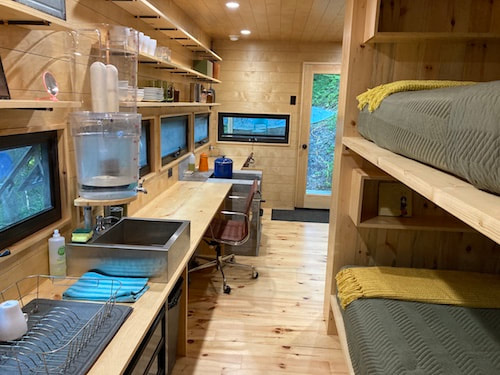
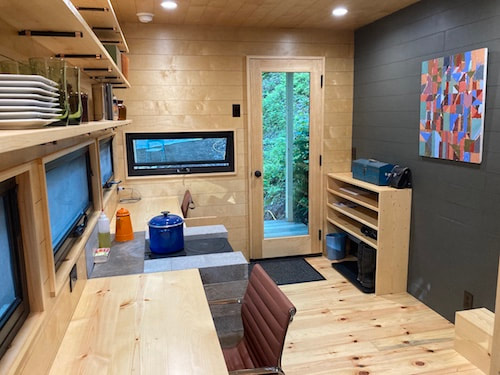
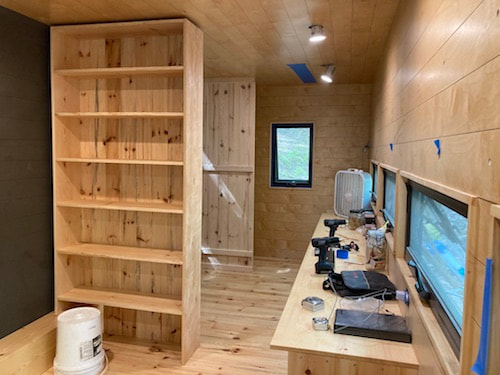
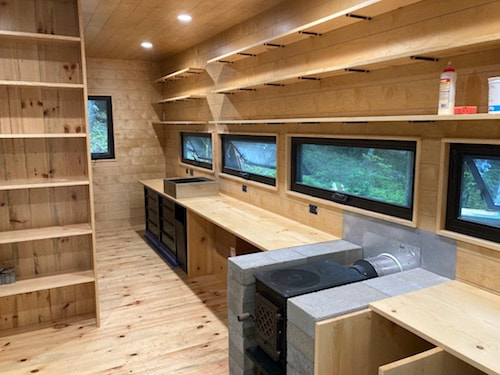
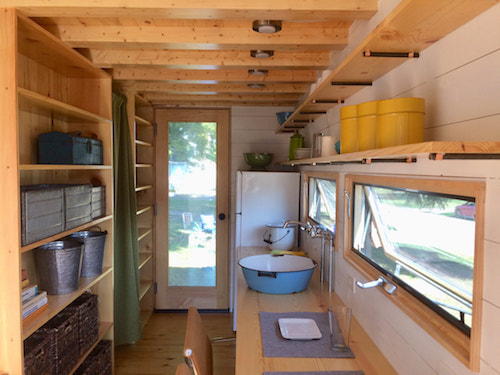
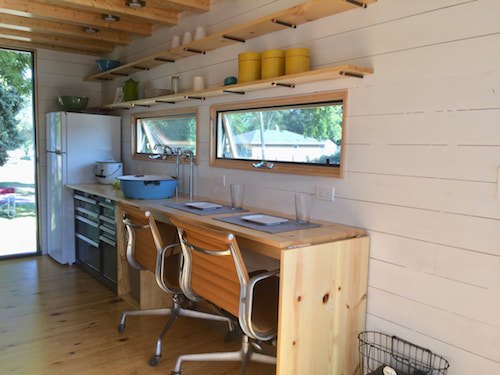
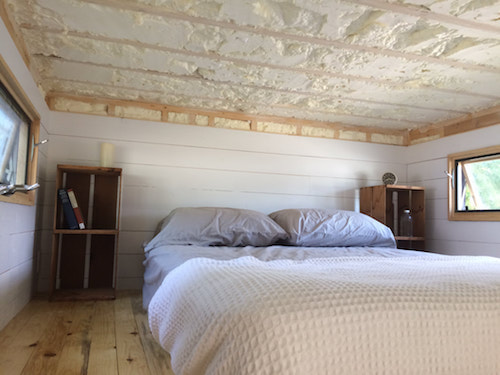
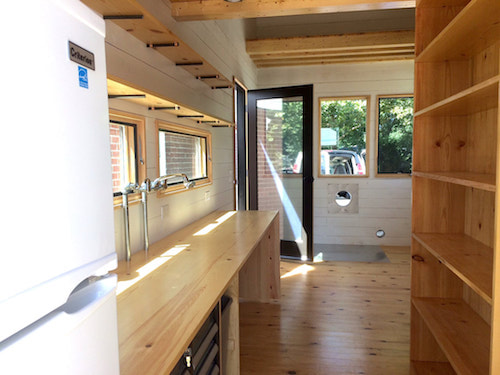
Tiny Dwelling for Students: Interior Completed
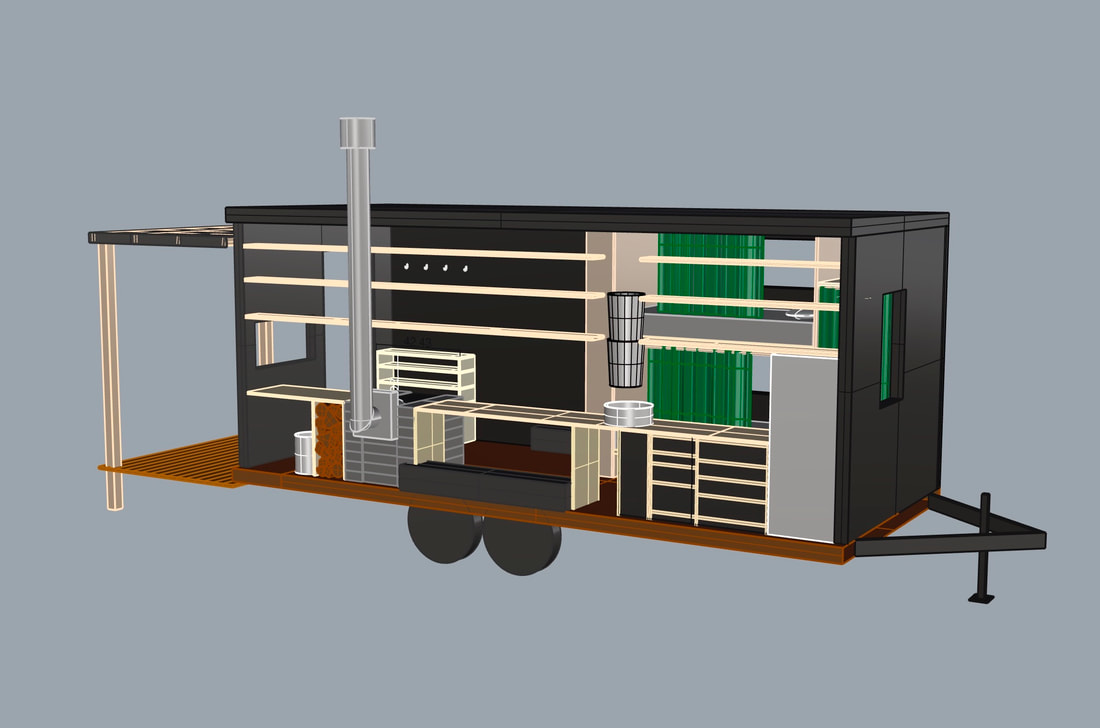
Designed to be used as a mobile off grid dorm room, the interior features two sleeping pods each with a window, shelving, and electrical outlets. Curtains will be added to give privacy as well as help control heat and light. Other features include a refrigerator, wood stove, gravity filtered water system, sink, composting toilet, two desk areas, and a large amount of open shelving.

|
|
|
|

|
|
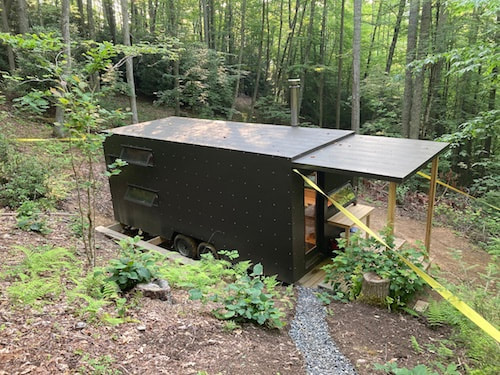
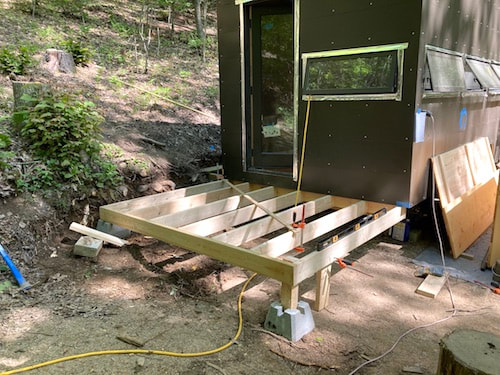
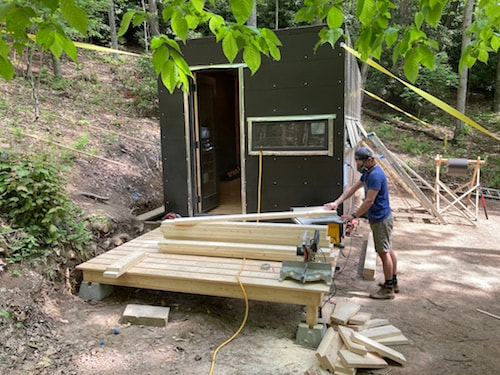
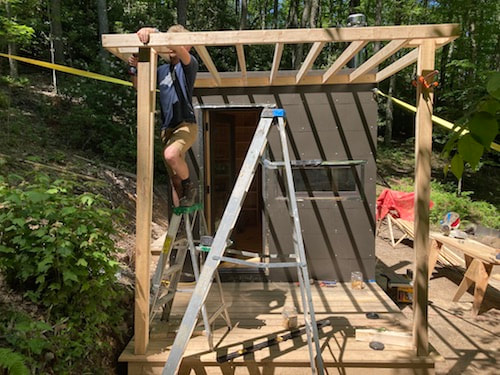
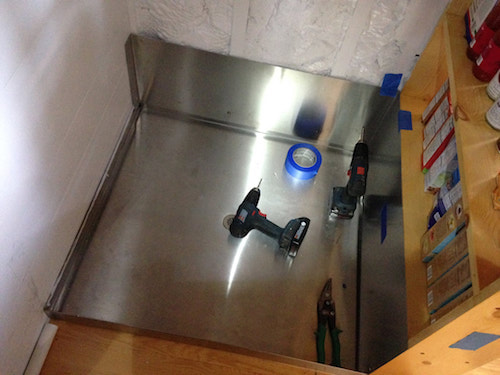
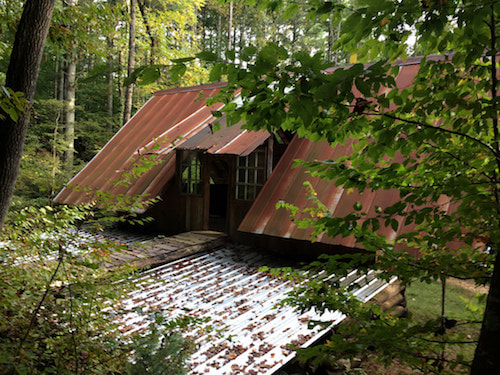
Tiny Dwelling for Students: Exterior Porches
To connect the outdoor space with the inside we built two porches and a connecting walkway. Both porches will be covered – the rear by wood framed structure and aluminum surface and the larger porch in front by a tensioned canopy.
|
|
|
|
|
|
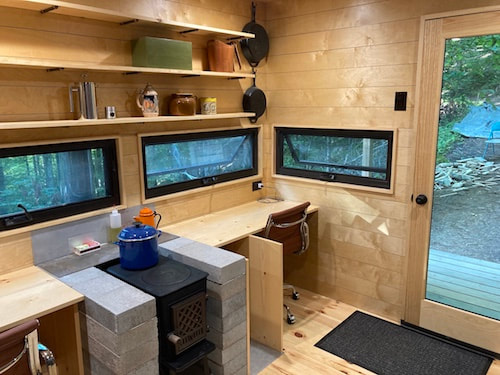
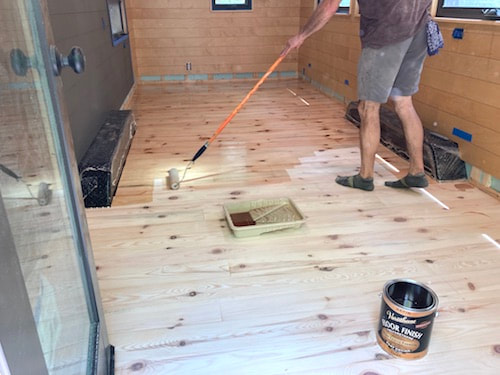
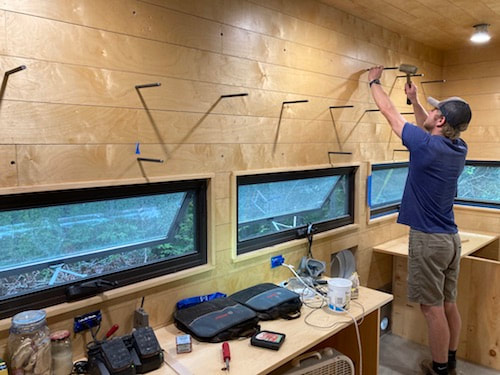
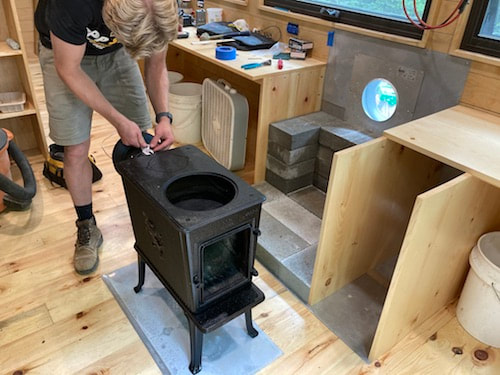
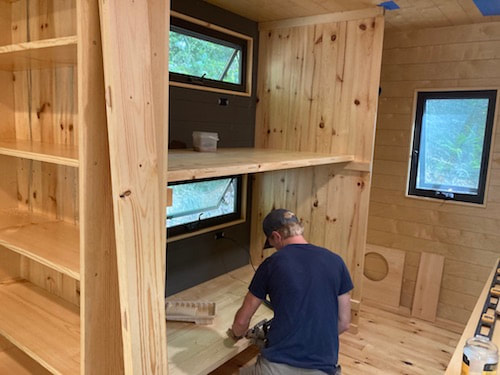
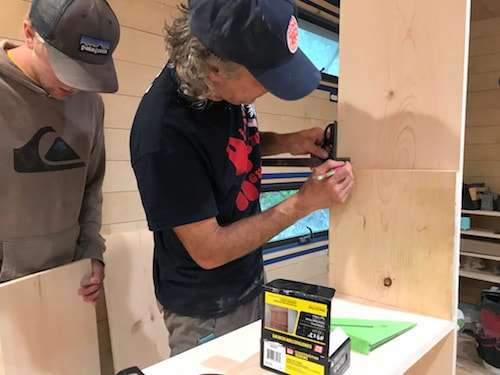
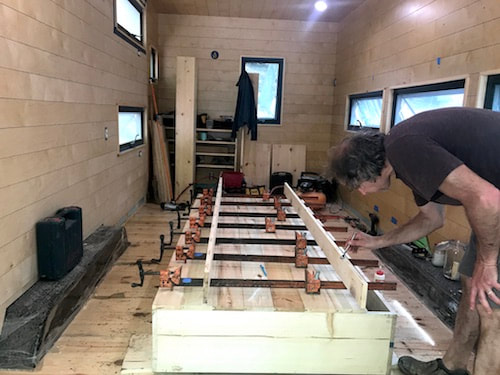
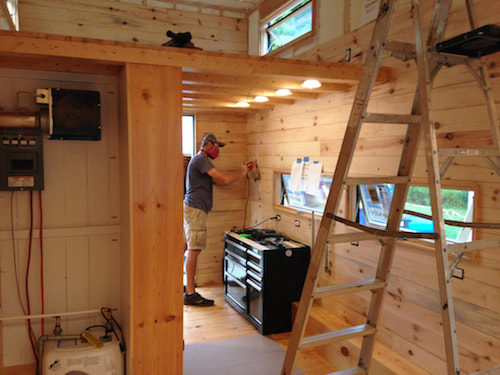
Tiny Dwelling for Students: Interior Details
To finish up the interior we pulled the protective carpet shield off the floor, sanded, and applied 3 coats of polyurethane. Then we brought in the cabinets, shelves, countertops, and bathroom partition. Next, holes were drilled into the studs for shelf supports. Then the Jotul 602 was installed along with 800lbs of concrete block to create thermal mass and protect the cabinetry from heat. Lastly, the sleeping pod support structure was installed for the beds.
|
|
|
|
|
|
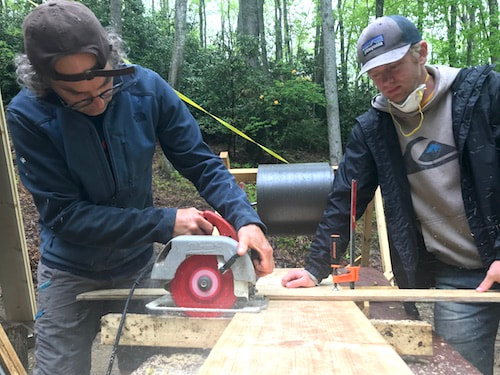
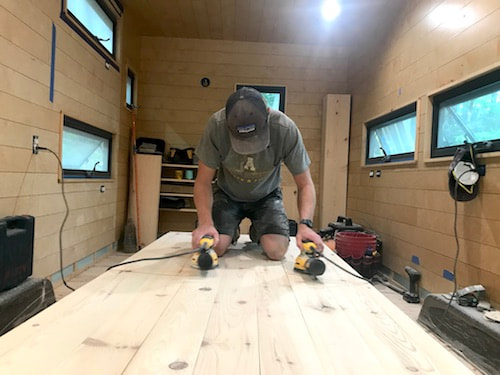
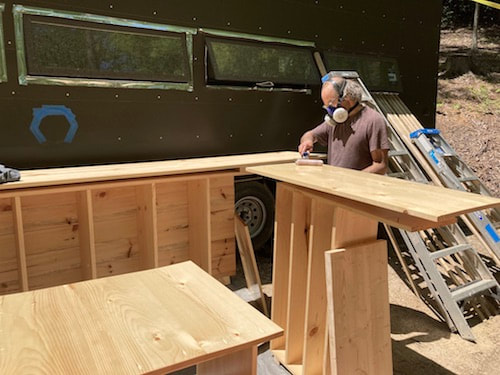
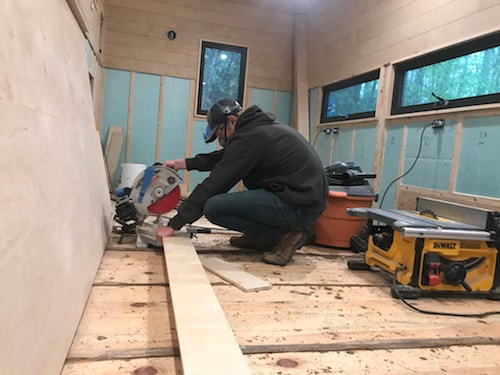
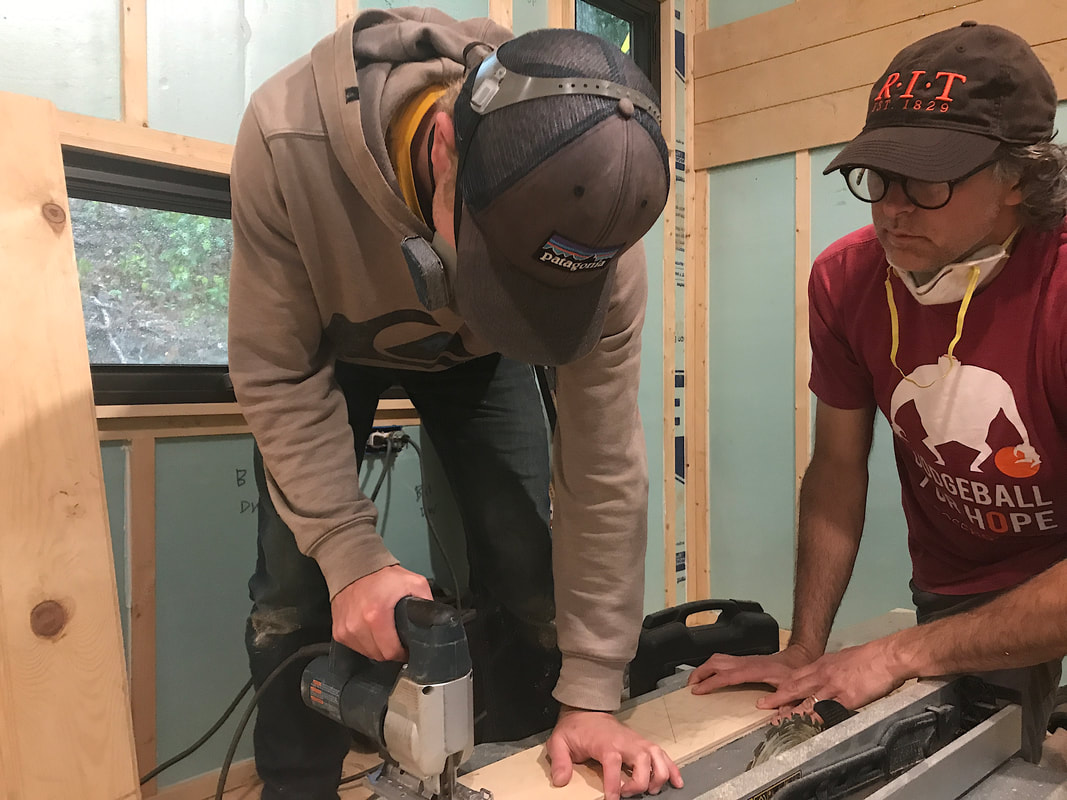
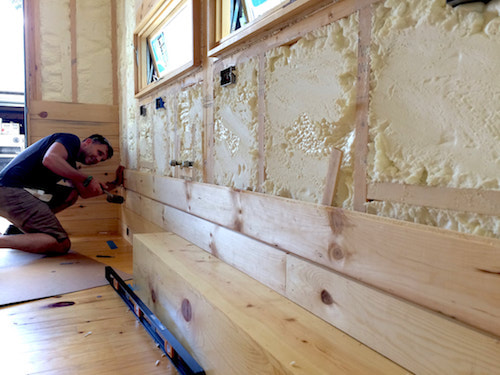
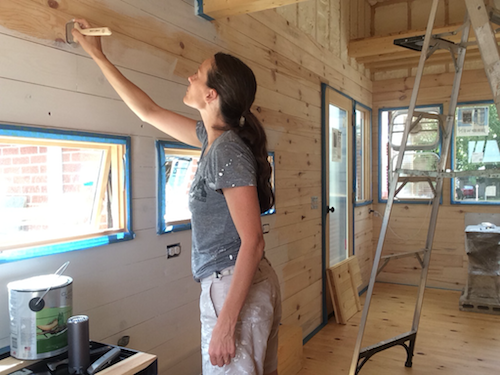
Tiny Dwelling for Students: Interior Millwork
Inside the dwelling we used solid pine for the countertops, shelves, and wall partitions. The pine is relatively inexpensive, light in weight, and can be found at your local big box home center. We used a basic cross cut jig to cut the boards to length and screwed everything together with 3” screws. The dwelling became a workshop for gluing and sanding. A couple nice days in a row allowed us to work outside to apply the polyurethane to all the millwork.
|
|

|
|
|
|
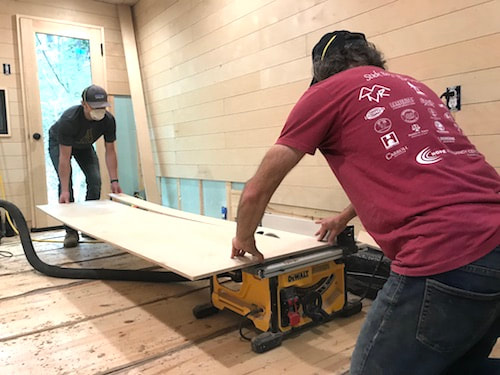
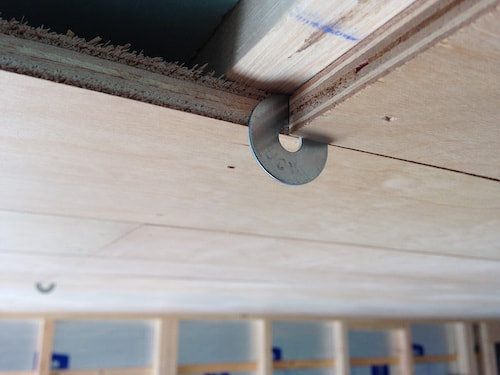
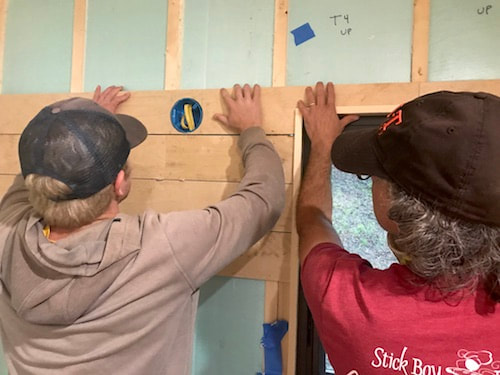
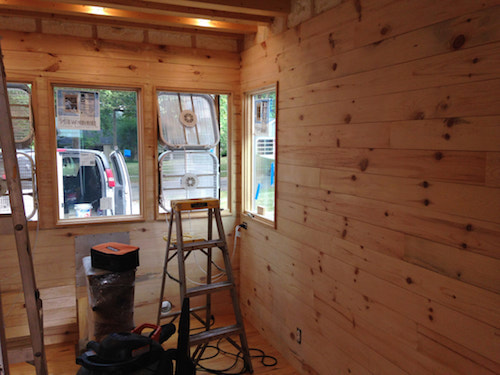
Tiny Dwelling for Students: Ceiling and Interior Walls
For the interior surfaces we used ½” Maple veneer plywood. This was an improvement over the previous dwelling where we used ¾” tongue and groove pine. The plywood is less expensive, lighter, straighter, and easier to install. Each 5” course was ripped out of a full sheet of plywood and we adjusted the dimension slightly larger or smaller to make our horizontal seams fall out where we wanted them. We wanted a “Nickel gap” look that is popular with shiplap and (being out of nickels) we used thick washers to create the gap. Of course, there are many windows and outlets to notch around and the consistency of the plywood made that process more efficient.
|
|
|
|
|

|
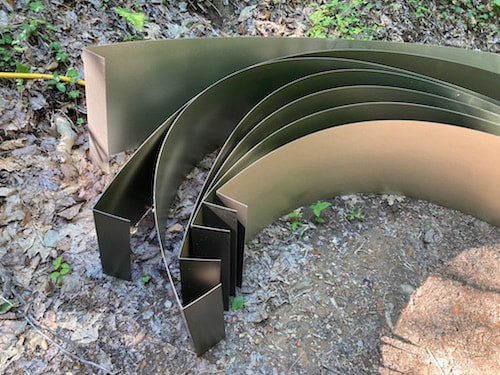
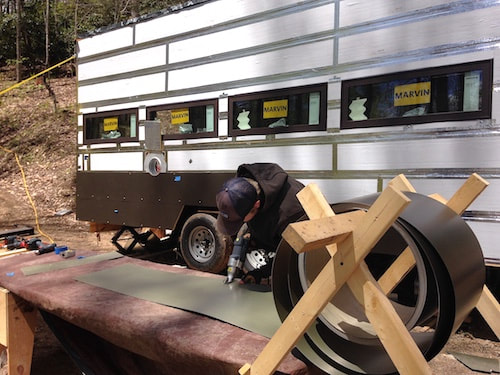
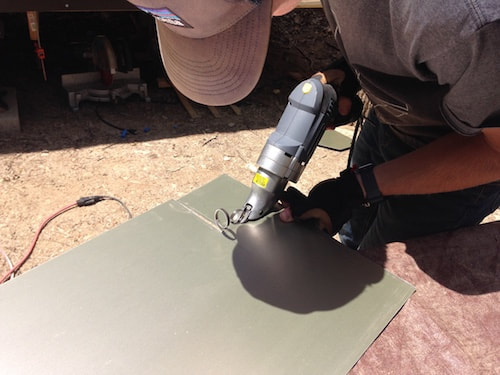
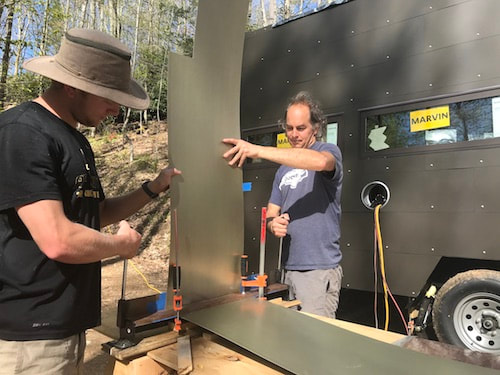
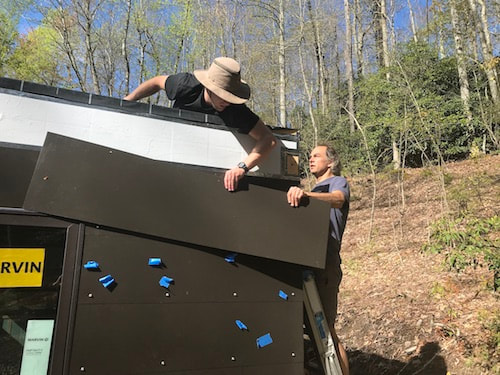
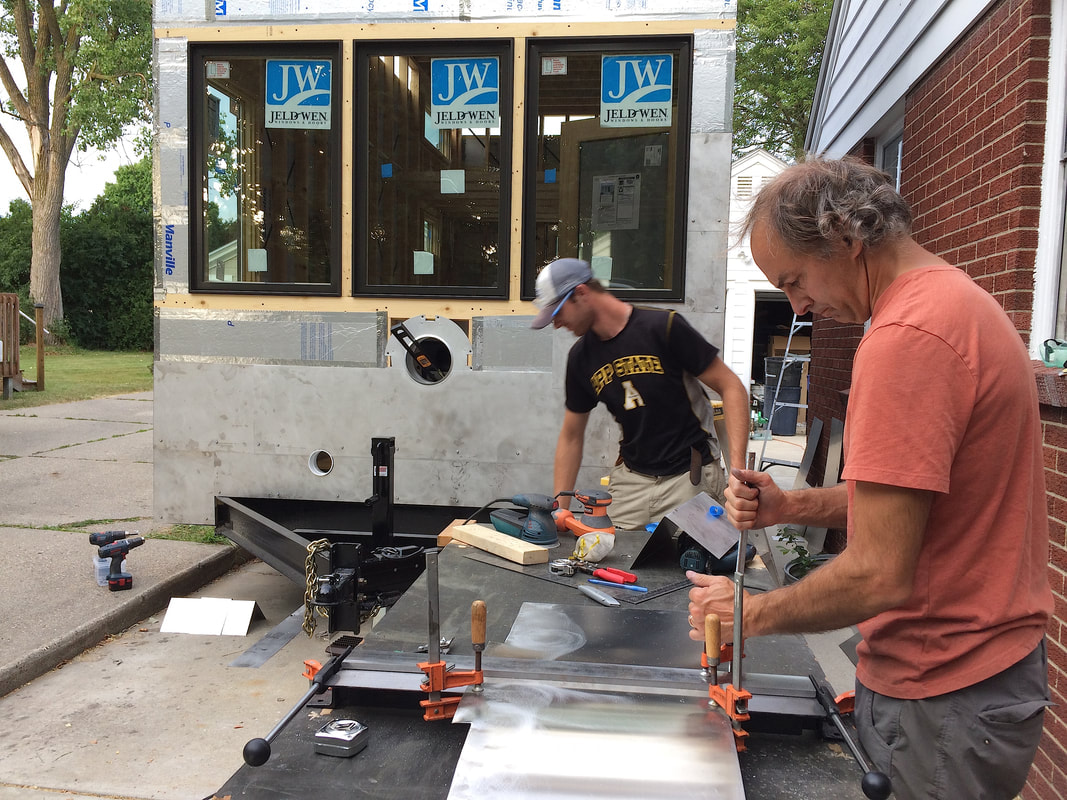
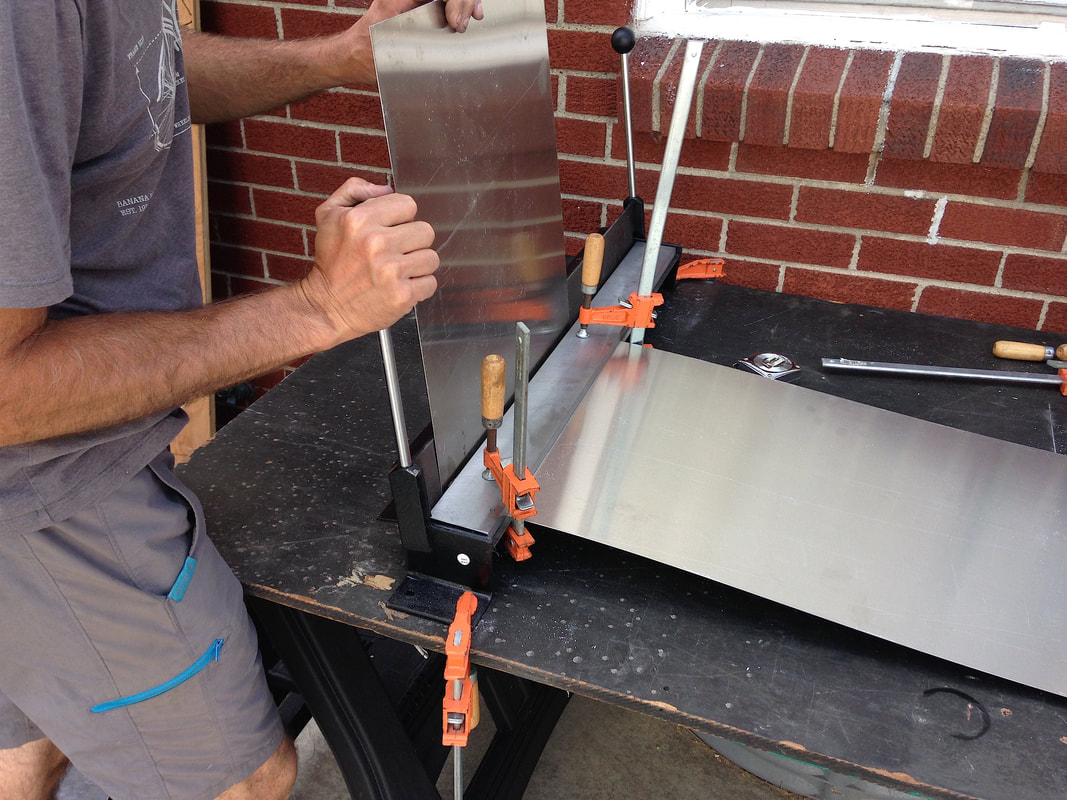
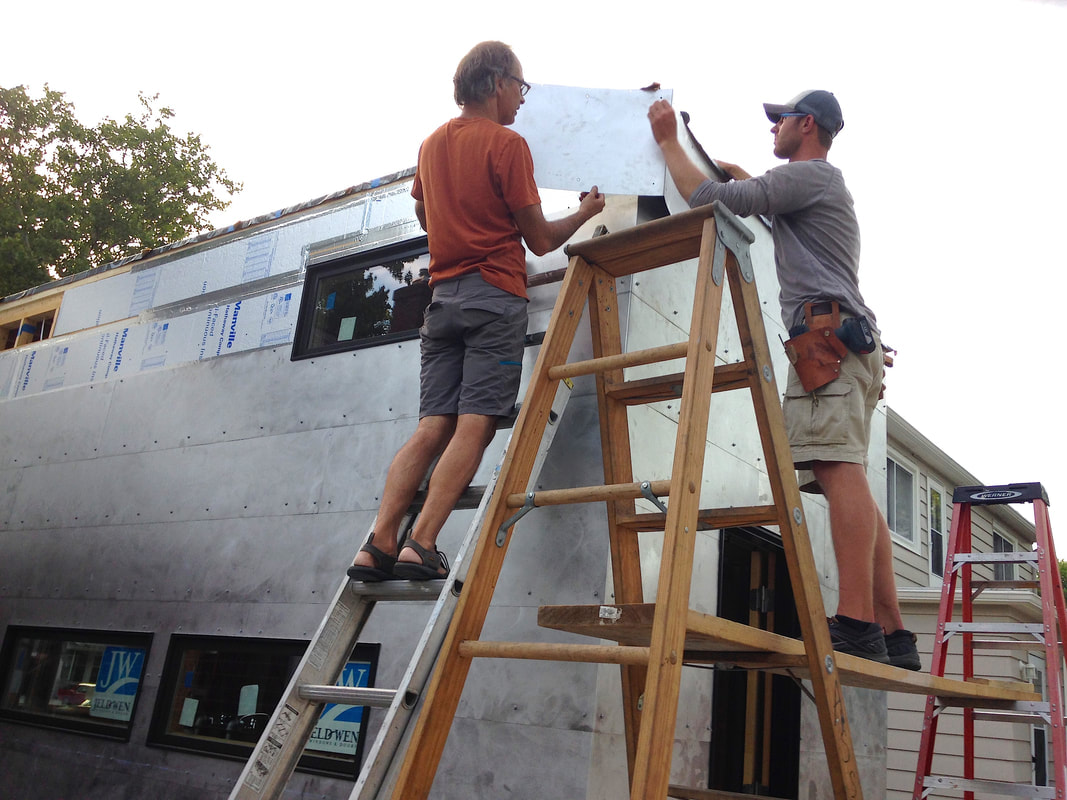
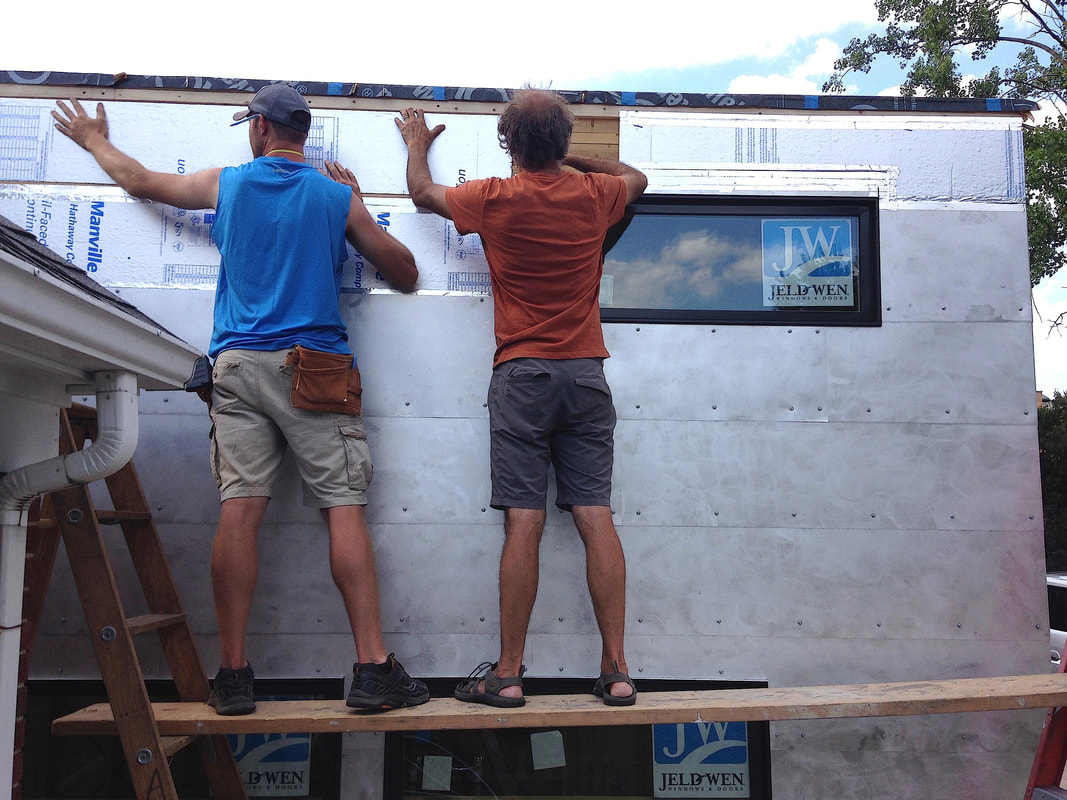
Tiny Dwelling for Students: Aluminum Siding
Thinness, lightness, and zero maintenance are the priorities for siding on a portable building and I can’t think of anything better than 0.030” aluminum to meet those requirements. We got smarter on this build however because instead of using 8’ sheets of raw aluminum like we did on the first tiny dwelling, we used pre-painted aluminum gutter coil which comes in a continuous roll and can be cut to any length. We used electric shears to cut the panels to size and to notch for the windows and doors. Next, we used a basic sheet metal brake to bend our corners. The sheets are then screwed into place with pole barn screws on the continuous cleats that we put on earlier. The result is an incredibly thin, light, water tight, and durable shell.
|
|
|
|
|
|
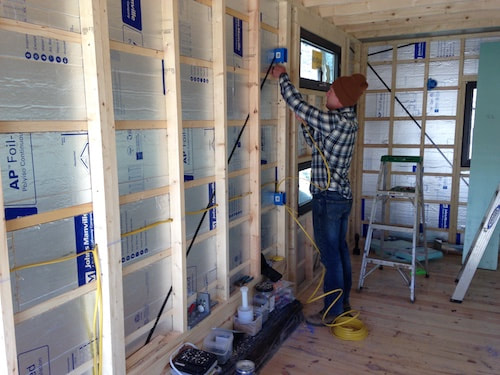
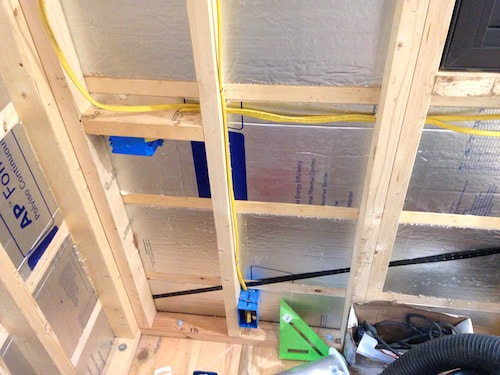
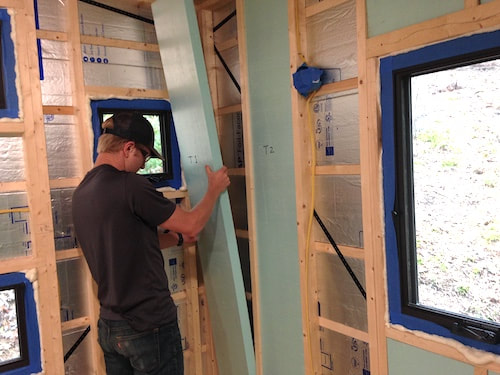
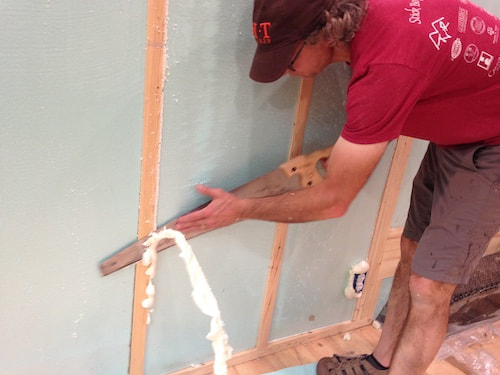
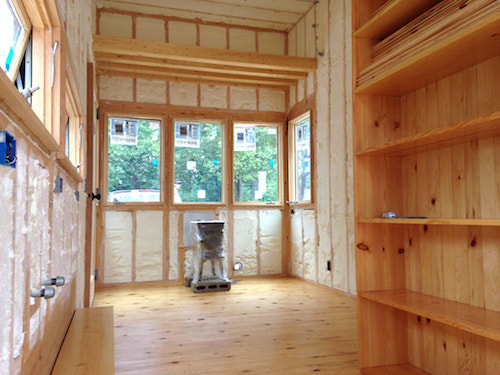
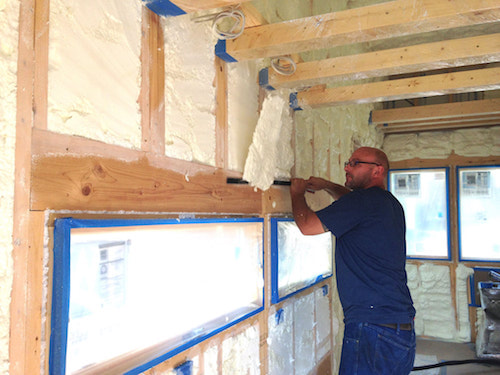
Tiny Dwelling for Students: Electrical and Insulation Board
Before beginning this next process, we cut, fit, and and labeled every 2” foam piece that we would be pressing into place in the joist and stud cavities. Once correctly fit we took those pieces out in order to run the electrical wiring. With studs just 2 ½” deep we went with a 2 ½ deep electrical box and kept our wires flat against the exterior insulation. Once the wiring was complete the precut 2” insulation panels were pressed into place leaving a ½” gap behind them for the wires to travel. Notches for the boxes were cut out and then expanding foam or caulk was used to seal all gaps. This system was a less expensive, less messy, DIY solution which could be a good alternative to spray foam insulation.
|
|
|

|

|
|
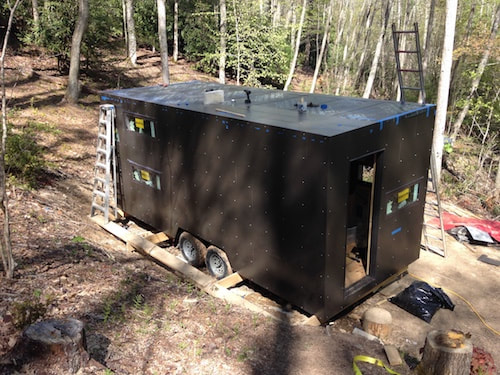
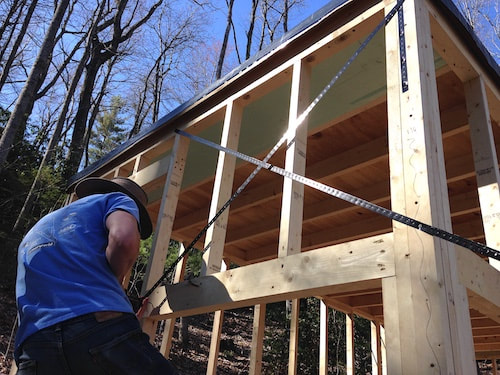
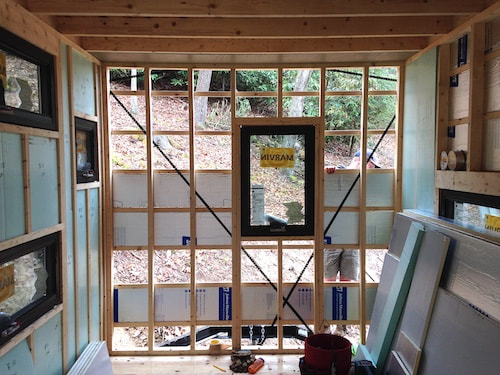
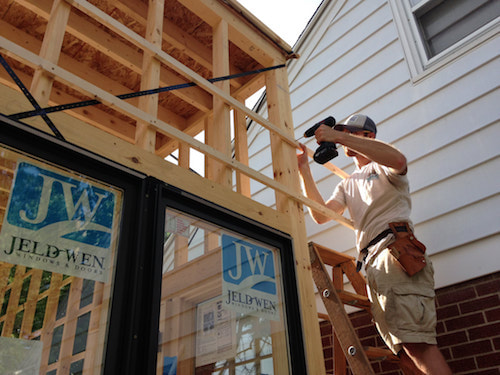
Tiny Dwelling for Students: Wind Bracing, Cleats, and Insulation
Next steel strapping was screwed to the framework on diagonals to provide rigidity and keep the frame square. Then we created 7/8” x 1 ½” horizontal cleats by using the drops from the previously ripped 2x4 material that was used for the framing. The cleats were installed at approximately 13” intervals. Next ¾” foil faced insulation board was ripped to fit between the cleats and held in place by foil tape. This cleat/insulation system will provide a vapor barrier, prevent thermal bridging with the frame, and provide continuous screwing for the aluminum siding.
|
|
|
|

|
|
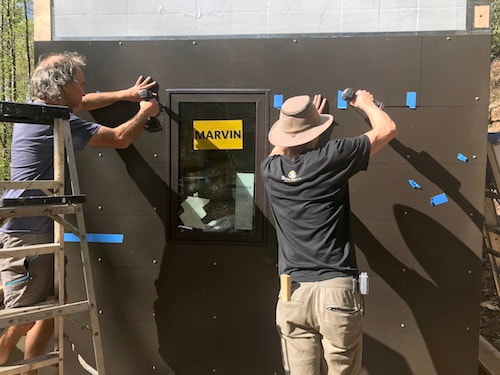
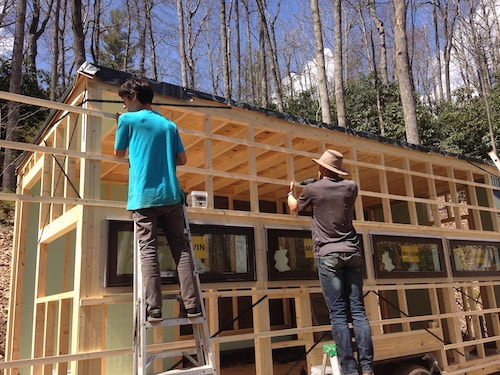
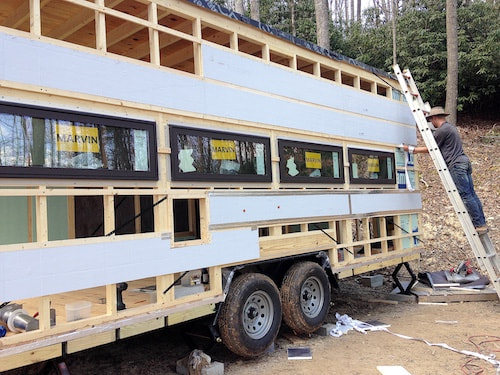
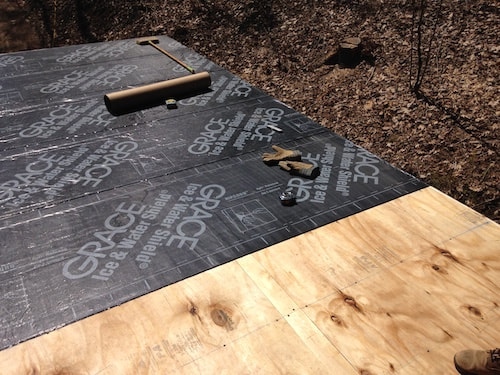
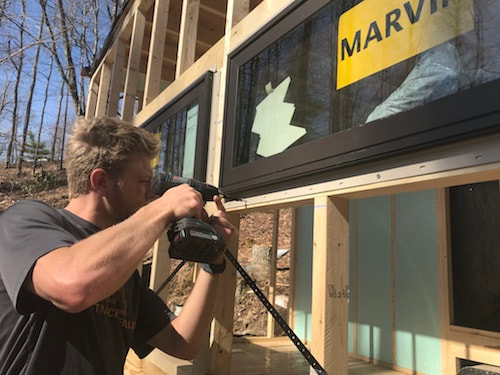
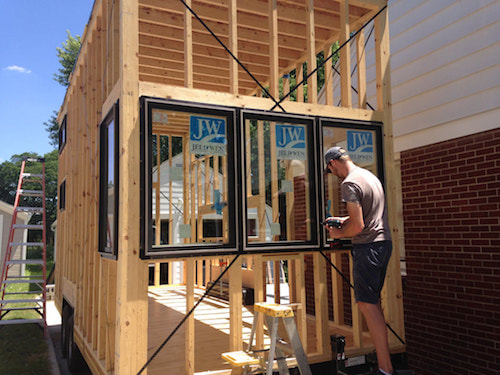
Tiny Dwelling for Students: Roof and Windows
We used typical ½” plywood for the roof deck and added the ¾” cleat around the edge to receive the aluminum siding. Then we covered the surface with Ice and Water Shield which will keep us dry until we can apply the final aluminum roofing material at a later time. In terms of windows, we went with Marvin “Essential Collection” fiberglass windows which need no paint inside or out. They will never have any mold issues which we found to be a problem with the wood clad windows on the first tiny dwelling.
|

|
|
|
|
|
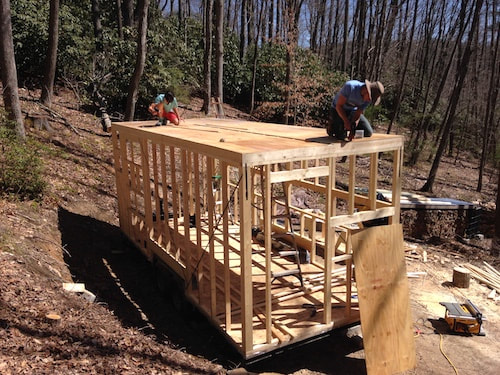
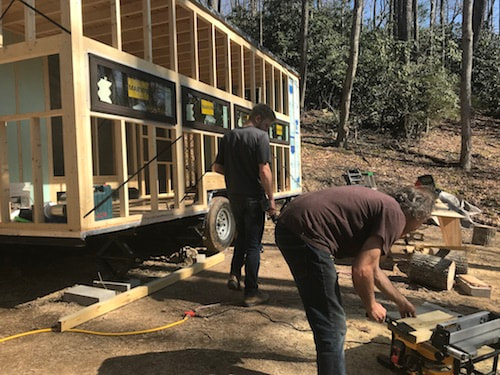
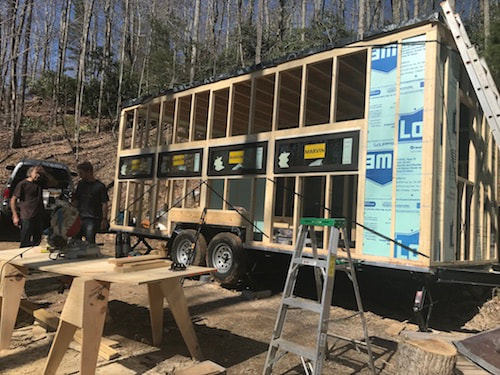
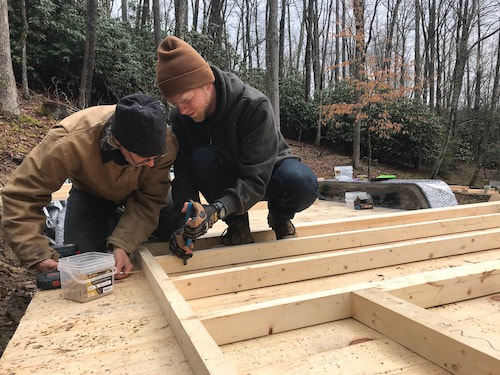
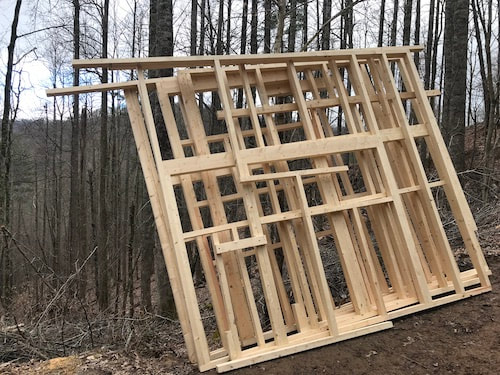
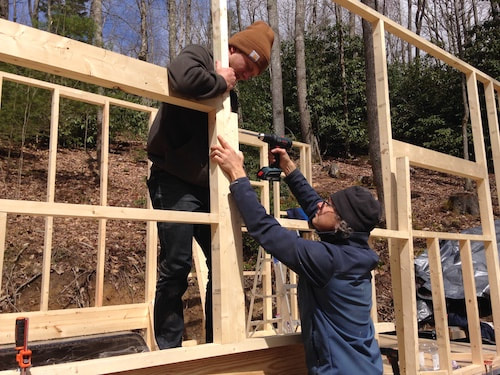
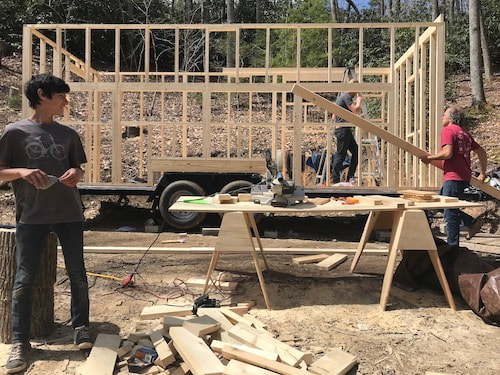
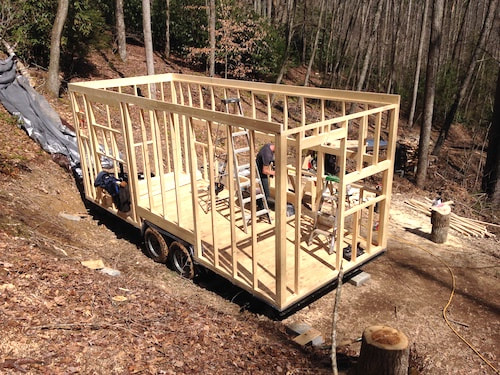
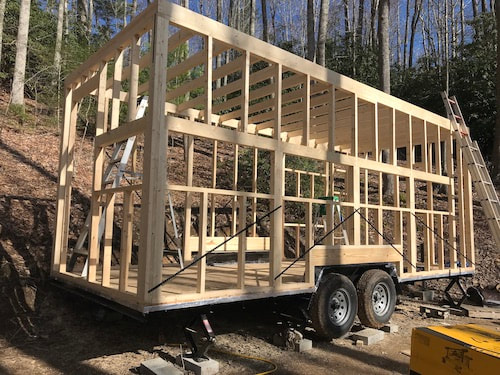
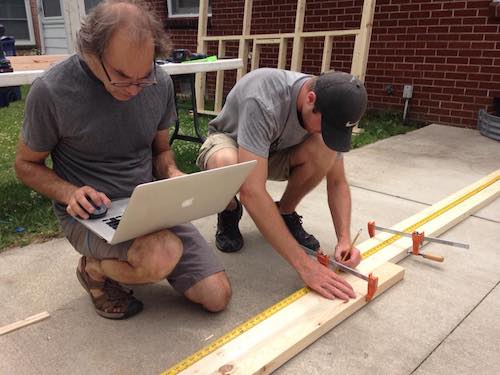
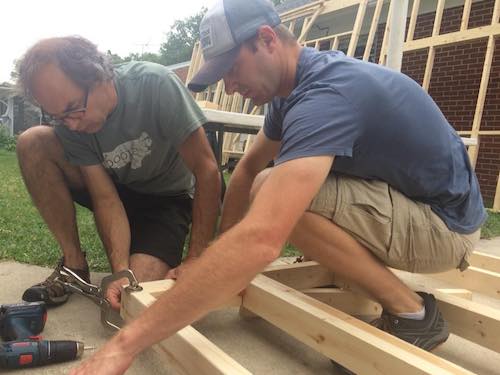
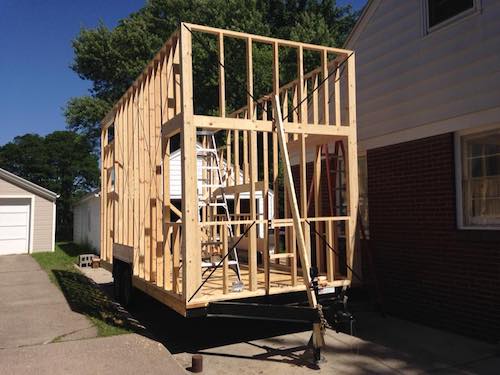
Tiny Dwelling for Students: Framing
A tiny house on wheels is limited to 8’6” in total width and so it is wise to keep your total wall thickness as thin as possible in order to maximize interior space. In this frame we used typical 2x4’s but ripped them to just 2 ½” wide. We used the completed trailer deck like a giant work table to screw together the various frames and lean them nearby. Then the frames were screwed together and bolted to the trailer.
|
|
|
|
|
|
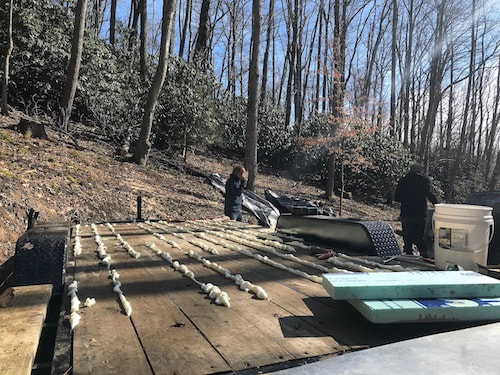
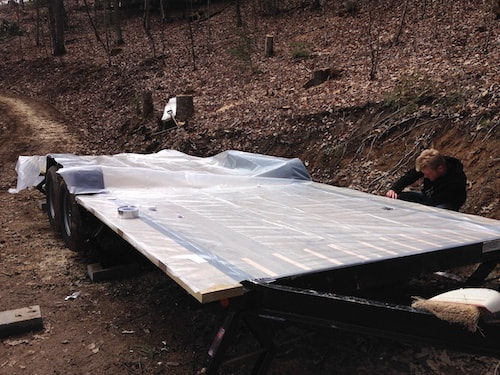
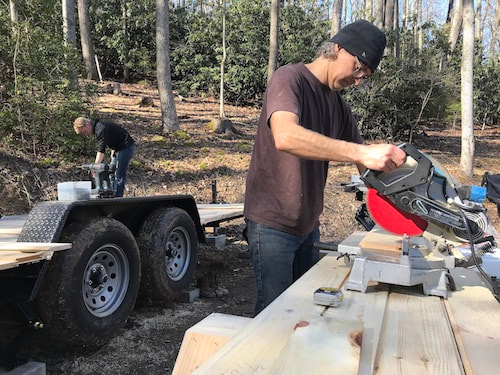
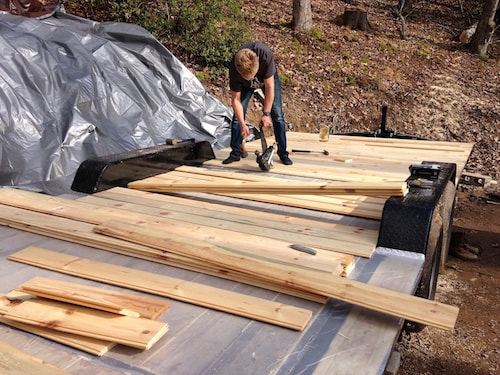
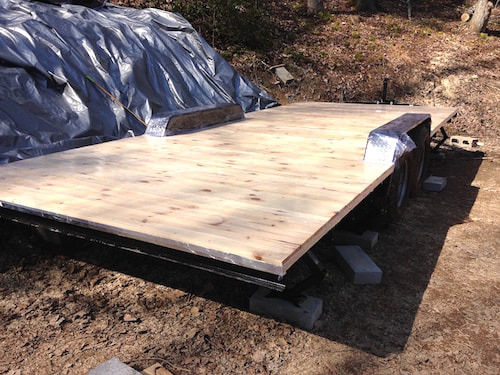
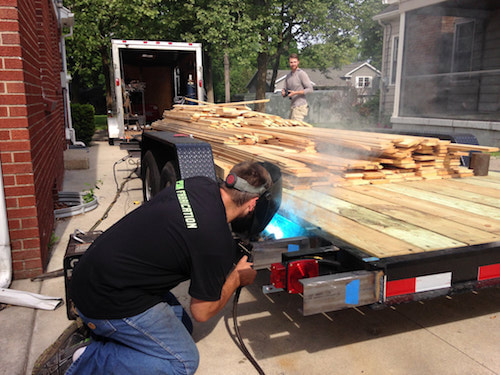
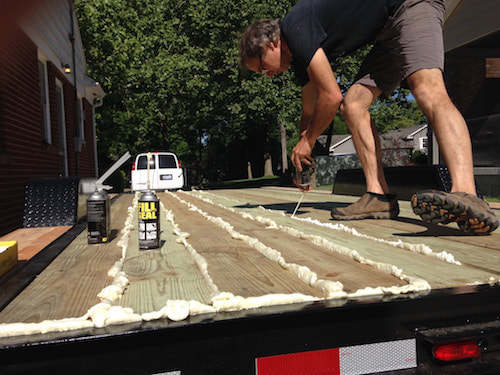
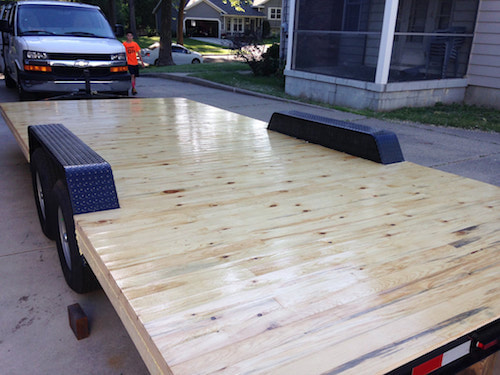
Tiny Dwelling for Students: Floor
I am a big fan of putting the finished floor down first on any project - particularly on this build where the trailer deck is not sufficient to mount the wall framing. In preparation for the floor, we cut and screwed 2” rigid insulation board to cover the entire bottom of the trailer. Then used expanding foam to fill any remaining gaps. Next we covered the subfloor with a vapor barrier to keep moisture from entering the structure from below. Then we nailed down the 5” red pine planks and wrapped the floor tightly with carpet shield. The carpet shield will protect the floor from rain and damage throughout the build. We will peel off the plastic film to sand and finish the floor at a later time.
|
|
|
|

|
|
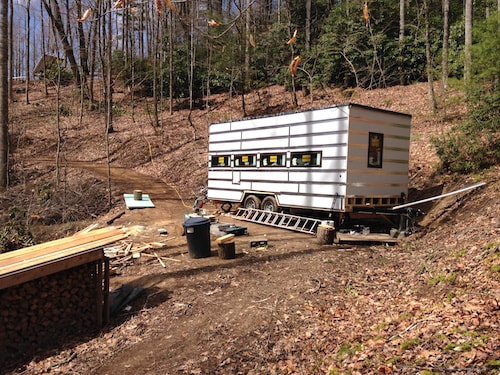
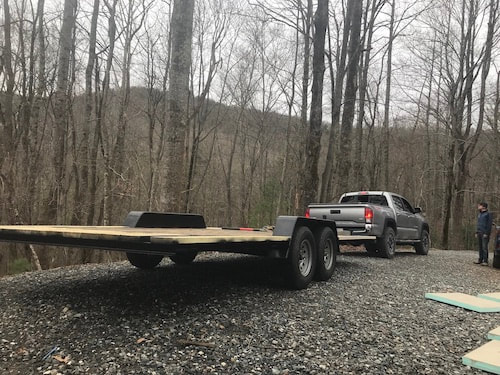
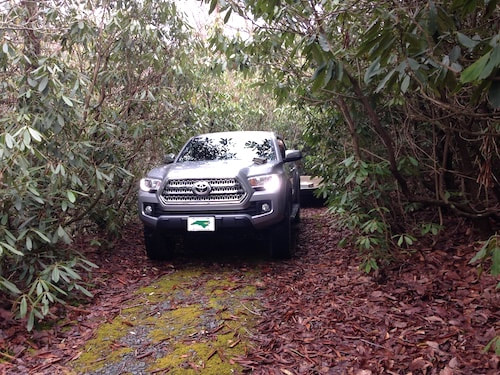
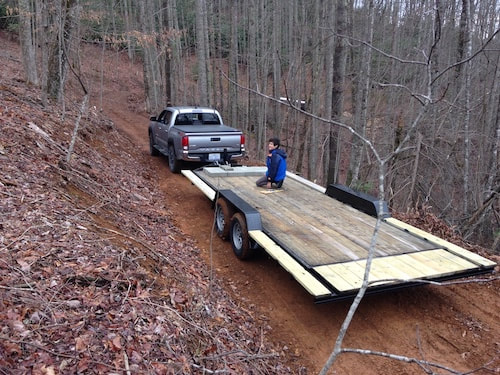
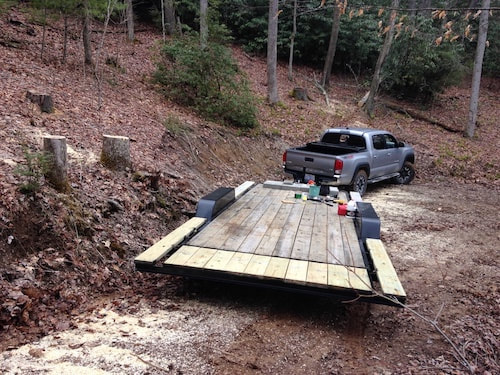
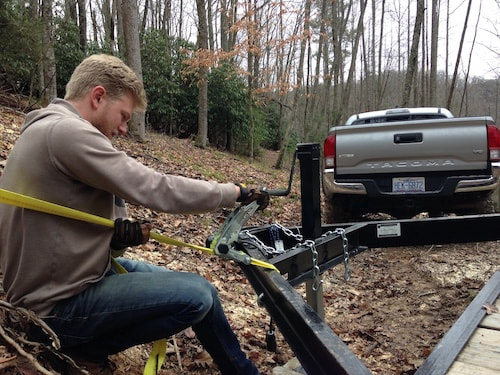
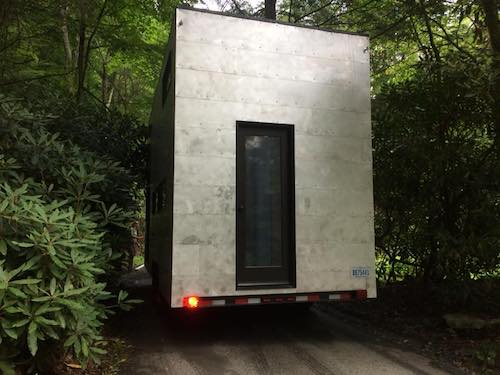
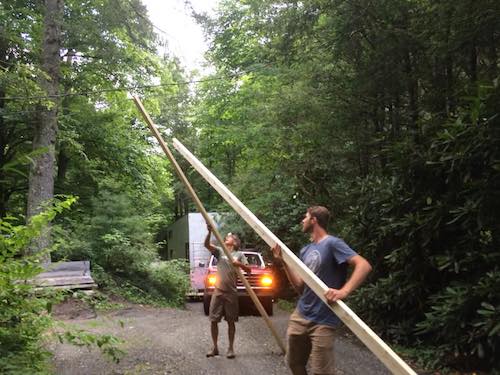
Tiny Dwelling for Students: Trailer Pulled into Place
The parking place for the tiny dwelling is down a narrow driveway with lots of overhanging rhododendrons. So we decided to position the trailer before we started building on it. Once on the site we were able to use heavy ratchet straps to slide the trailer sideways and get it right next to the bank in order to maximize the space in front.
|
|
|
|
|
|
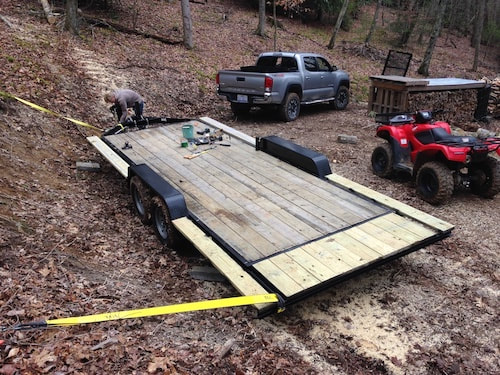
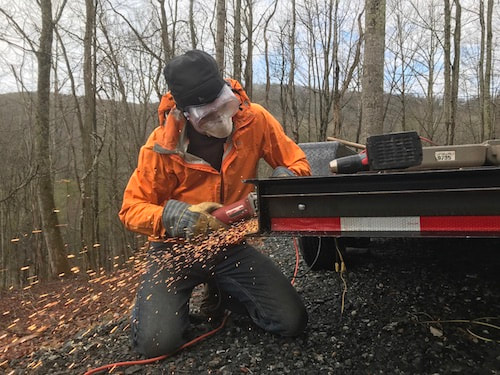
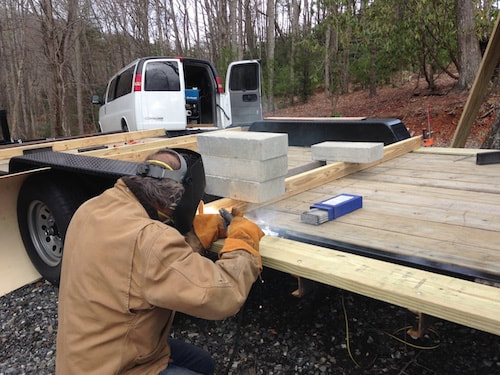
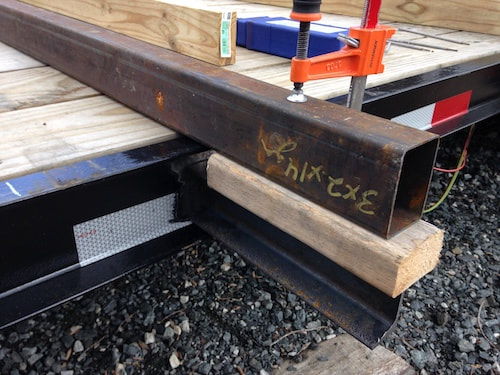
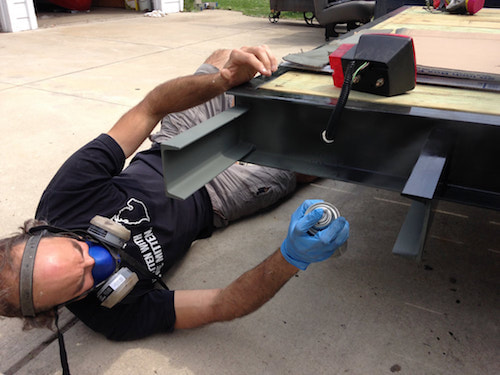
Tiny Dwelling for Students: Trailer Modification
Last year I bought an 18 foot equipment trailer in anticipation for this next build, but while designing I found instead that 20 foot was the ideal length. So, to start this build we created a 24” extension on the back of the trailer. In order to do this, we welded up a steel frame and bolted it to the rear side supports at the correct height. Then we went about the same process as the first trailer – using cantilevered beams to hold the 8” extensions at the correct height and location while they were welded on. Then the treated wood subfloor was bolted in place creating one large flat platform that is the full width of the trailer.

|

|

|
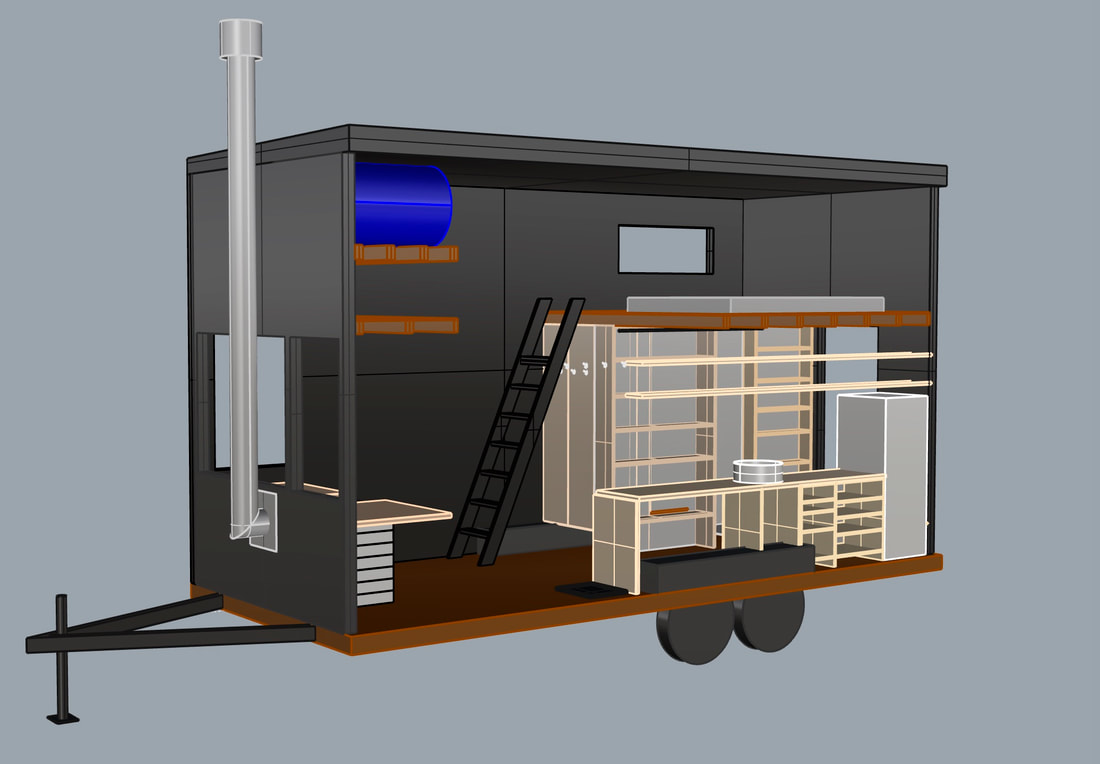
Tiny Dwelling for Students
With our desire to share our off-grid experience with students we have decided to build another mobile dwelling on the property. Similar in many ways to the first one but this time designed for two students, it will have two private sleeping pods along with more desk space and more storage. I have hired one of my industrial design students for the next eight weeks to work with me on the build.
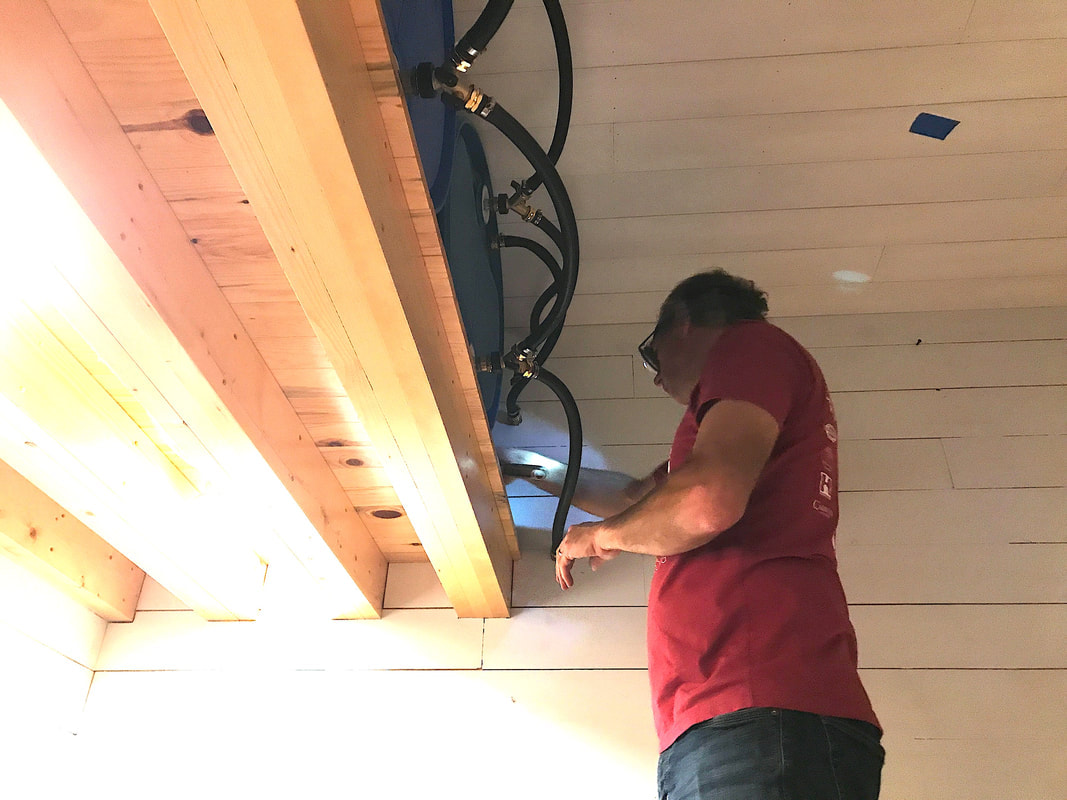
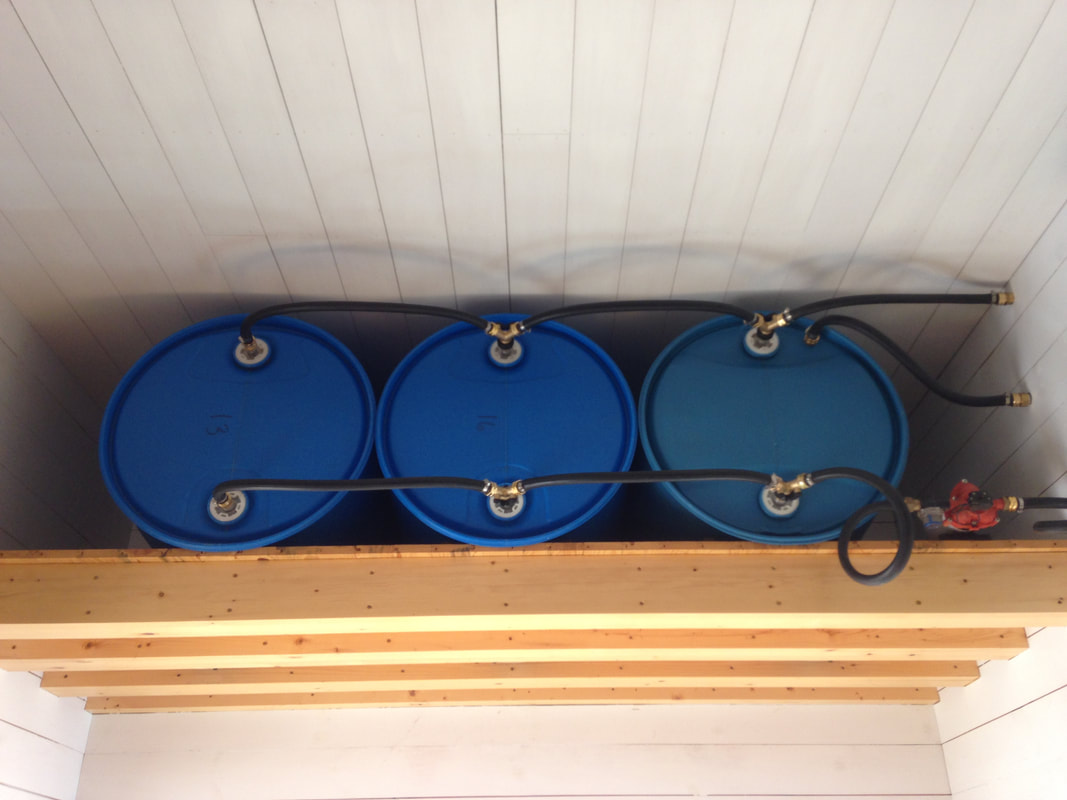
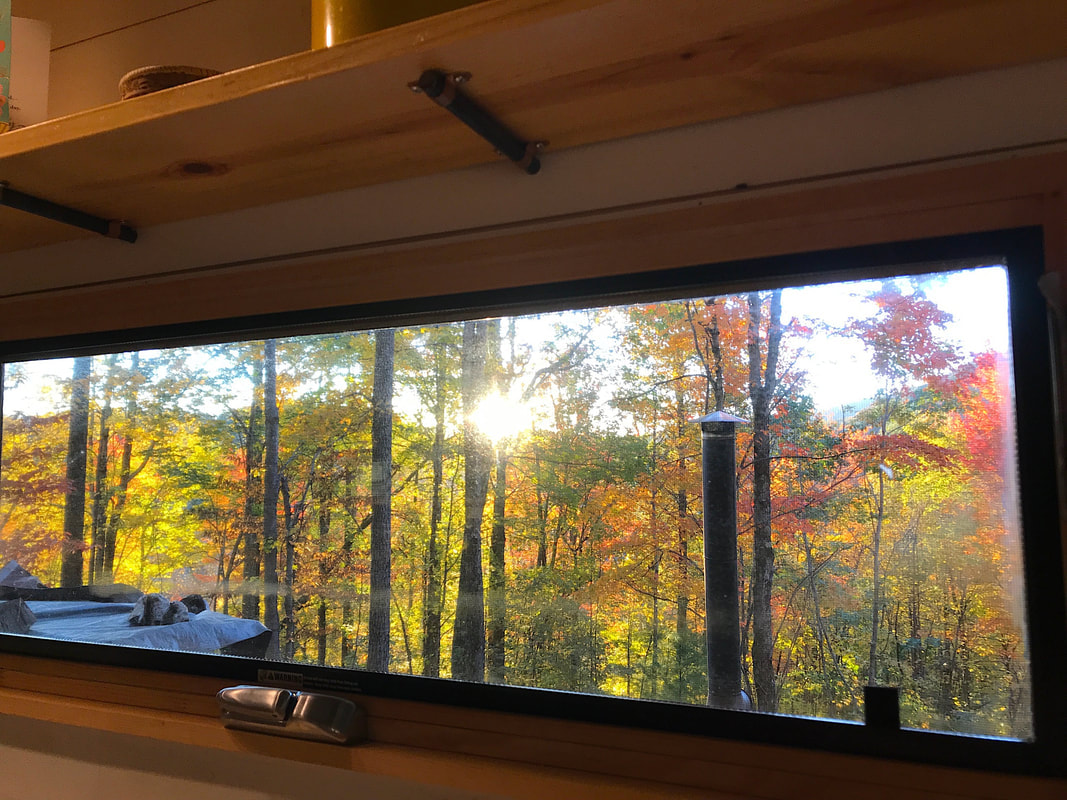
Homestead Project: Indoor Water
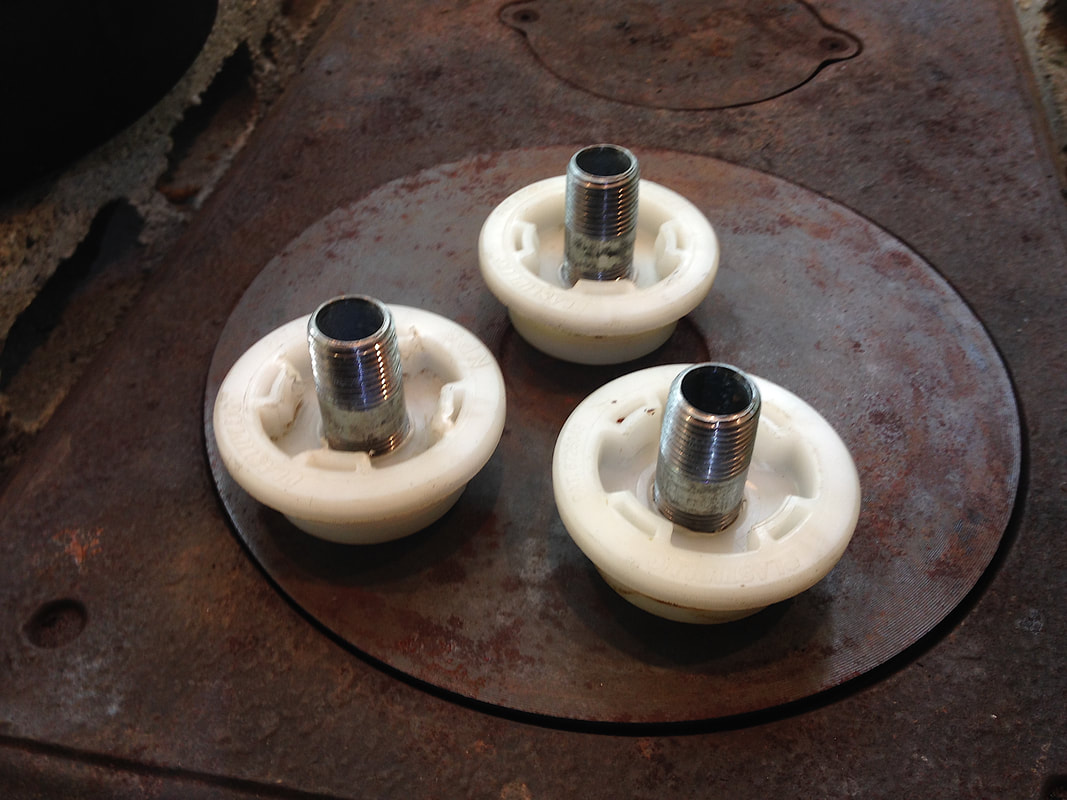
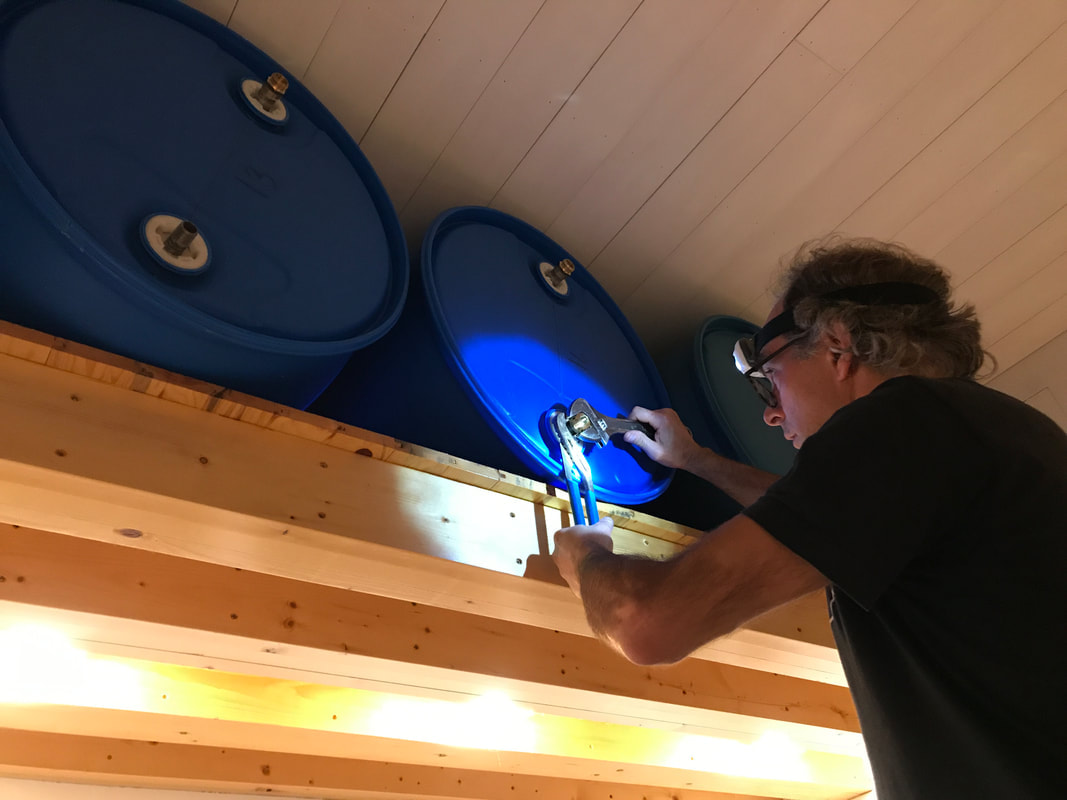
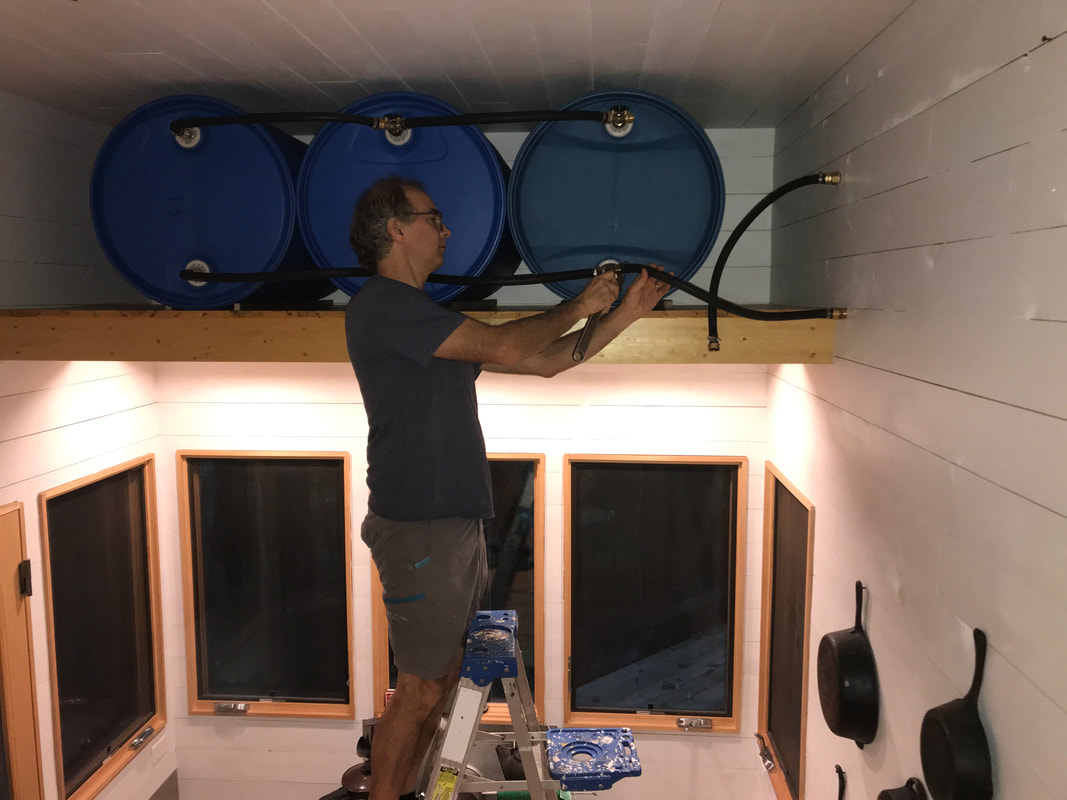
With winter coming we needed to move our water storage inside the mobile cabin to keep it from freezing. The water is stored in three 55 gallon drums that sit on a hefty “shelf” above the wood stove near the ceiling. When the drums are full there is 1300 lbs of water in storage. The beauty of this system is that the water acts like a giant heat sink – absorbing heat while the wood stove is burning and releasing it slowly during the night time which helps keep the indoor temperature stable.
|
|

|
|
|
|
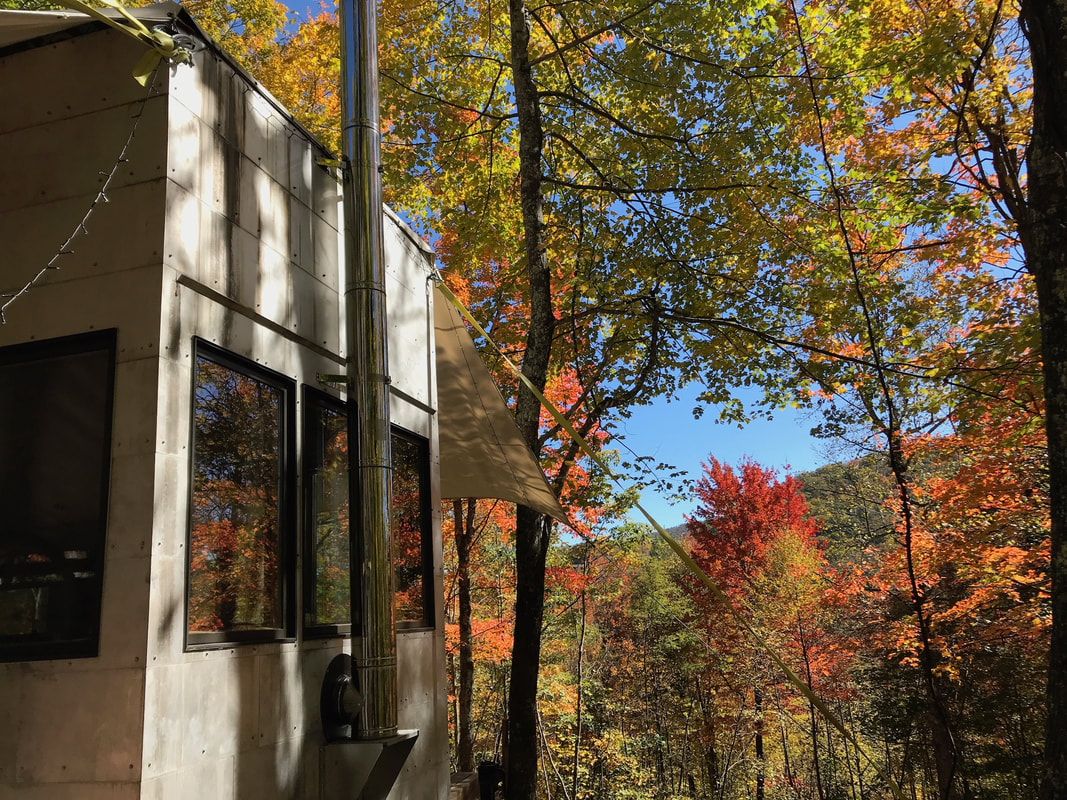
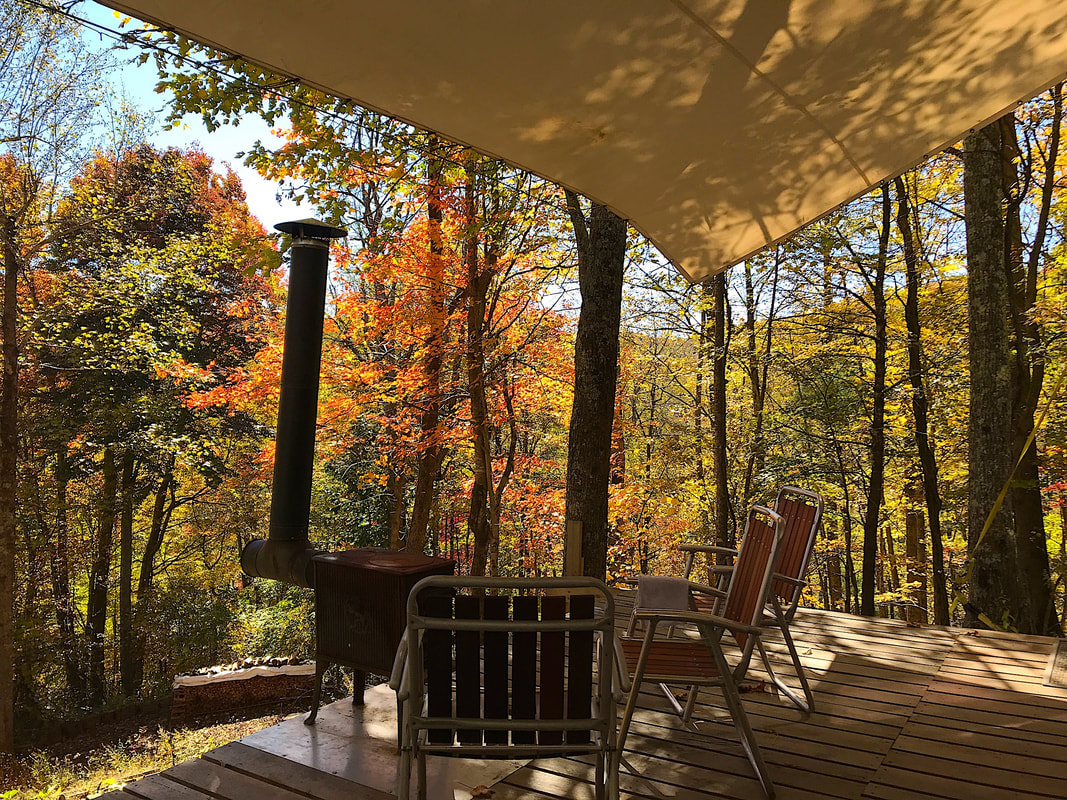
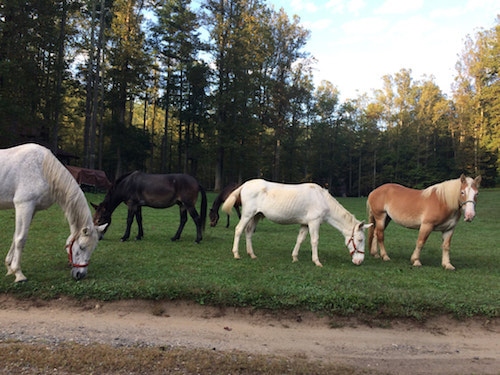
Homestead Project: Beautiful Autumn
It has been a gorgeous fall in the mountains. Enjoy a sunny October afternoon with us.

|
|
|
|
|
|
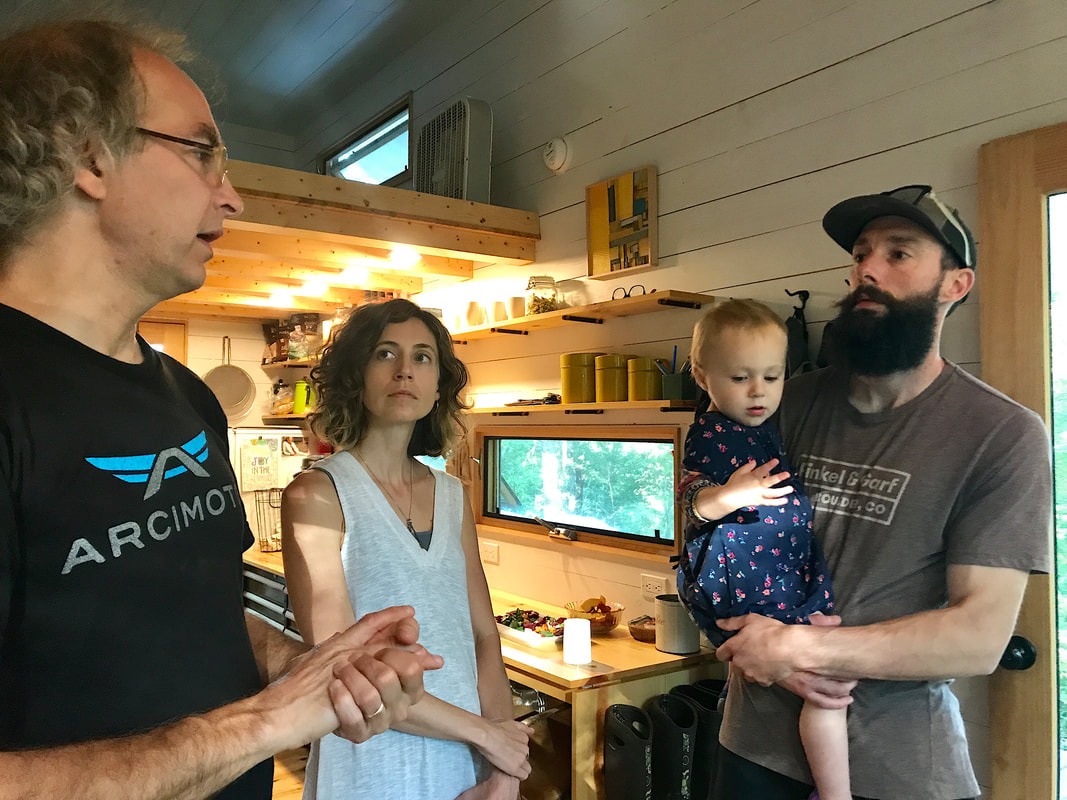
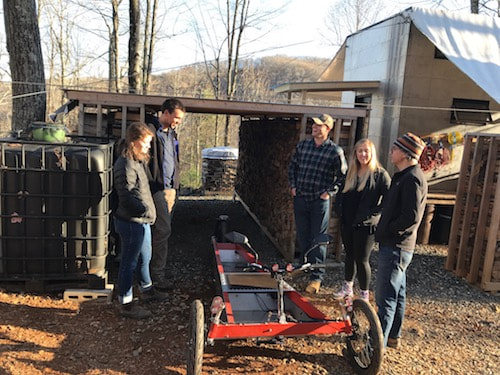
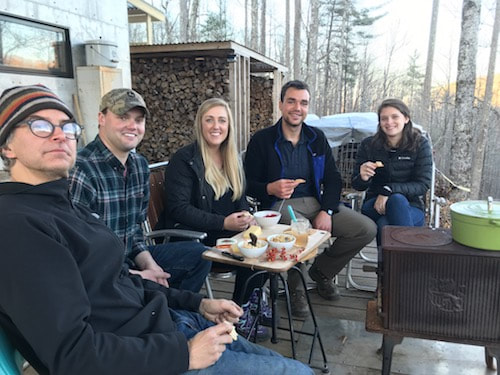
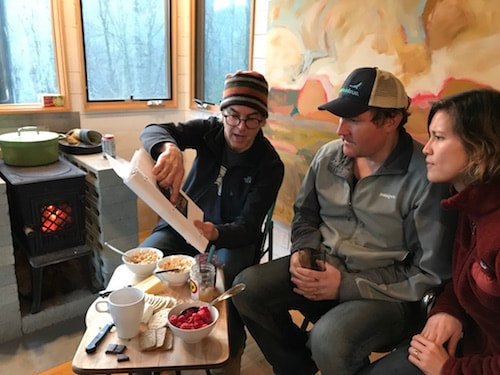
Homestead Project: Airbnb Experience
One of the important aspects of our project is to share it with others that are curious about tiny house off the grid living. We decided to create an Airbnb Experience to reach an audience that we would not otherwise have access to. The experience consists of a two-hour tour with explanations of the structures, systems, site, and other design considerations. After the tour we sit down over some local food and beverages to discuss additional questions and goals for our guests. Direct link: https://www.airbnb.com/experiences/1167857?source=p2
|
|
|
|

|
|
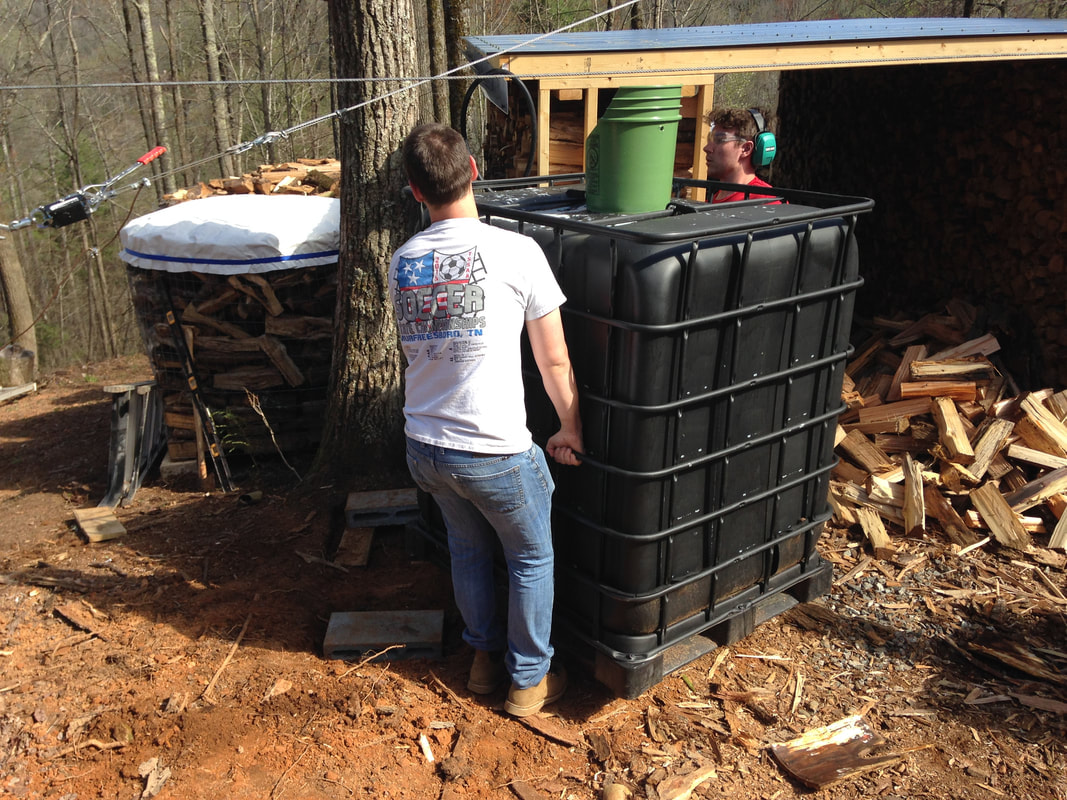
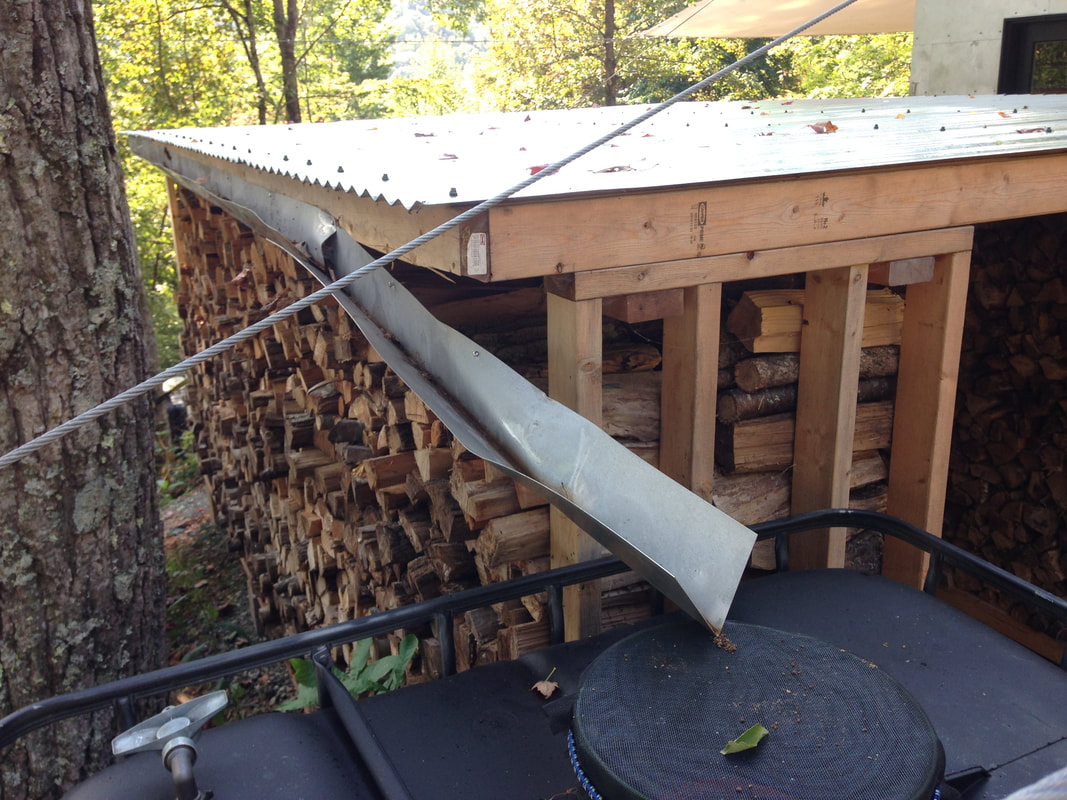
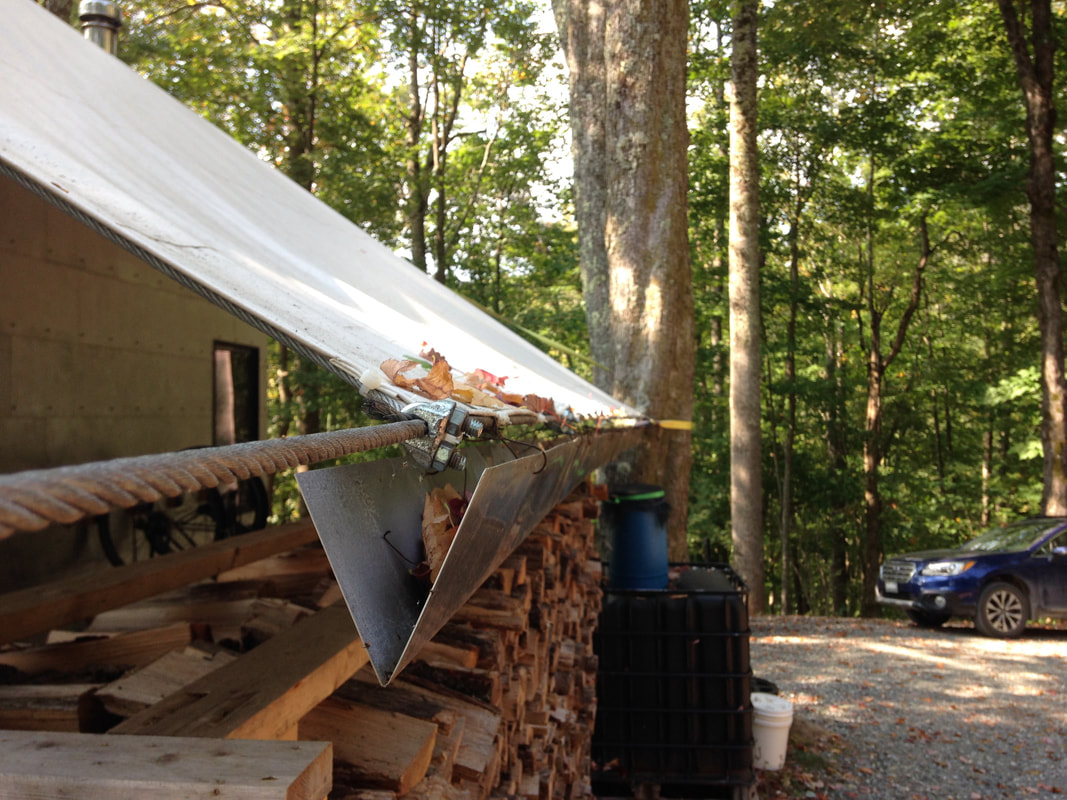
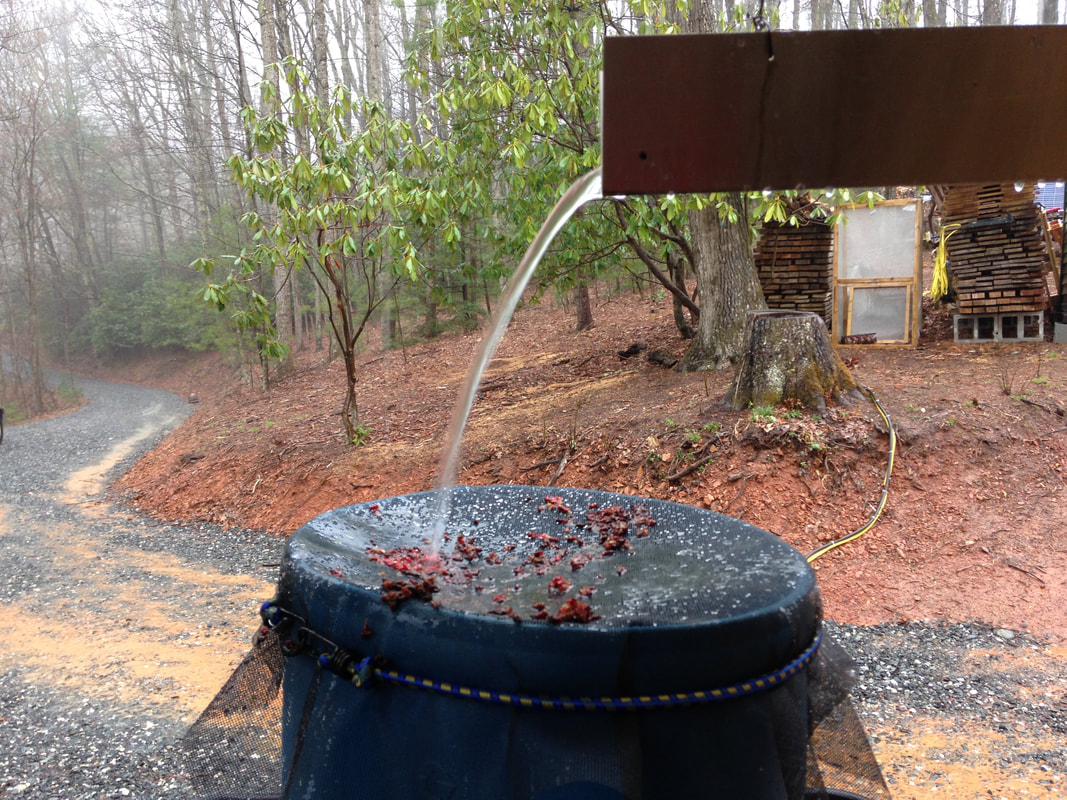
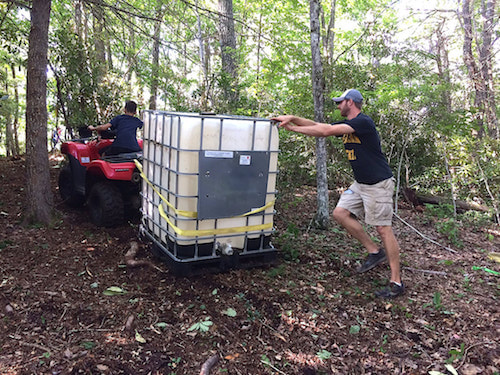
Homestead Project: New Water Collection
Earlier this year some high winds ripped down our rainwater collection tarps that were on the hill above our homesite. We decided after that event to collect our rainwater from both the roof of the mobile cabin and our wood shed and to use an electric pump to create our water pressure. To do this we leveled new locations for the IBC totes, bent up aluminum gutters to be hung along the roof edges, and connected the hose, pump, and filters.
|
|
|

|

|
|
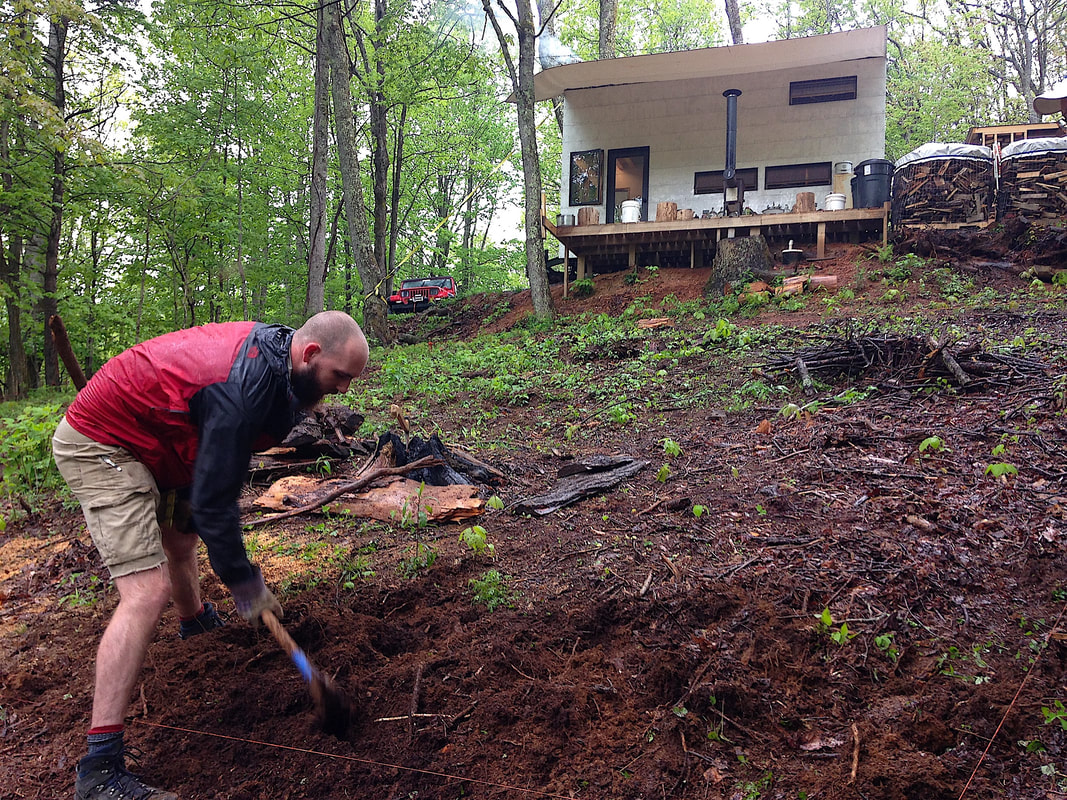
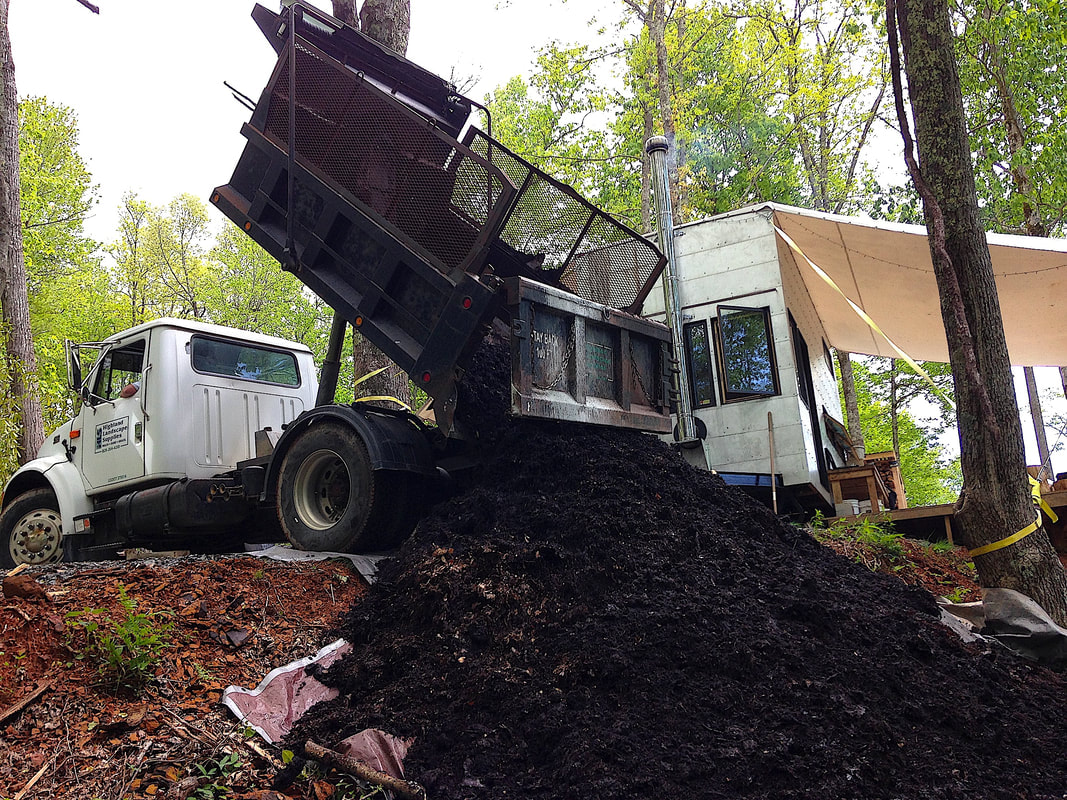
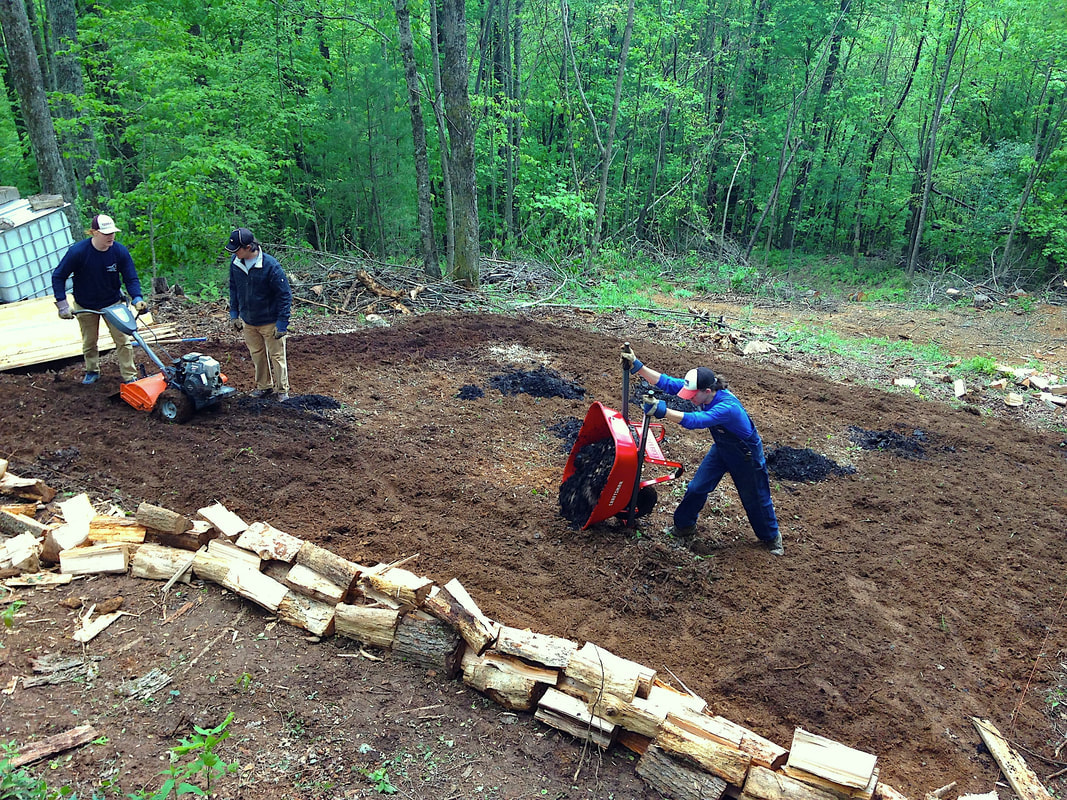
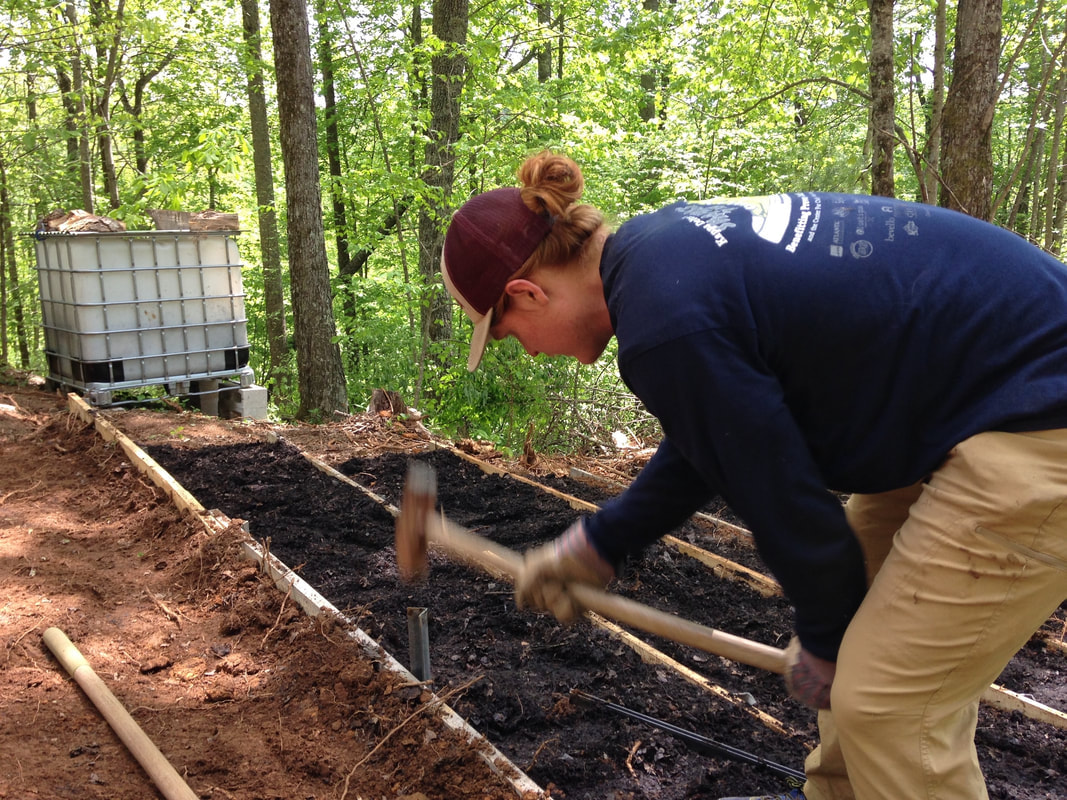
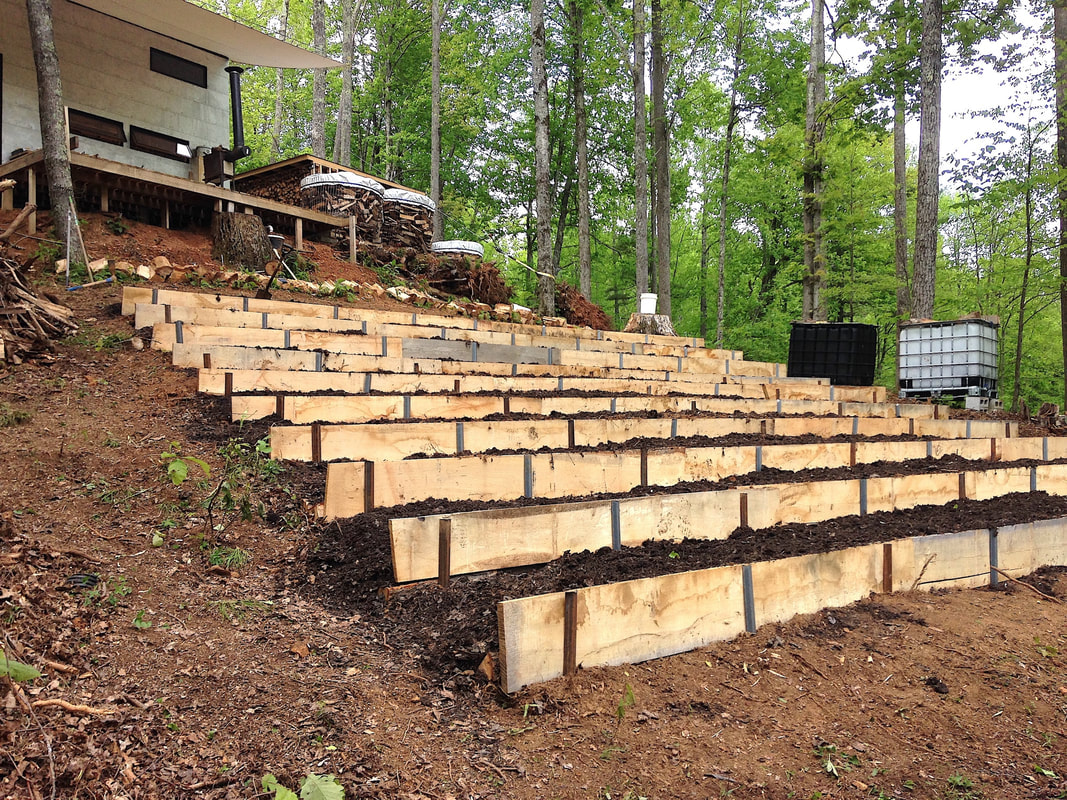
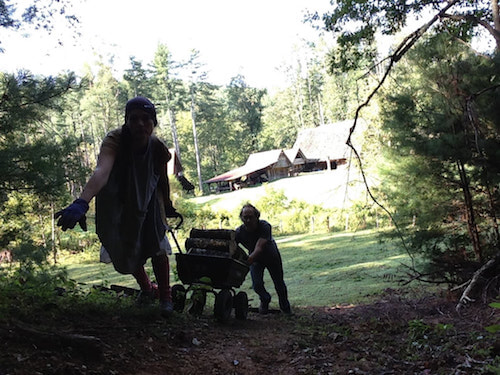
Homestead Project: Terraced Gardens
We would like to grow food on the property and the south facing slope just below the mobile cabin is the best place to do that. It is fairly steep and so we felt it would be best to terrace the slope. We were able to hire some students to help out with this labor intensive project and started by digging out some old stumps, using a mattock to break up the clay-based soil, and using a rototiller to aerate the soil and work in the leaf compost. Next we employed white oak boards milled from the property to create the terrace levels. Utilizing a cut and fill method we worked our way up the slope using steel angle iron to pin the boards in place. We finished by adding 3” of leaf compost over the surface. Our soil still needs improvement and so the next phase of the project will be adding amendments to boost nitrogen levels and microbial biodiversity.
|
|
|

|
|
|
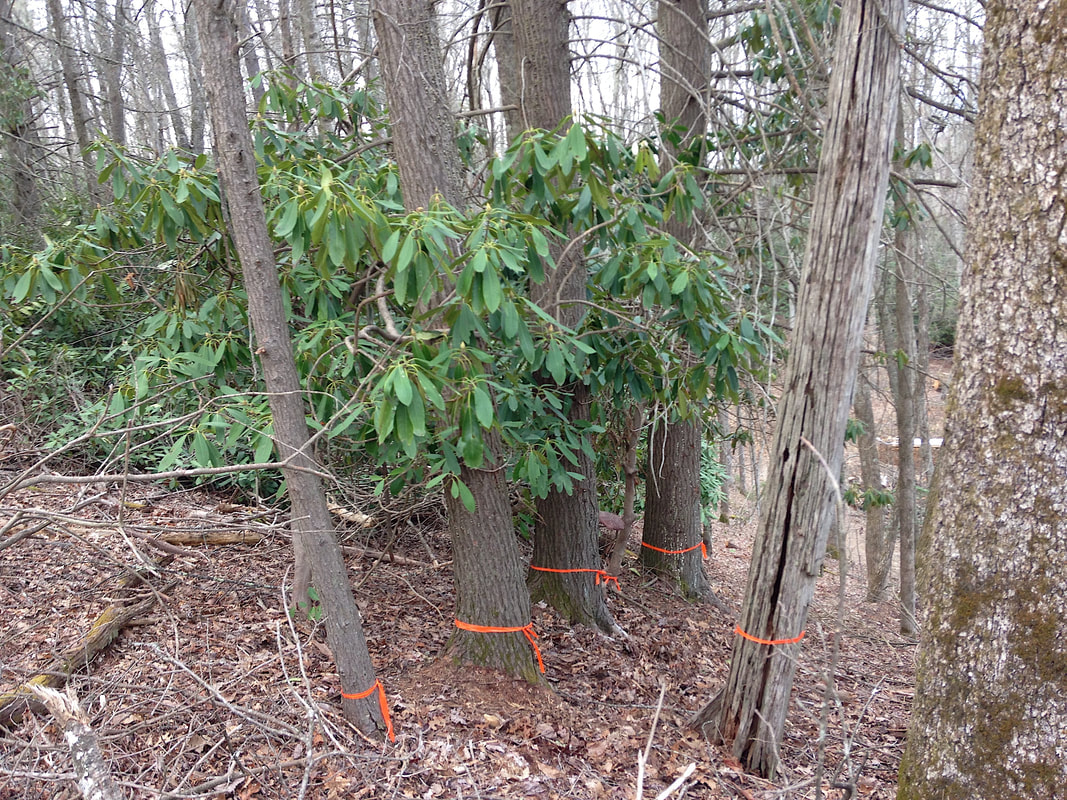
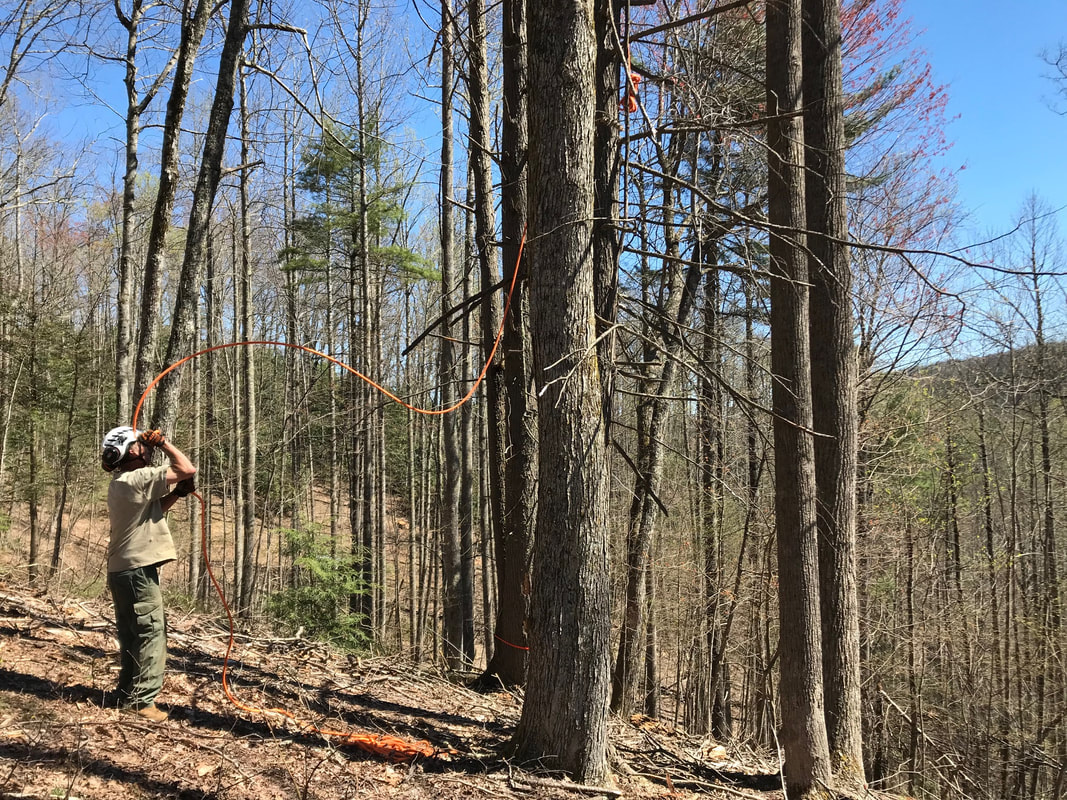
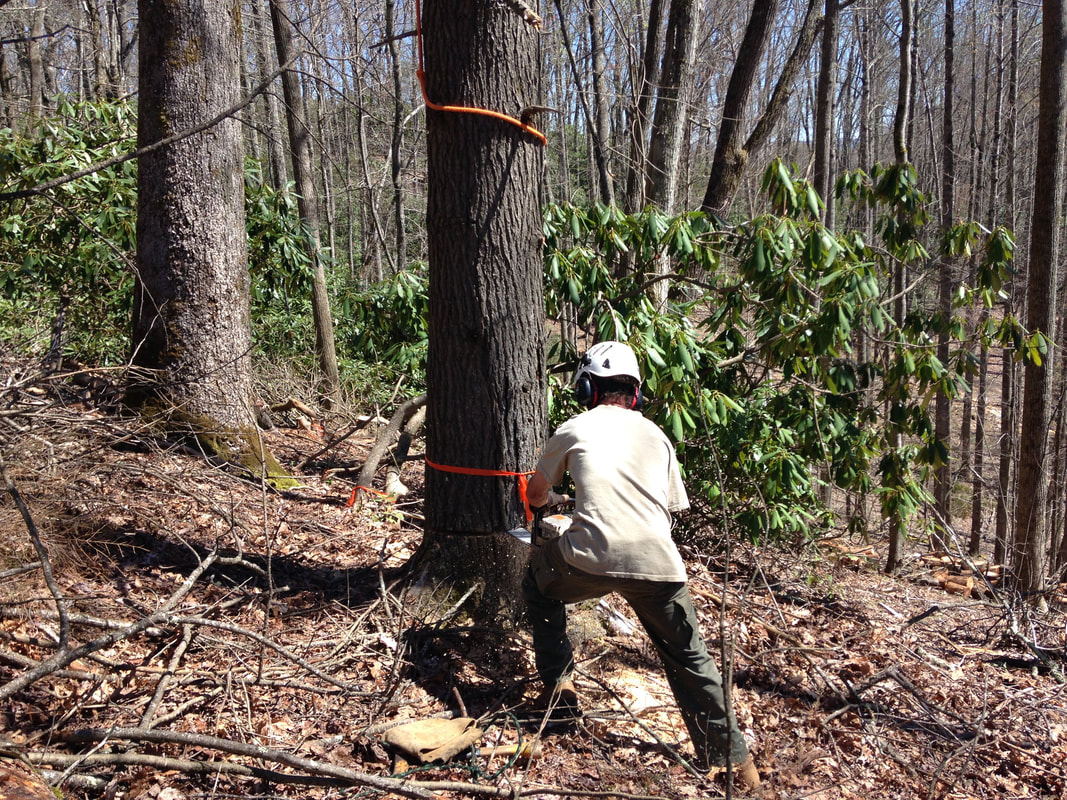
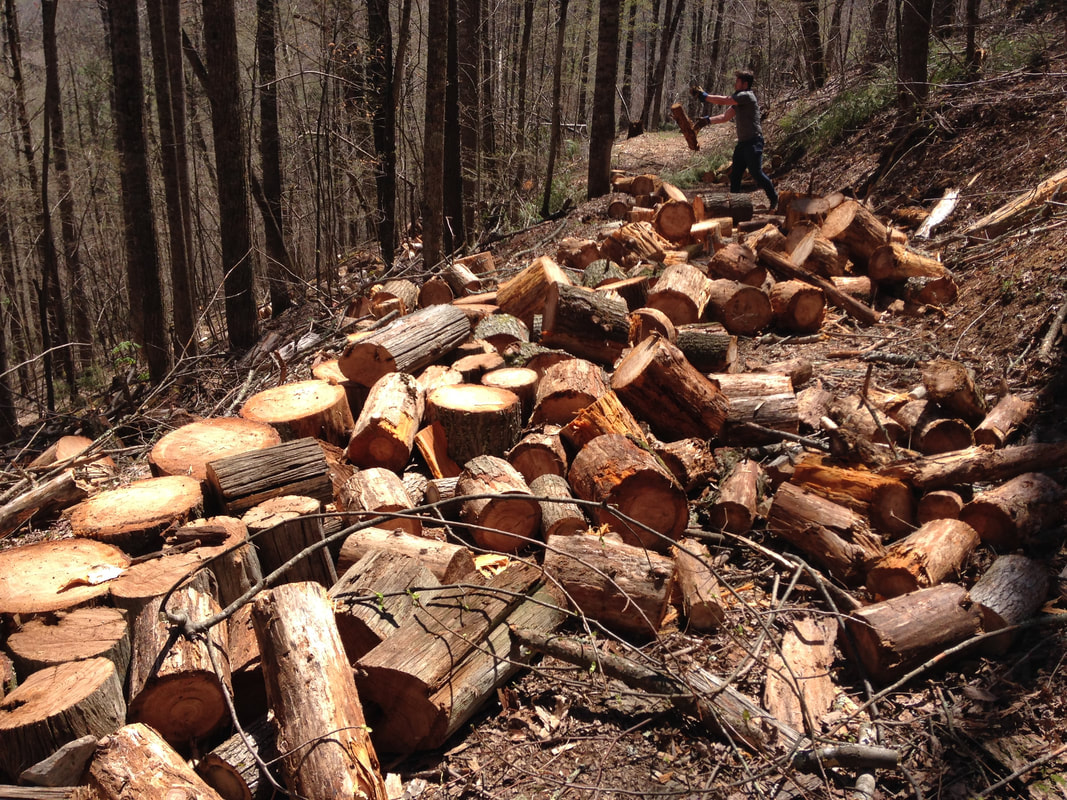
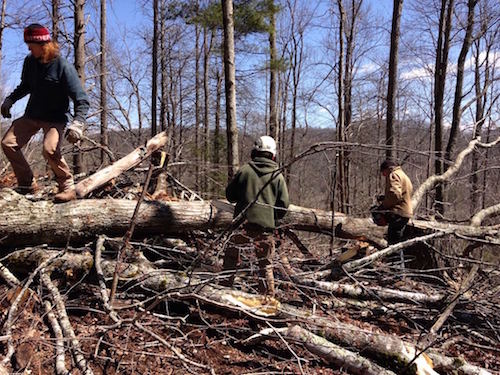
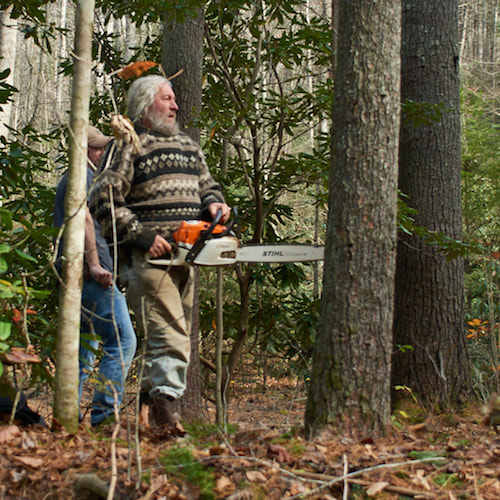
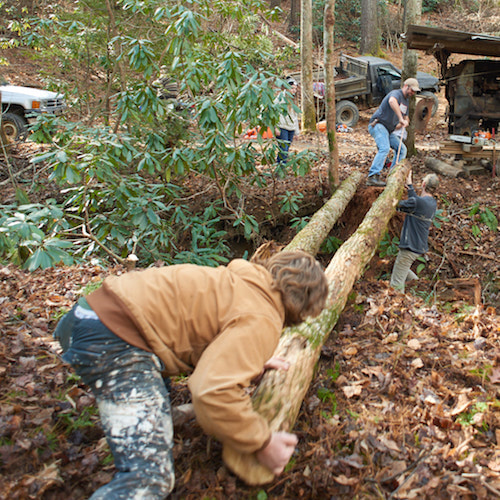
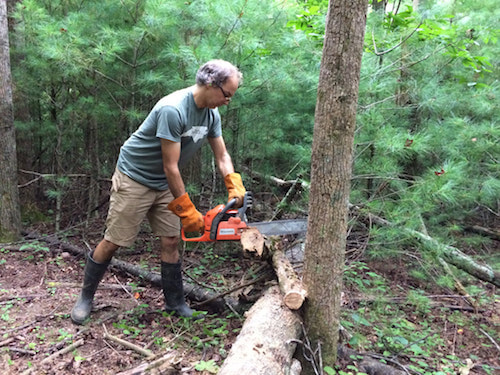
Homestead Project: Dead Hemlocks
The Woolly Adelgid aphid has decimated the Hemlocks in the eastern United States, particularly in the area in which we live. These formerly huge and beautiful trees dry out, die, and the branches fall off creating a huge mess on the ground. There were about 20 of these trees standing dead in close proximity to our homestead site and so we have been slowly taking them out as time allows. I recently hired a tree expert to fell the largest and most dangerous of these trees in order to get them down on the ground safely. The wood was already rotten and so there was little value for firewood. We cut the trunks into short sections and threw them downhill where we are using them to fill a low area on the property.

|
|
|
|

|
|
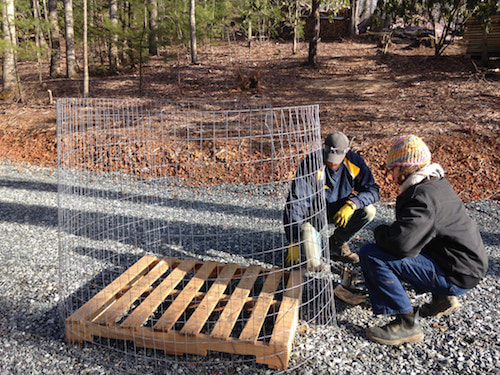
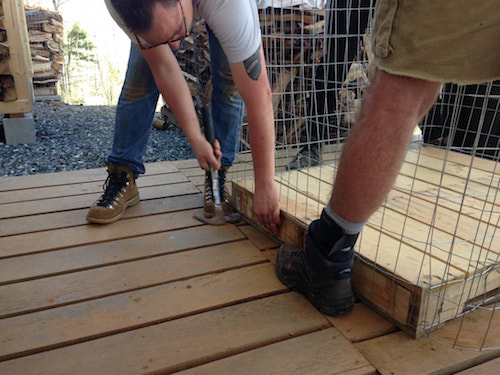
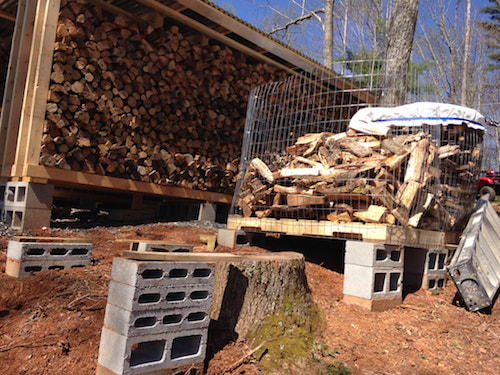
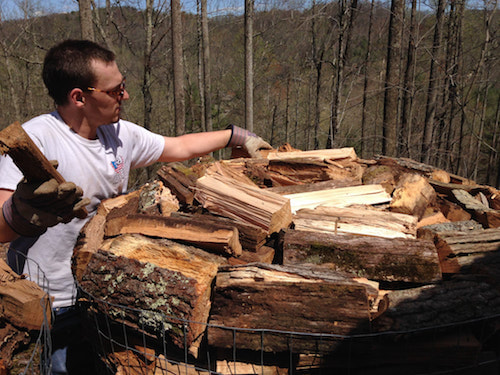
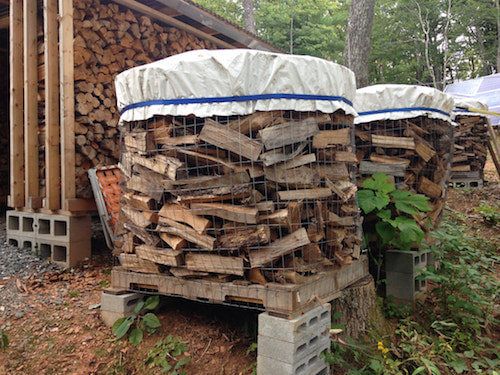
Homestead Project: Firewood Cages
One of the problems of chopping firewood is dealing with all the odd cut offs, weird branches and curved pieces which fit nicely into the stove… but are too difficult to stack into a pile. Inspired by wood drying techniques presented in the book, “Norwegian Wood”, Cameron designed a low cost solution. Each pallet is wrapped in four foot wire fencing, set on level concrete blocks, filled with odd shaped firewood pieces, and capped with a tarp and ratchet strap. The total cost for all materials is $35 and this solution safely stores exactly a ½ cord of firewood for many years.
|
|
|

|
|
|
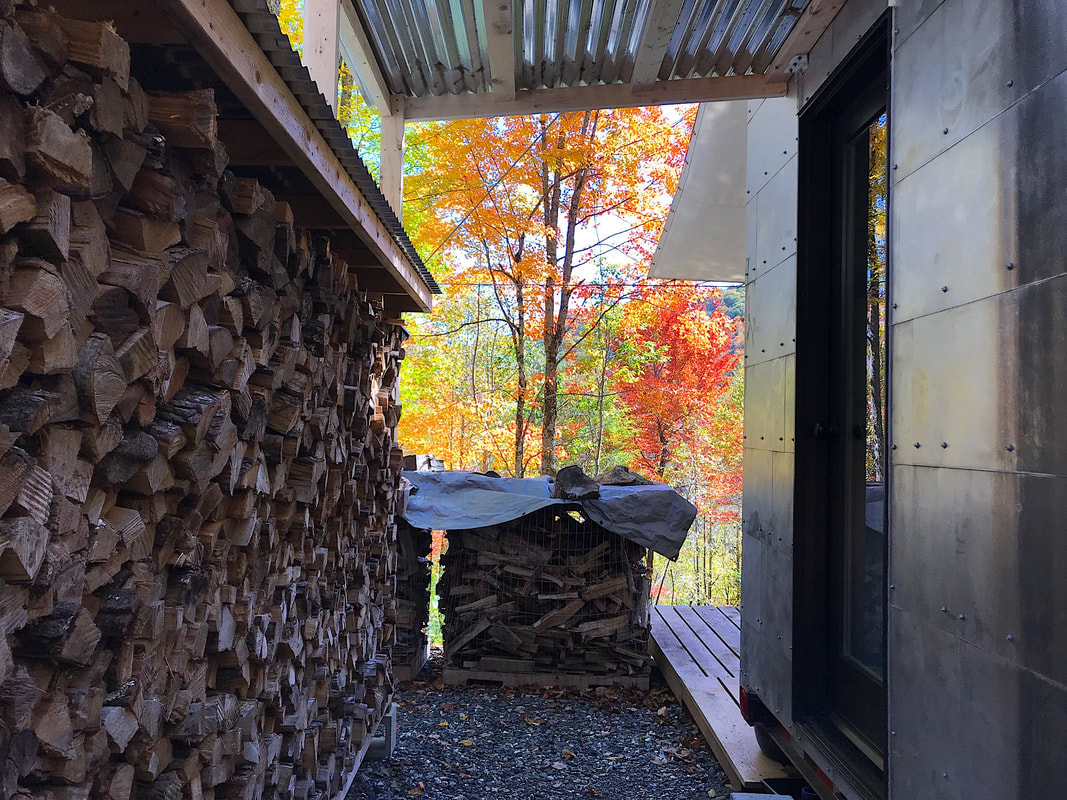
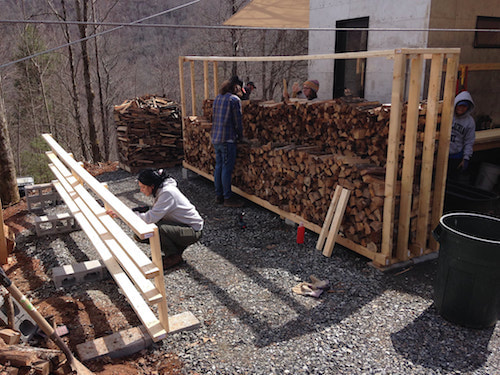
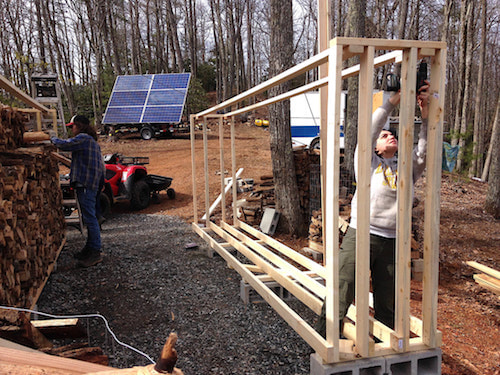
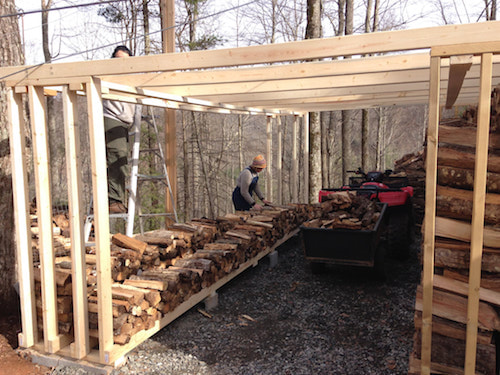
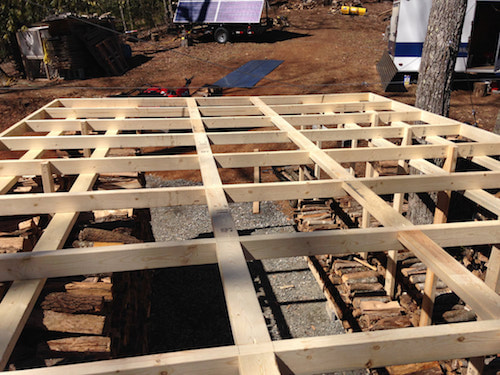
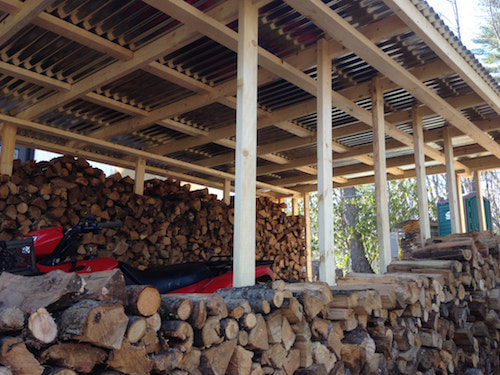
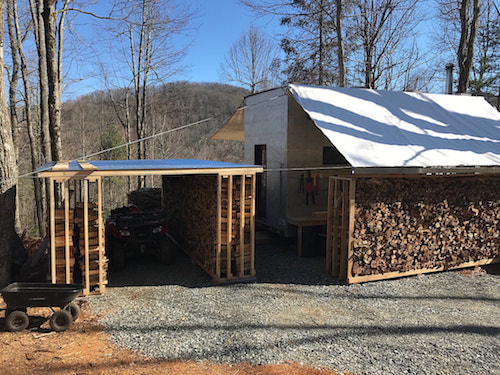
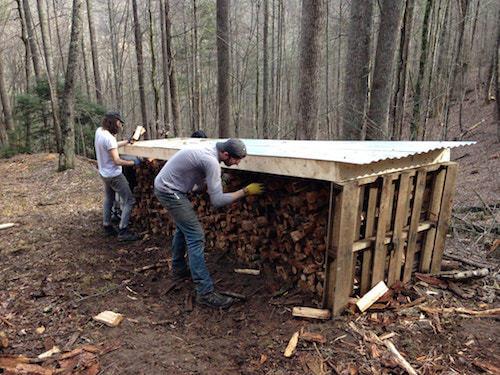
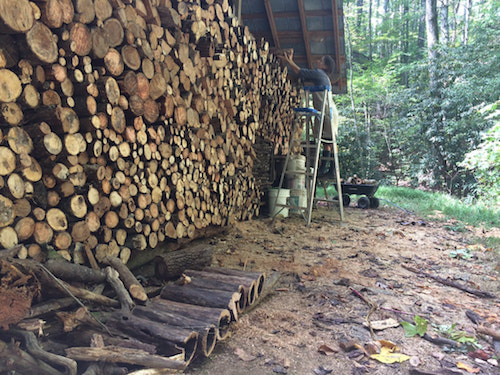
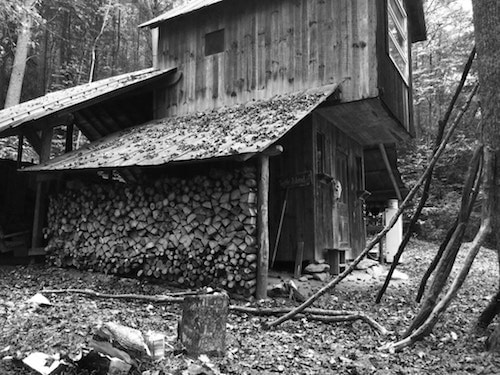
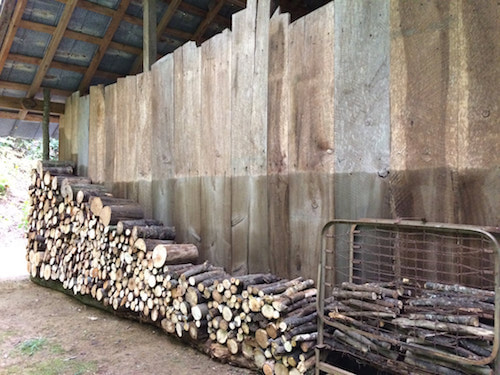
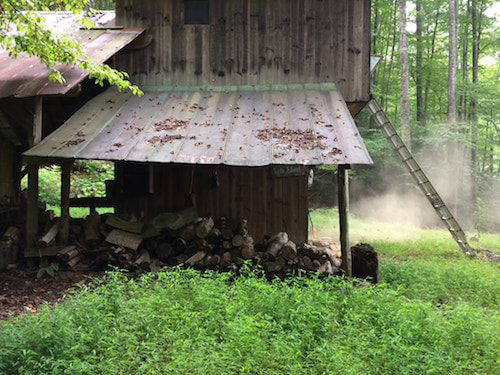
Homestead Project: Wood Storage
With all the firewood cut and split we needed a good place to store it. Last autumn we had made a 16’ long by 6’ high rack that functioned as a wall behind the tiny house to block wind and create a protected work area. It seemed like we could use that same technique to create covered wood storage – placing two racks about 6’ apart and allowing the racks to become the walls. We invited several students to come out for the day to build the racks and fill them with firewood. Concrete blocks were leveled on the ground, the racks were set on the blocks, filled with wood, and then a covering of corrugated tin was set over them. This created an open space in the middle which can be filled with more firewood as needed.
|
|
|
|
|
|
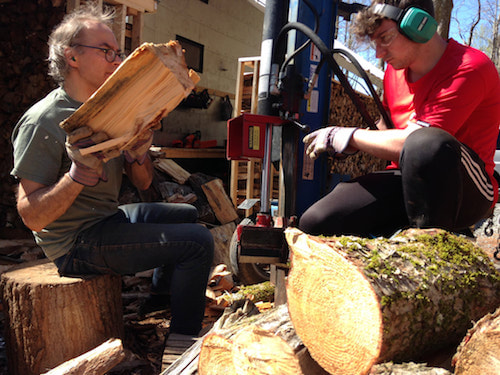
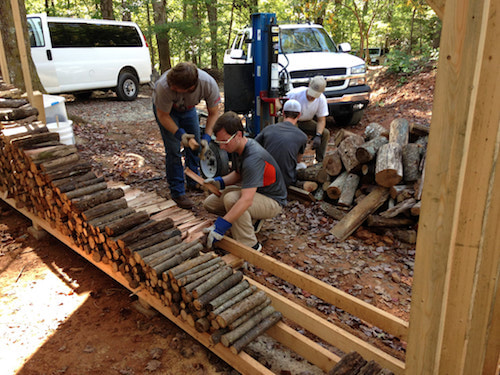
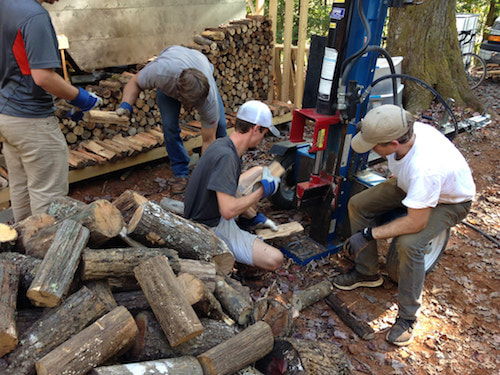
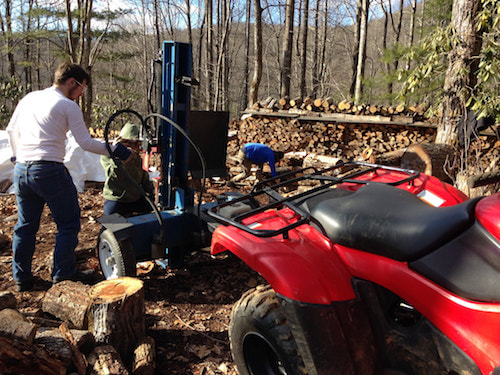
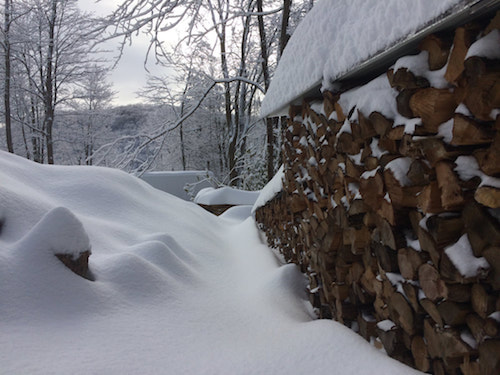
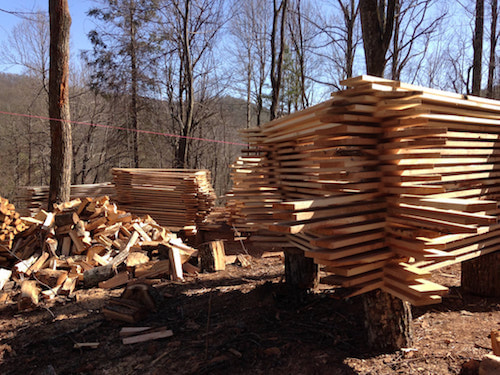
Homestead Project: Firewood
For the past year we have been systematically cleaning up our 6 acres of woods - creating firewood as we go. All the firewood we have generated so far has come from dead, damaged, or dangerous trees. Even though we are not in need of all this wood at the moment, it makes environmental sense to process and store it for fuel rather than let it rot on the ground because whether it is burned or it rots the carbon stored inside will be released into the atmosphere.
We now have about fifteen cords of firewood (1920 cu/ft) that is split and drying. The tiny house only uses about one cord per year for heating, so in a way we are doing a small form of carbon sequestration – storing wood (carbon) in a way that will keep it locked up for a long time.
We now have about fifteen cords of firewood (1920 cu/ft) that is split and drying. The tiny house only uses about one cord per year for heating, so in a way we are doing a small form of carbon sequestration – storing wood (carbon) in a way that will keep it locked up for a long time.
|
|
|
|

|
|
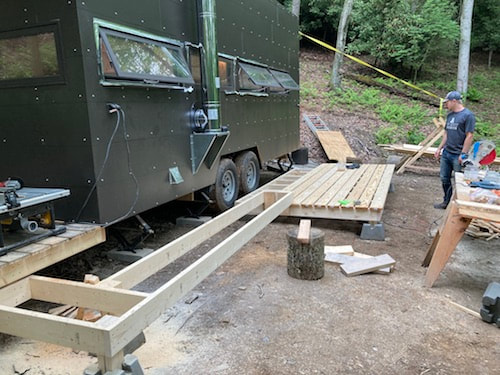
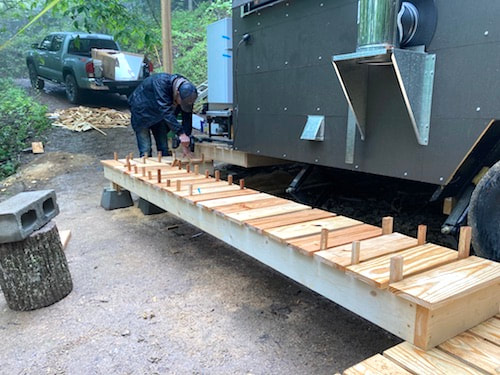
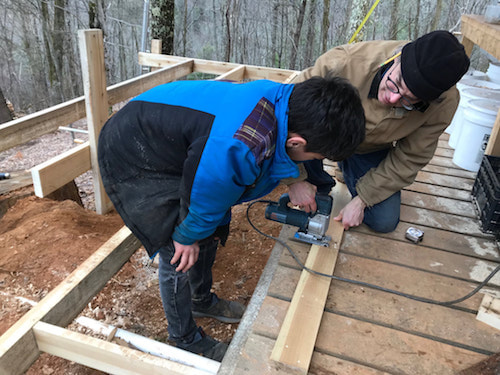
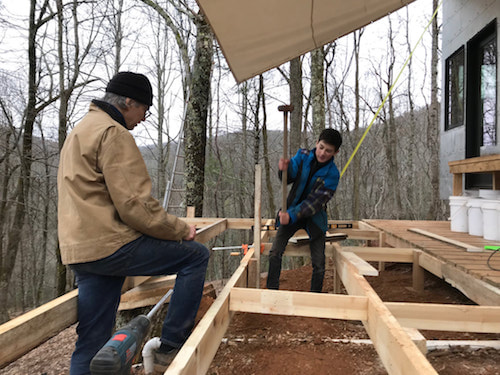
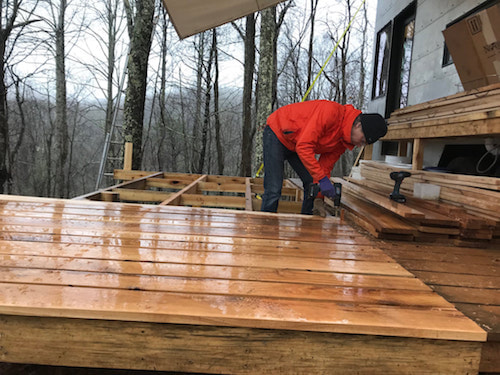
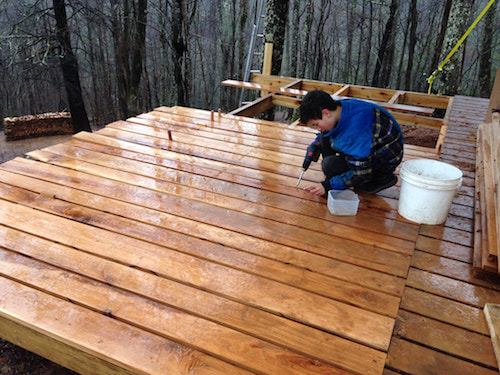
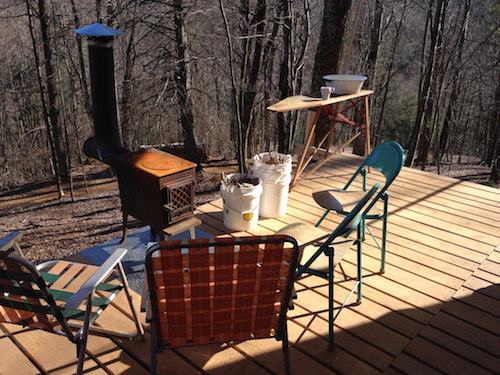
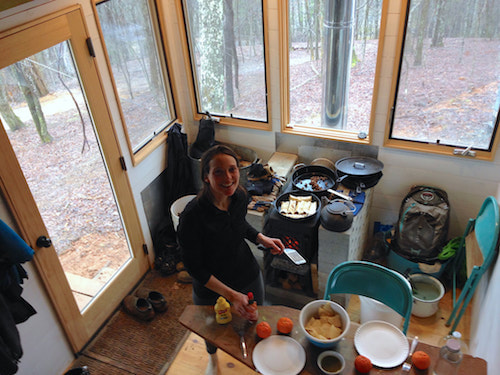
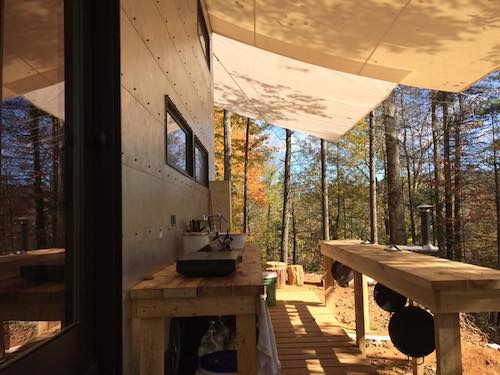
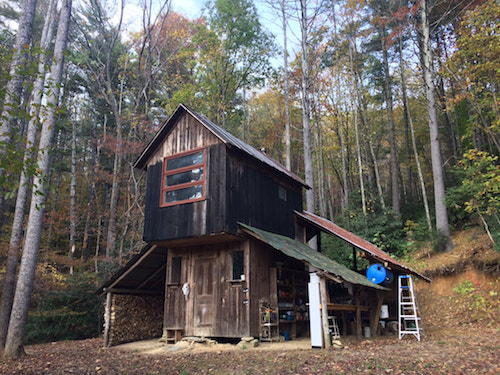
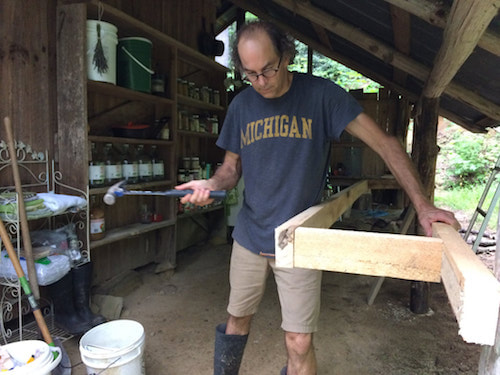
Homestead Project: Front Porch
We have been without a covered work area since the winds of the late fall ripped off our large secondary tarp. So this spring we decided to maximize the space under the main tarp and build a deck that extends the kitchen area out. Joshia worked with Cameron to build the deck – made entirely from lumber milled from the property. Our outdoor wood stove will now be in close proximity to the outdoor kitchen – making cooking much more convenient.
|
|

|
|
|
|
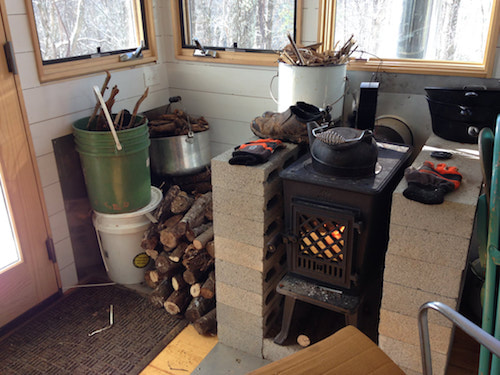
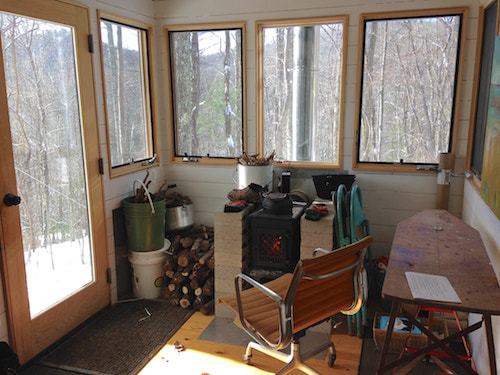
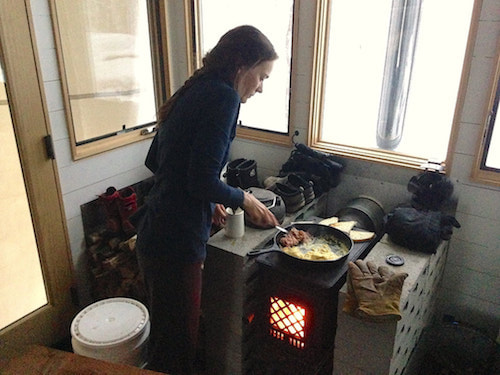
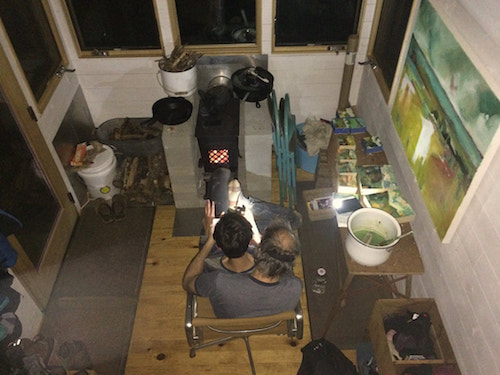
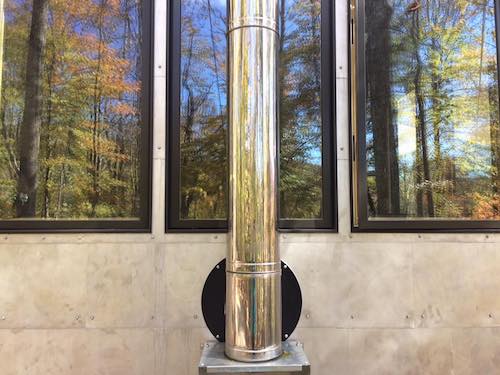
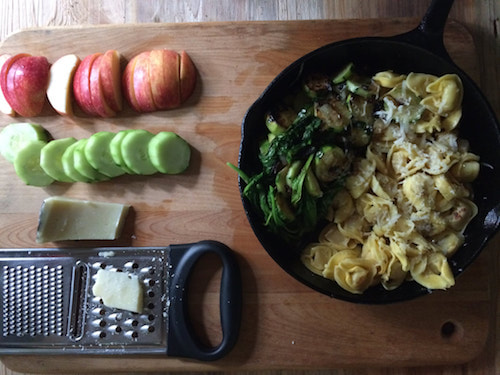
Homestead Project: Jotul 602
As our winter heating season comes to a close we just want to take a minute to recognize the little wood stove that kept us warm and heated our food daily. Rachael did all of our cooking on it which included pizza, soups, stews, grilled meats and veggies. Also a great place to sit and read a book or do your math. The Jotul 602 is EPA certified and one of the world’s most popular wood stoves. It was the only source of heat for our cabin this winter and kept us toasty warm even with temperatures well below freezing. The comfortable performance of our heating system is made possible by a large amount of thermal mass inside the insulated envelope. In plain English… there is a lot of heavy stuff inside the cabin to store and then release the heat slowly. To start there is 600 lbs of concrete block around the stove – capturing heat and protecting things from touching its hot surfaces. Then there is the 1200 lbs of water that is stored in barrels above the stove. Add to that the weight of the ¾” thick pine that covers the floor, walls, and ceiling plus everything else inside the cabin and you have close to 4000lbs of thermal mass with which to store heat. The result is a home that can be heated up during the day and coast its way through the night with stored thermal energy.
|
|
|
|
|

|
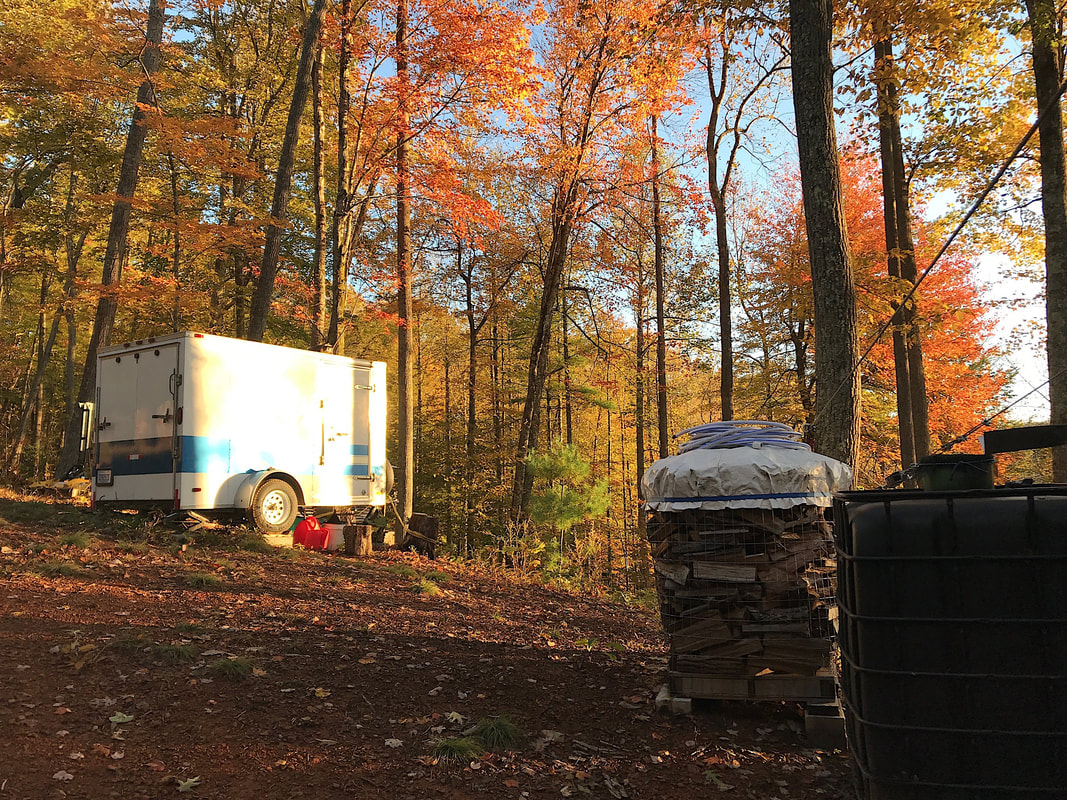
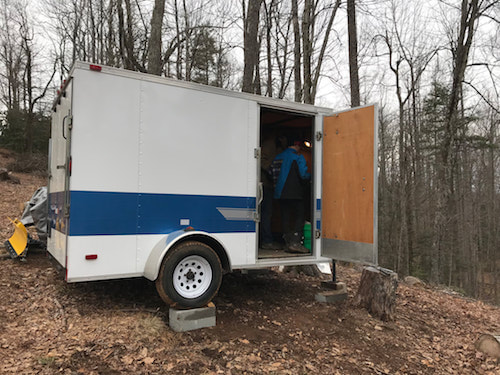
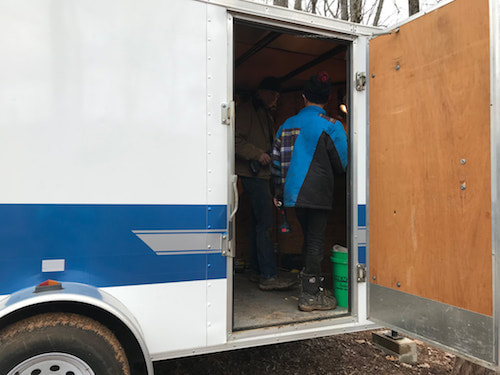
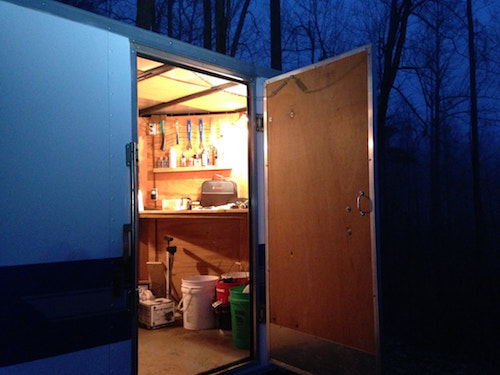
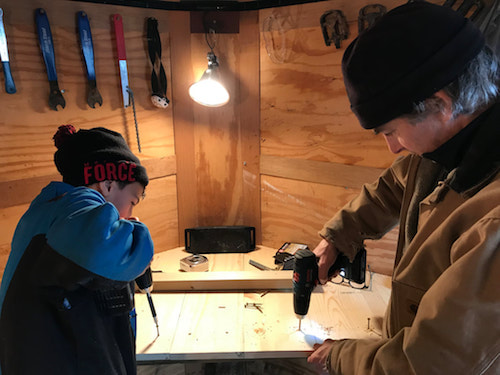
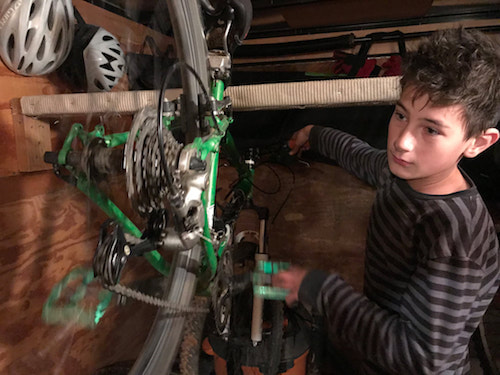
Homestead Project: Shop Space
This winter Cameron and Joshia have been struggling to keep their tools dry and find a warm place to work on their bicycle projects. The solution was to buy a small cargo trailer, build in a work table, and add some lights and a space heater (both made possible by the solar electric system). Now Joshia can go out to the trailer anytime to repair the bikes that he is buying and flipping.
|
|
|
|

|
|
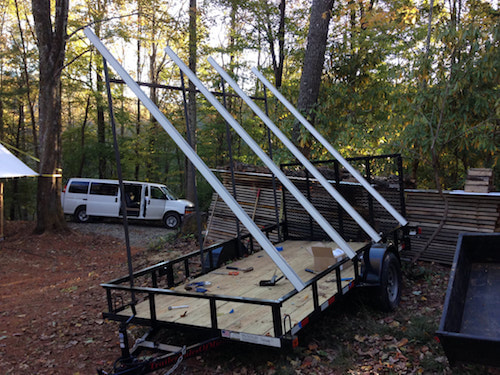
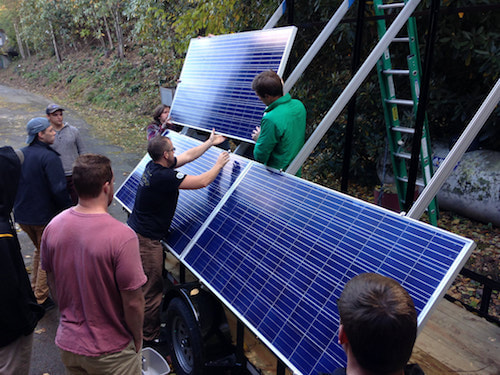
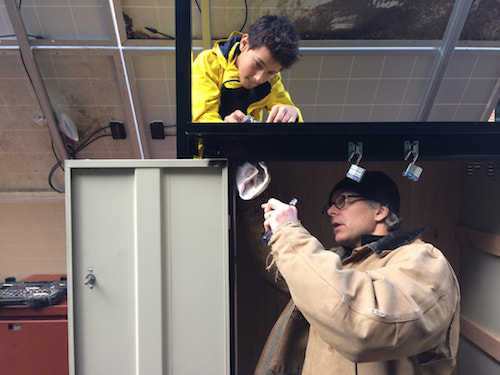
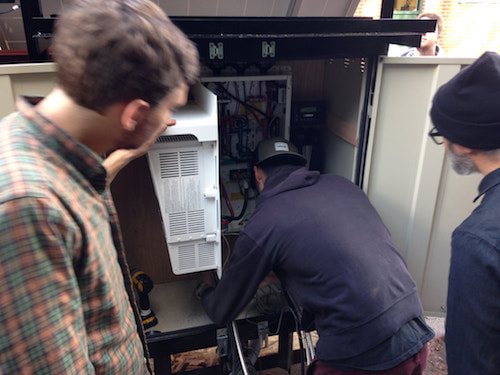
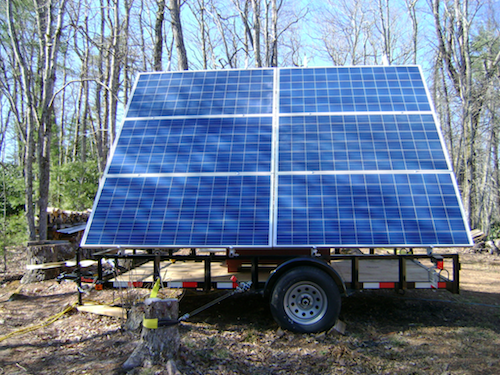
Homestead Project: Solar Electricity
Earlier this fall Cameron began working with Brent Summerville in the Sustainable Technology and the Built Environment department at App State to plan a solar electrical system for the Homestead Project. They decided it would be best if the system was portable and so Cameron purchased a 6’ x 12’ trailer and added a rack and storage boxes that would hold the panels, battery, and electronic controls. The students then went to work installing the system in an outdoor work area just outside of the classrooms. The project was recently completed and installed on the property where the system is currently providing power to run our lights, refrigerator, ventilation fan, power tools, and charge our phones. The system is comprised of six 300 watt solar panels and has 10 kwh of battery storage.
|

|
|
|
|
|
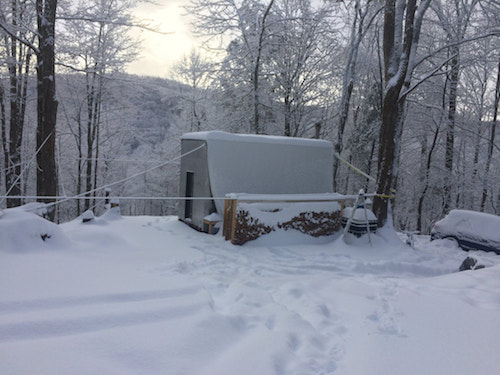
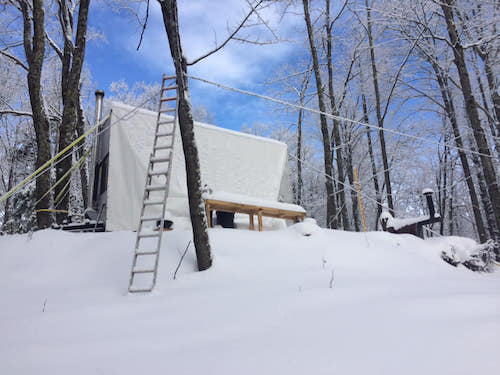
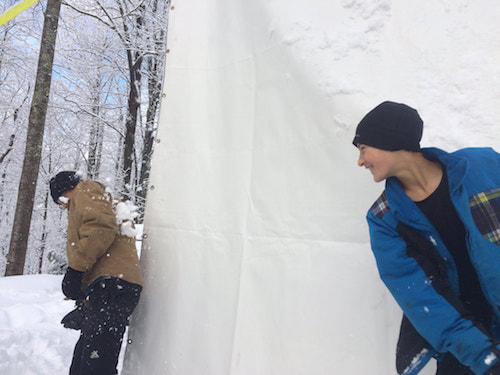
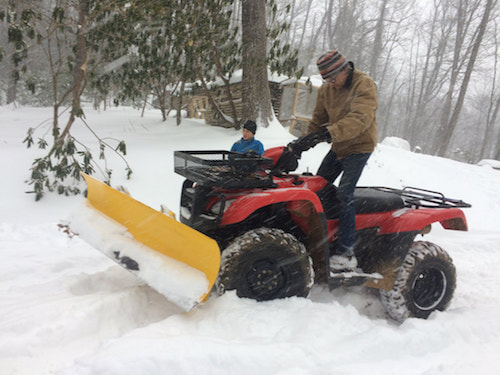
Homestead Project: Blizzard in Boone
2 feet of snow fell in 30 hours at our homestead site. We had prepared for the blizzard and had plenty of wood and water inside.
|

|
|
|
|
|
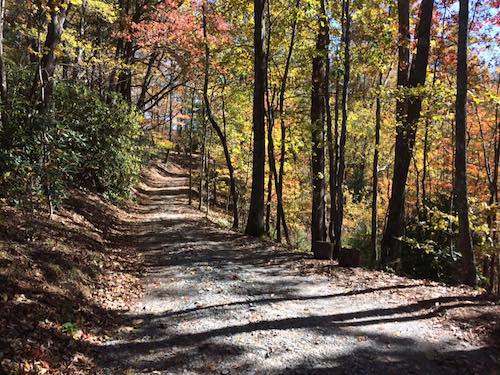
Homestead Project: Fall Colors
Enjoying the fall colors that surround us. Preparing wood stacks for the winter that is soon to come.

|
|
|
|
|
|
Homestead Project: Setting up the Water System
The highest point of our property is 30’ above the mobile cabin which gives us enough vertical drop to create a gravity powered water system. In order to collect and store the water Cameron purchased a 20’ x 20’ tarp and two used IBC 275 gallon tanks. The tanks where pulled to the highest point and cables were installed between four trees. Next the tarp was hung on the cables so that it sagged in the middle and the tanks were positioned at the lowest point of the tarp with a small weight installed to keep it in that location. The tanks were then painted black in order to limit light (and therefore algae growth) from entering the tank. Screen filters at both the intake and exit of the tanks catch most of the small debris. Boone gets about 55 inches of rain a year so the 400 square foot tarp will collect approximately 13700 gallons of water a year.
|

|

|
|
|
|
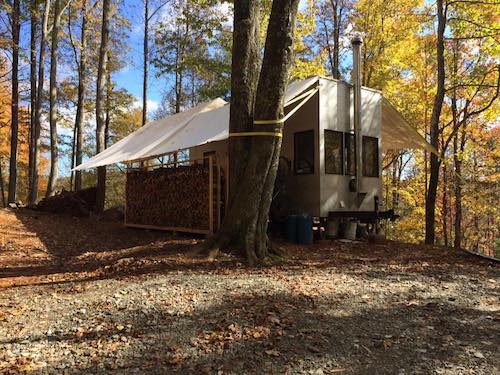
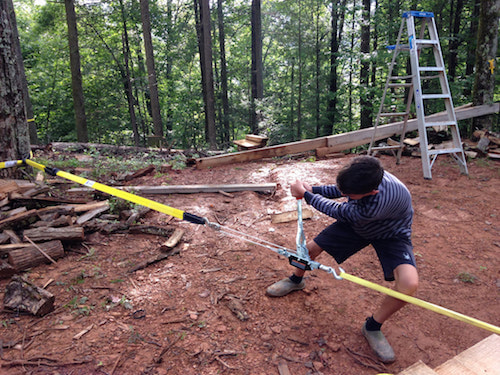
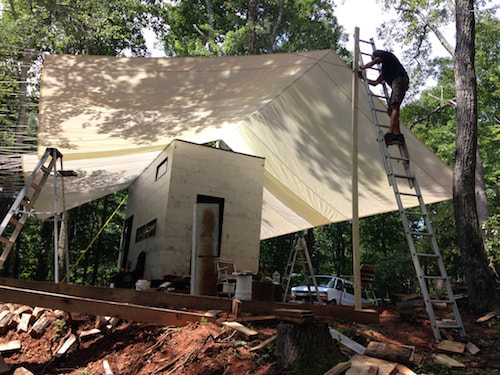
Homestead Project: Site Set-Up
Once the cabin was in place there was a process of adjusting the the trailer location, anchoring it to nearby trees, setting up tensioned cables for the tarps, and getting the tarps in place. We now have an outdoor space that is nearly five times as large as the cabin itself where we will set up an outdoor kitchen/living room and store tools, bicycles, and firewood.
|

|

|

|
|

|
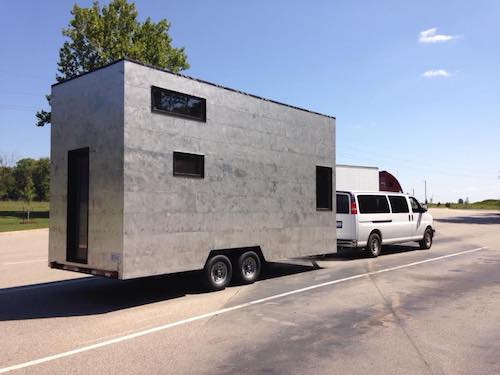
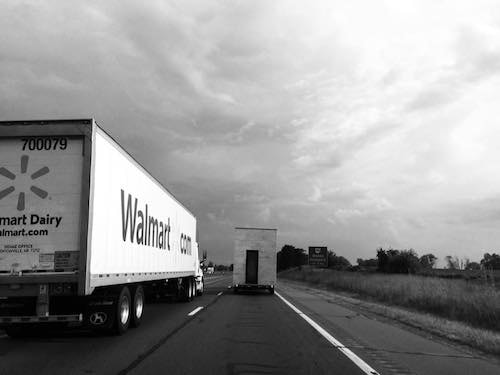
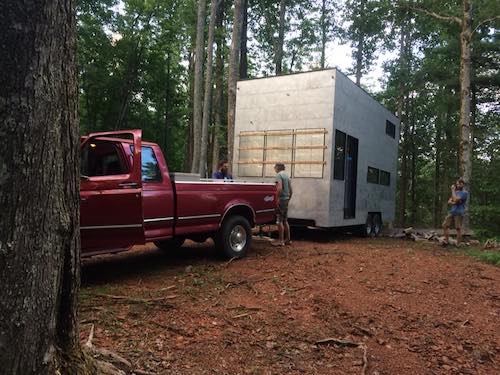
Homestead Project: Moving the Mobile Cabin to Boone
After 10 weeks of fabrication the mobile cabin was ready to go the 760 miles to our property in Boone, NC. On a Friday morning we hooked the trailer to Cameron’s Chevy Express van and left Grand Rapids. Despite a top speed of about 50 mph the trailer handled quite well and we made it about half way the first day – sleeping inside the mobile cabin at a rest area. The next day we arrived in Boone at about 5 pm and our neighbor hooked the trailer to his 4-wheel drive pickup to take it up the narrow and steep gravel driveway to the property. It was in place by dark and we enjoyed a good night's rest in the cabin.
|
|
|
|
|

|
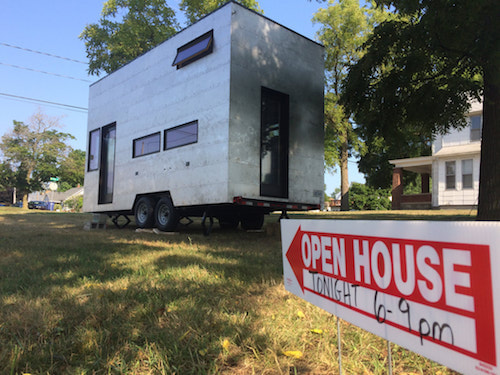
Homestead Project: Open House
After finishing the interior siding up to the ceiling we decided that we wanted to have a public open house before leaving Grand Rapids to bring the cabin to Boone. We set up the cabin on a large grassy lawn on a major street in Grand Rapids and advertised the open house on Craigslist and Facebook – inviting the general public to come and experience tiny house living and ask questions. We styled the space with the furniture items that we would be using in Boone. Over 100 people came to experience the cabin and enjoy live music and s’mores over the fire.
|

|

|
|
|
|
Homestead Project: Interior Wall Surface
Once the insulation was done we could begin covering the interior wall surface with shiplap. The shiplap is ¾” thick tongue and grove Red Pine from Quebec. We hired long time friend and woodworker David Bult to install most of it as we were a bit pressed for time to finish. He used the standard nickel spacing and once the installation was complete a single coat of white wash paint was applied.
|
|
|
|
|
|
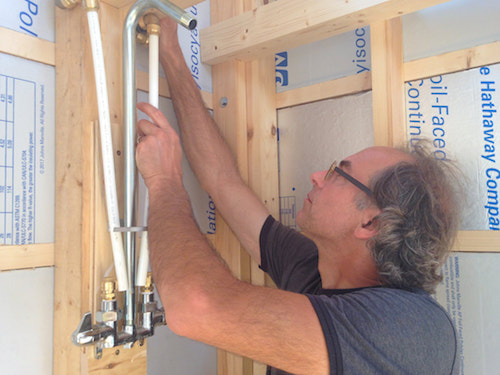
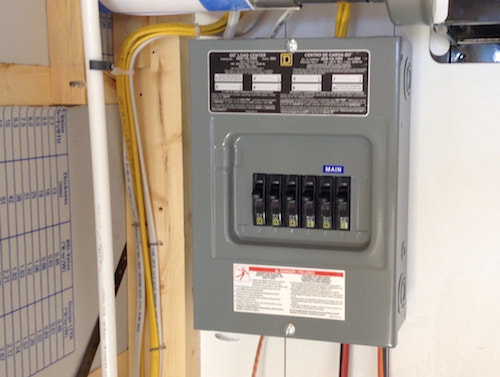
Homestead Project: Cabinets, Plumbing, Electrical, and Insulation
Once the exterior of the cabin was complete we turned our attention to the cabinets, plumbing, and electrical in preparation for the sprayed insulation. The cabinets are made of lightweight pine with a clear coat and the plumbing is a combination of galvanized pipe and Pex with a shower and indoor/outdoor kitchen faucets. Next we hired our long time friend Tommy Schichtel from Supro electric to install our electrical system which will eventually be powered by solar panels at the property
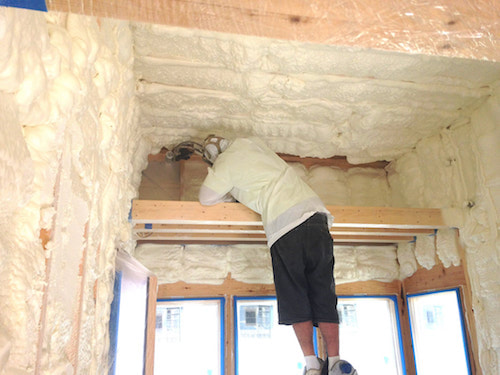
Once everything was ready for the foam we wrapped every finished surface in plastic or cardboard to protect it from over spray. We choose to go with a ½ pound density soft foam and a team of 2 men from Advanced Insulation Technology sprayed it in and then trimmed it down to the surface of the studs.
Once everything was ready for the foam we wrapped every finished surface in plastic or cardboard to protect it from over spray. We choose to go with a ½ pound density soft foam and a team of 2 men from Advanced Insulation Technology sprayed it in and then trimmed it down to the surface of the studs.

|
|
|
|
|
|
Homestead Project: Exterior Cladding
The exterior of the cabin is clad with thin aluminum panels and Cameron and Alex spent a week measuring, cutting, fitting, and screwing the panels onto the trailer. Pole barn screws with rubber washers were used to create a water tight seal. Aluminum was chosen because it is very lightweight, weather resistant, and bug resistant. Originally the plan was to paint it, but the response so far is that many people seem to like the raw aluminum so we are living with it for a while to see how we feel about it over time.
|
|
|
|

|
|
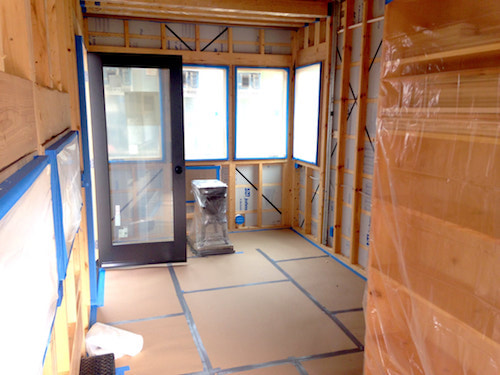
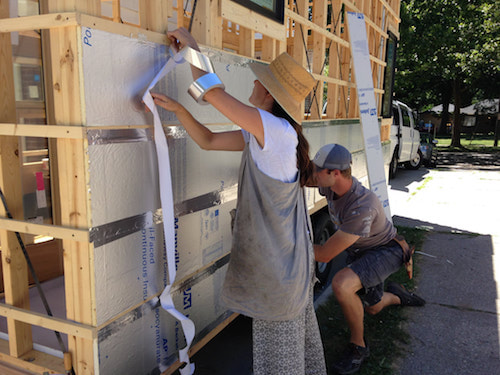
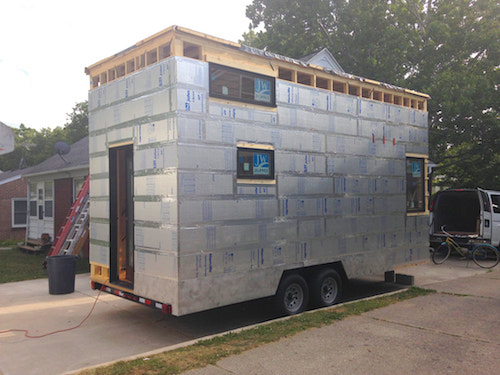
Homestead Project: Windows and Exterior Insulation
Aluminum clad double glazed windows and doors from Jeld Wen arrived last week and were installed in the cabin. Then 1 ½” cleats were spaced horizontally around the entire exterior in preparation for screwing on the horizontal aluminum cladding. Next ¾” foil faced insulation board was installed between the cleats to increase the over all R value of the walls and help decrease thermal bridging with the studs. The insulation was held in place with foil tape in order to create an air tight envelop on the exterior.
|
|
|
|
|
|
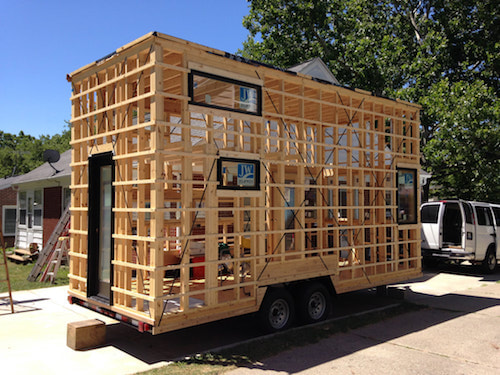
Homestead Project: Mobile Cabin Framing
The framing schedule for the mobile cabin was created in CAD and every stud was cut to length and labeled before beginning the assembly. Cameron and Alex used the CAD file to layout the plates and then screwed the frame together over the course of a couple days. Wind bracing was added to keep the frames square. Several friends came to help bolt the frames together on the trailer.

|
|
|

|

|
|
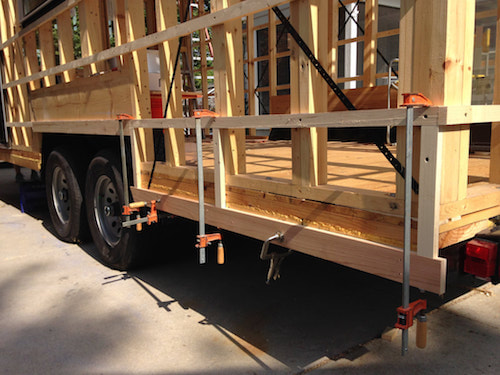
Homestead Project: Modifying the Trailer and Installing the Floor
As a permanent platform for the mobile cabin, Cameron purchased a 20’ long 11,000 lbs GVWR utility trailer, used it to pick up the red pine for the floor and walls, and then parked it in the driveway of his dad’s house. The first thing that needed to be done was to extend the sides of the deck out to the full width of the wheel well. 4” steel channel was cut to length and an on site welder came to weld them on. After that the extensions were cleaned and painted and a 2x10 subplate was used to extend the deck to 100” wide. 2” insulation board was screwed underneath the deck and expanding foam filled the cracks in the sub floor. A plastic vapor barrier was applied, then 4” red pine was nailed down, sanded, and polyurethane was applied.
|
|

|
|

|
|
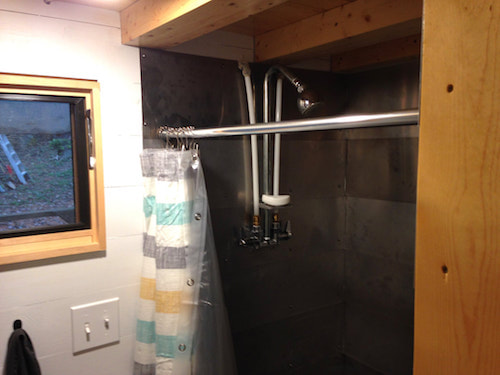
Homestead Project: Mobile Cabin Rendering
Cameron has completed the design of our mobile cabin on CAD. The 160 sq/ft home will be constructed on a 20’ x 8’ flatbed trailer and will have a small kitchen, a small eating area, a small living area with work surfaces, and a 60 sq/ft loft for the bed. It will have a bathroom with a shower and composting toilet. Rain water for the sink and shower will be collected in tanks at a site uphill from the cabin and will run down to the house through gravity pressure. Heat will be provided through firewood collected from the site and a small wood stove. Electricity will be created by a small solar array and used to power LED lights, a small fridge, and 7 gallon water heater.
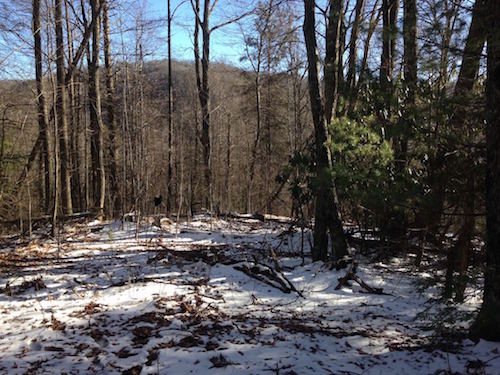
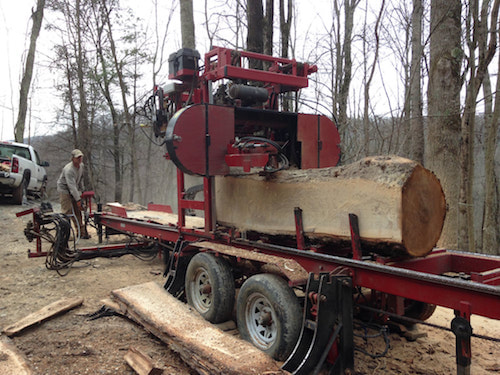
Homestead Project: Clearing the Land
In 2017 we came to enjoy living in a more authentic relationship with the natural world at Turtle Island in North Carolina. We decided to look for wooded land close to Appalachian State to continue to expand our off the grid experiment. In early spring of 2018 we purchased 6 wooded acres of land on a south facing ridge that is just 15 minutes by bicycle away from the university. Since then we have been cutting downed logs into firewood, clearing a spot to place a mobile cabin, and harvesting and milling trees into lumber. We are preparing to start living on the property in August 2018 with a small energy footprint and creating as many of our own necessary solutions as possible. We will be sharing our progress and what we learn along the way.

|
|

|
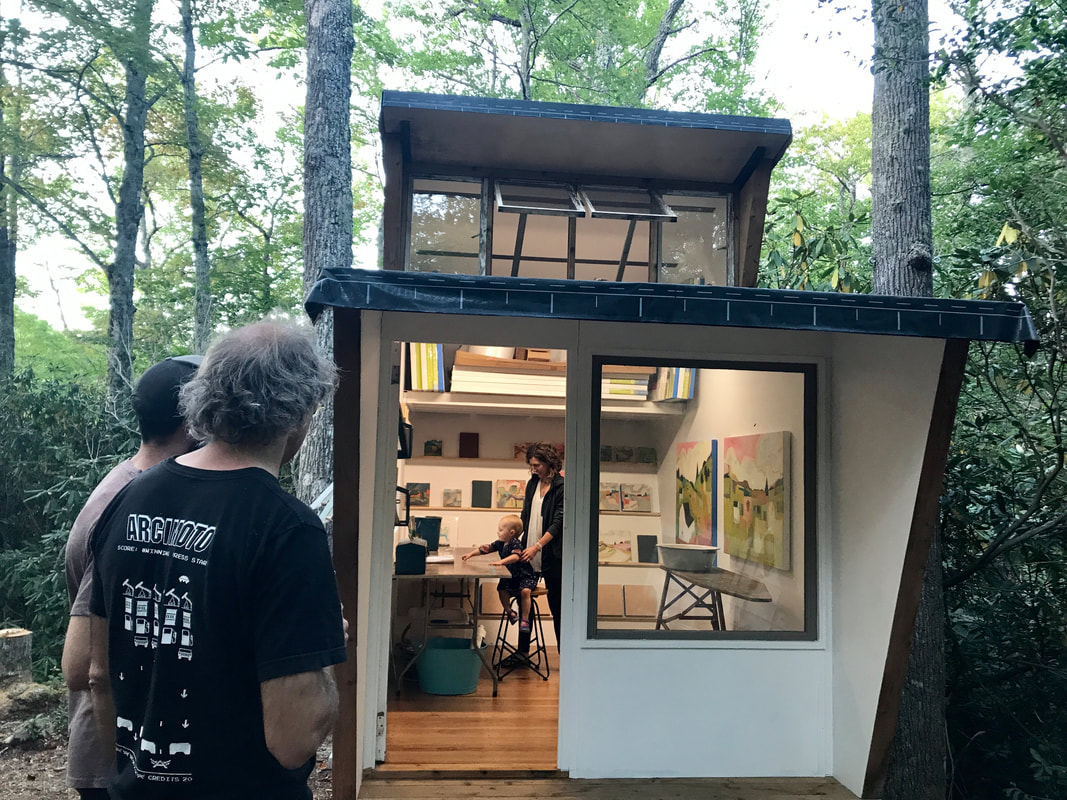
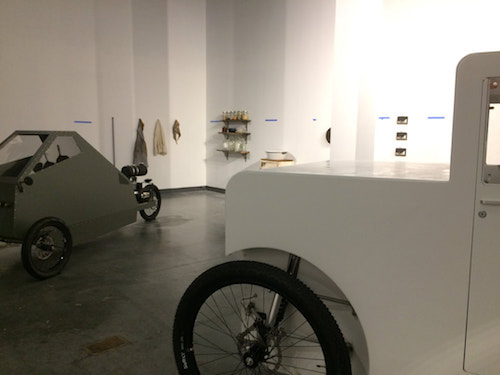
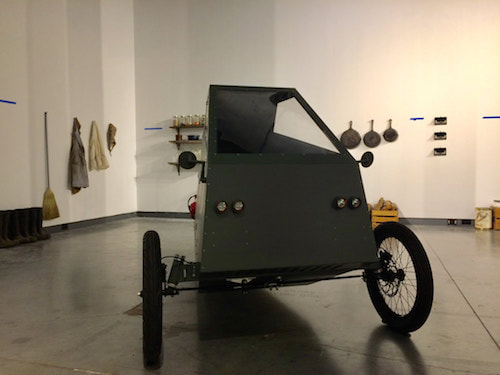
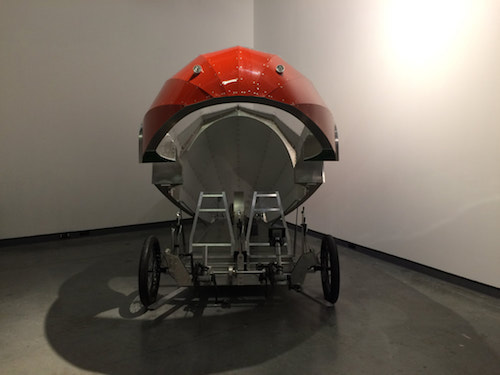
Solo Exhibition at the Delaware Contemporary Museum of Art
THE FUTURE PEOPLE: creating public imagination is a solo exhibition at the Delaware Contemporary Art Museum in Wilmington, DE. The exhibition runs through October 10, 2018. The exhibition displays two major projects of The Future People's work -Future Cycles and The 1000 Acre Experiment. The projects demonstrate alternative ways of living and transporting ourselves in the 21st century.
|
|
|
Off the Grid: week 39 Our Final Week
Our nine month living "off the grid" experience has come to a close. Turtle Island Preserve has brought such beauty, joy, rhythm and purposeful
labor to our lives. We are grateful for the opportunity to challenge our conventional needs and comforts and through that experience find more authentic luxuries. We want to continue to live in this way and so we are beginning a large project that will synthesize what we have learned from all of these past experiences. More on that soon...
labor to our lives. We are grateful for the opportunity to challenge our conventional needs and comforts and through that experience find more authentic luxuries. We want to continue to live in this way and so we are beginning a large project that will synthesize what we have learned from all of these past experiences. More on that soon...
Off the Grid: week 35
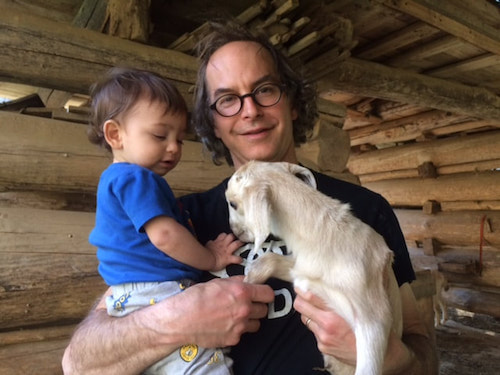
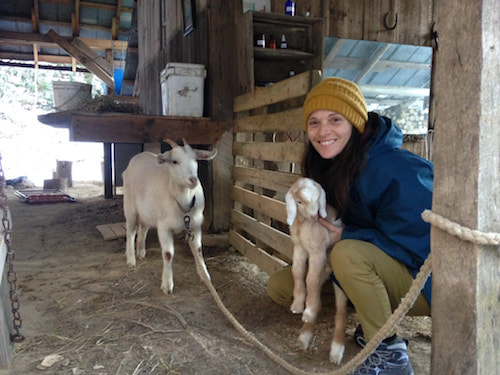
Spring has brought Turtle Island to life with budding trees, six new baby goats, Work Away interns, and many volunteers. We continue to feed the the horses, pigs, and goats, but our daily life has shifted back to the outdoors as Rachael begins painting outside again and our weekends are filled with assisting with workshops, school groups, and Forestry programs.

|

|
|
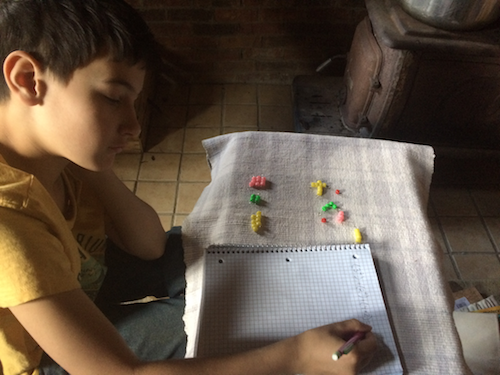
Off the Grid: week 30
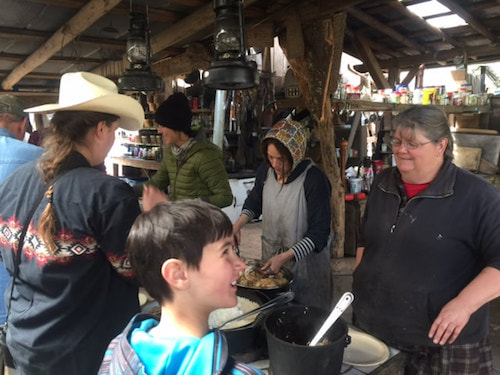
While visiting our family in Michigan over the Christmas holidays we realized what an incredible opportunity for learning Turtle Island would be for our 11 year old nephew. The beauty of home schooling is that teaching can be done anywhere and so with his mother’s consent, our nephew has been living and learning with us by being fully immersed in the work, culture and countless teachable moments of a 1000 acre classroom.
|
|
|
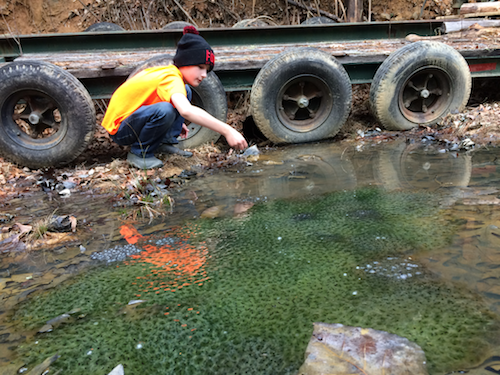
Off the Grid: week 23
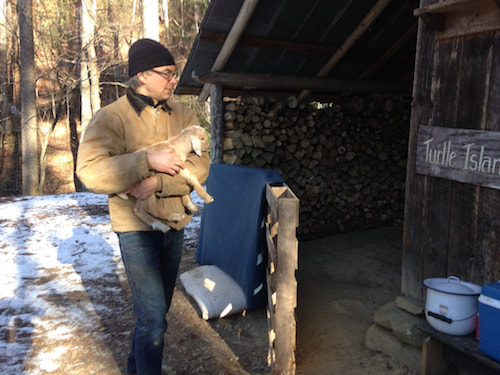
While doing evening chores Rachael discovered a newborn goat in a corner of the shed almost frozen in the frigid 6 degree weather. Wiping it down and wrapping it in a blue blanket, the baby goat was quickly taken to our cabin and warmed by the wood fire. With much effort the mother goat was coaxed to our cabin and tethered outside for nighttime feedings. Cameron constructed a pen from pallets for mom and baby. We are thankful that “Juniper” is healthy and feeding well! He is even walking and exploring on his second day of life!


|
|
|
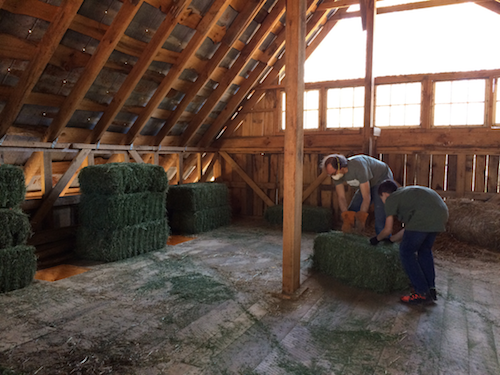
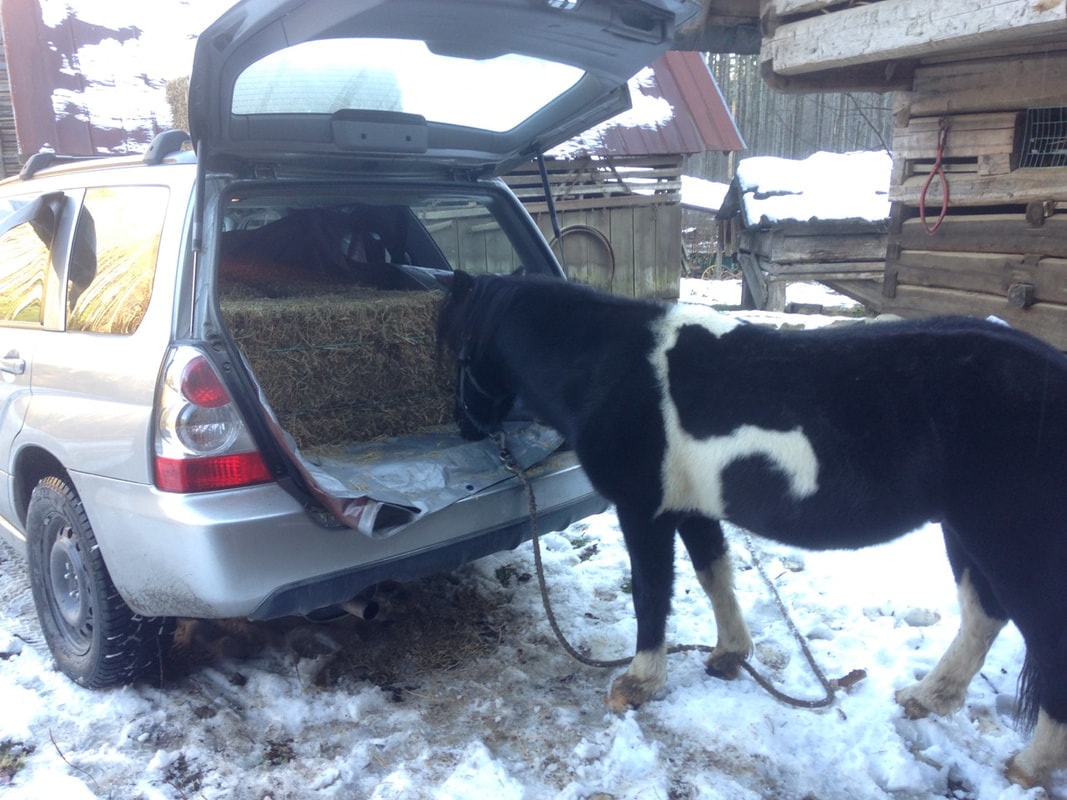
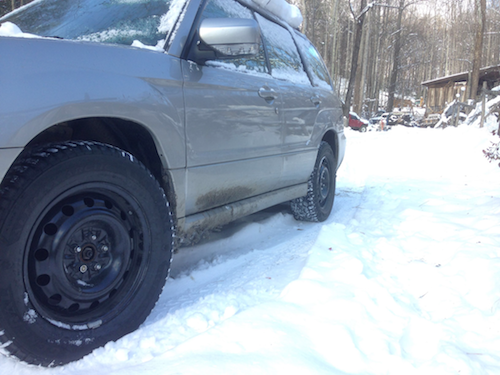
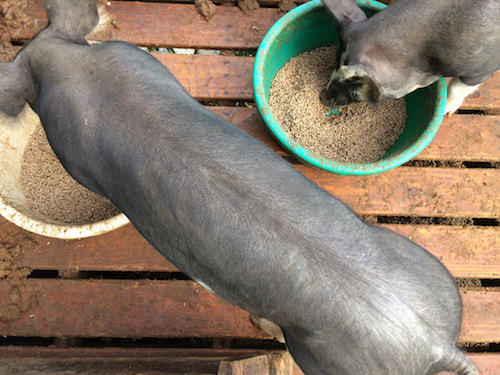
Off the Grid: week 21
Now that winter is here the animals need extra food. Its Pizza Pizza for the pigs and hay for the goats and horses. The Subaru has become a critical part of this process used to shuttle hay down the steep road into main camp and deliver food to the animals.


|

|
|
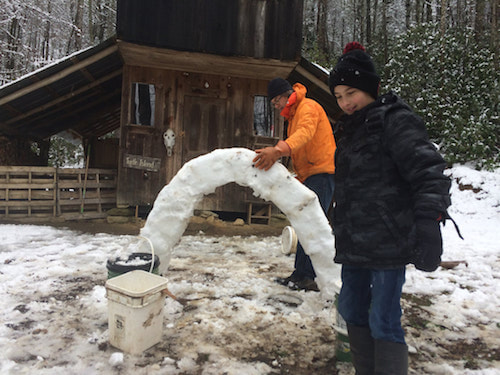
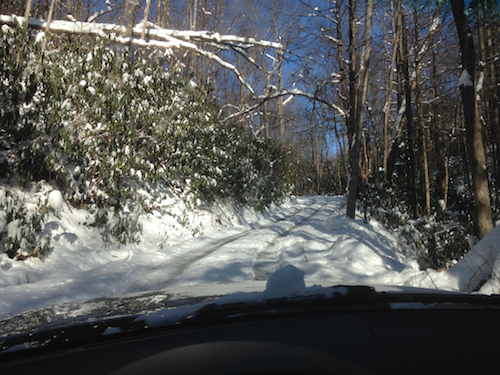
Off the Grid: week 19
First snow of the season brought 6 inches. Beauty surrounds us. Steel studded snow tires mounted on the car will help us get in and out of Turtle Island Preserve in the snow and ice.

|
|
|
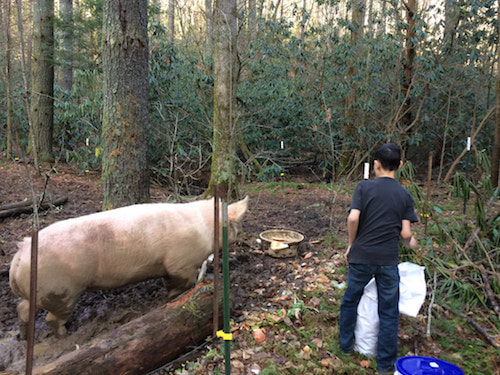
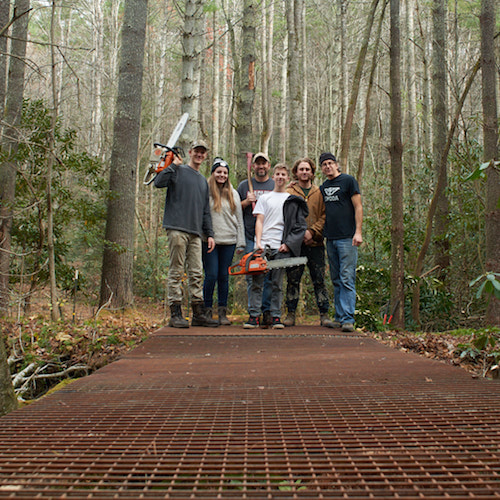
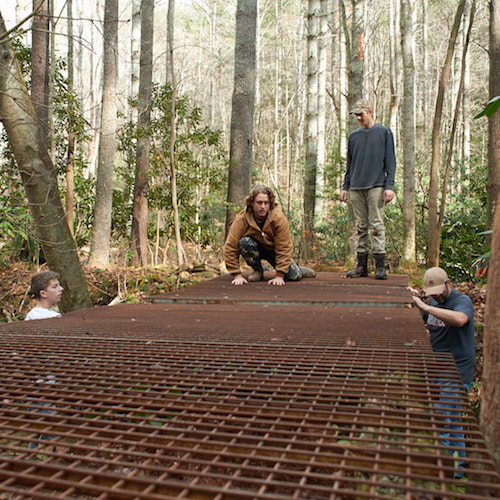
Off the Grid: week 18
Chilly mornings prompted Rachael to consider how to shorten her walk to do chores. By placing a wood board over the creek bed to feed Miss Piggy she was able to avoid circumnavigating the creek. Eustace noticed the wobbly make-shift "bridge" lying across the water as well as the embankment Rachael was climbing to get to Miss Piggy. He suggested that Cameron and a volunteer crew make an actual bridge to the pig. Eustace downed a dead black locust and Cameron and volunteers laid the logs and placed metal grates over the top. Rachael cooked a "thank you" lunch over the fires for the work crew!
|

|
|
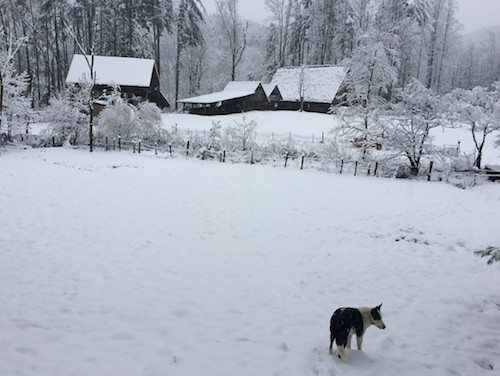
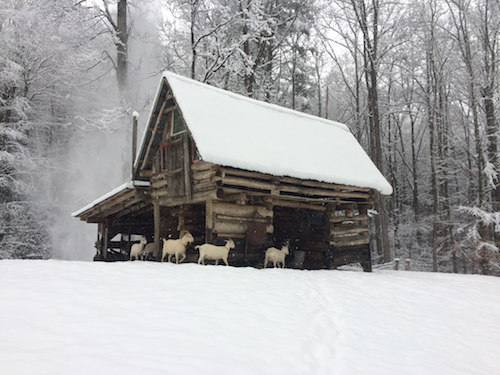
Off the Grid: week 17
We traded our snake boots for snow boots as winter has arrived in Boone, NC. Our efforts to collect, chainsaw, chop and stack firewood has brought us comfort as the first snow begins to fall. The potbelly stove lets off a steady heat throughout the night and the cast iron steamer humidifies our cozy cabin.
|

|
|
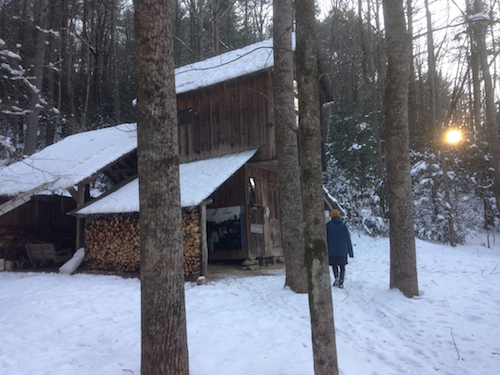
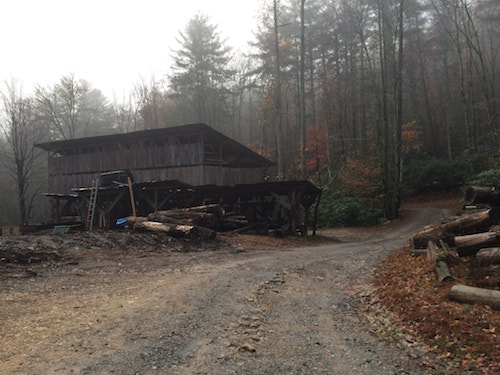
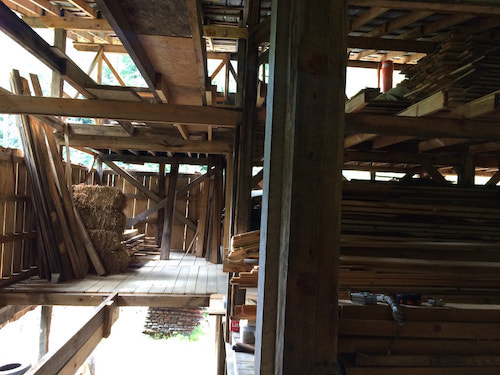
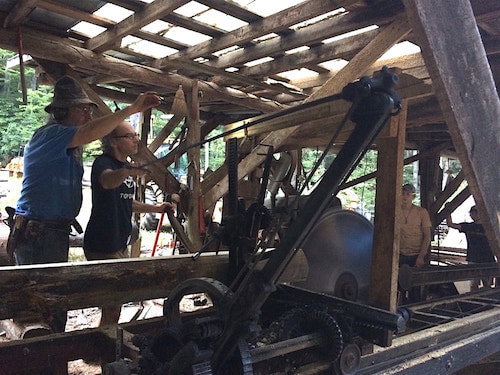
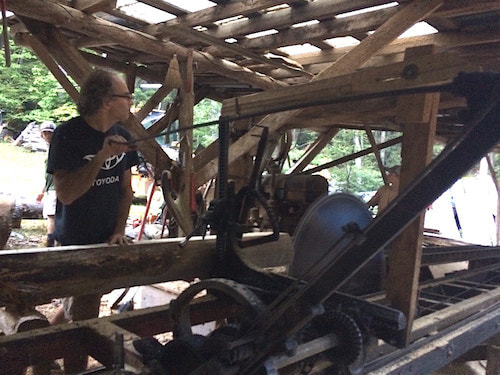
Off the Grid: week 15
Turtle Island Preserve is 1000 acres of forest and so all of the buildings there are made from wood harvested from the property. Critical to that harvesting is the sawmill where the tree trunks are cut into lumber and stored to dry in the lumber shed. Cameron recently had a chance to work with Eustace learning how to run the saw mill. The mill consists of a 48" circular saw blade attached with belts and pulleys to an old diesel tractor motor. An adjustable carriage holds the log and runs on a track - taking the log back and forth through the blade to make each cut.
|

|

|
Off the Grid: week 11
With winter wood chopped and stacked Rachael has found time for landscape painting again. Colors surround us here at Winter Cabin inspiring a new body of work for the fall. Canopies of ocher and crimson arc across the trail to a beautiful cabin that has become Rachael's studio for the season.
|

|

|
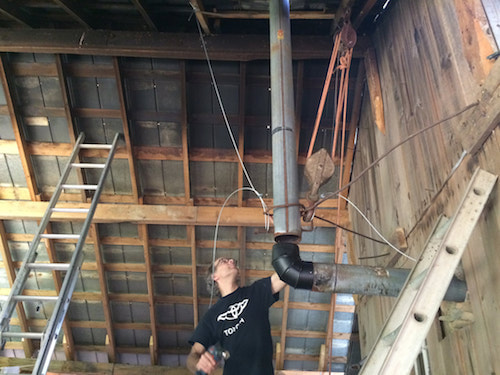
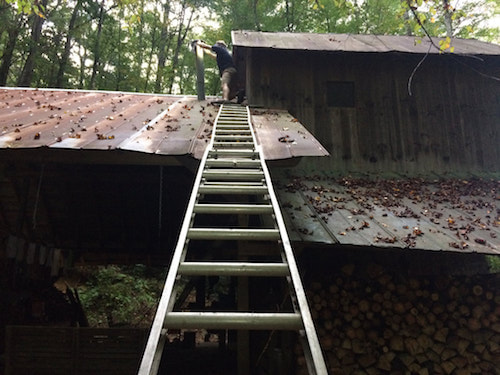
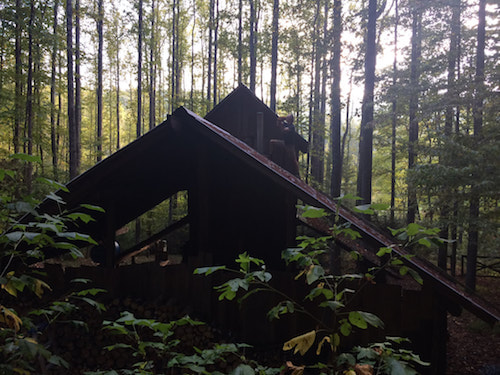
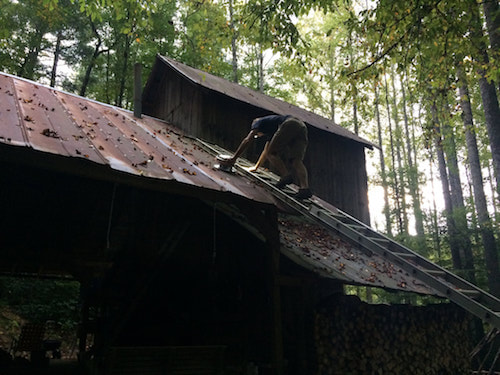
Off the Grid: week 8
Leaking holes in the tin roof and a missing elbow in the stove pipe needed to be fixed this week. Cameron lowered the heavy stove pipe with a block and tackle attached to the rafters. He placed a chimney cap on top and then raised the stove pipe and connected the elbow. With cooler weather coming we look forward to firing up the pot belly stove soon.

|
|
|
|
|
|
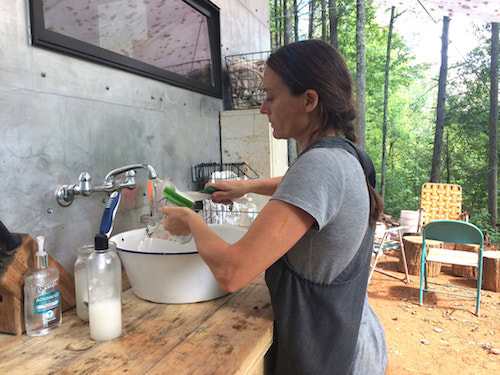
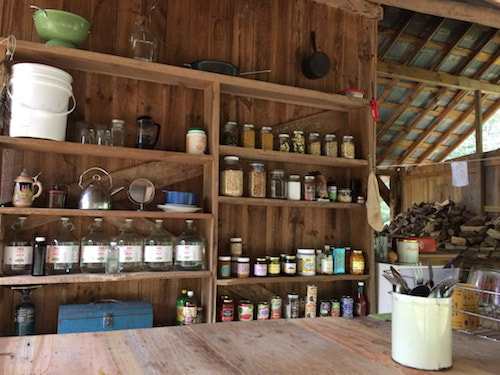
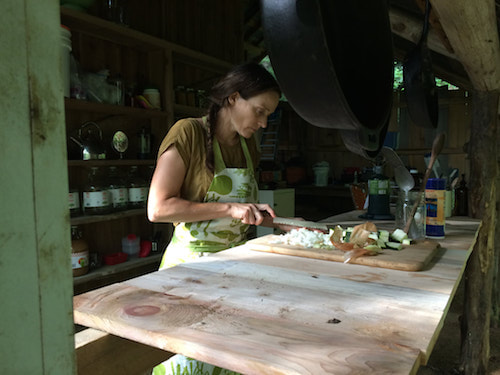
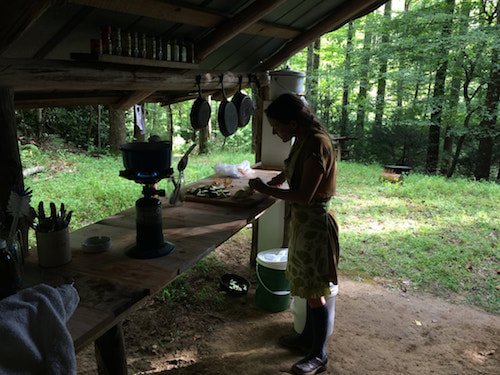
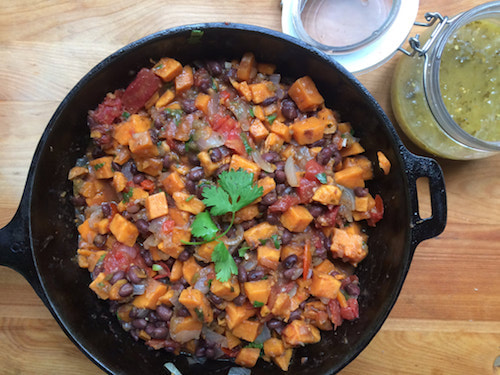
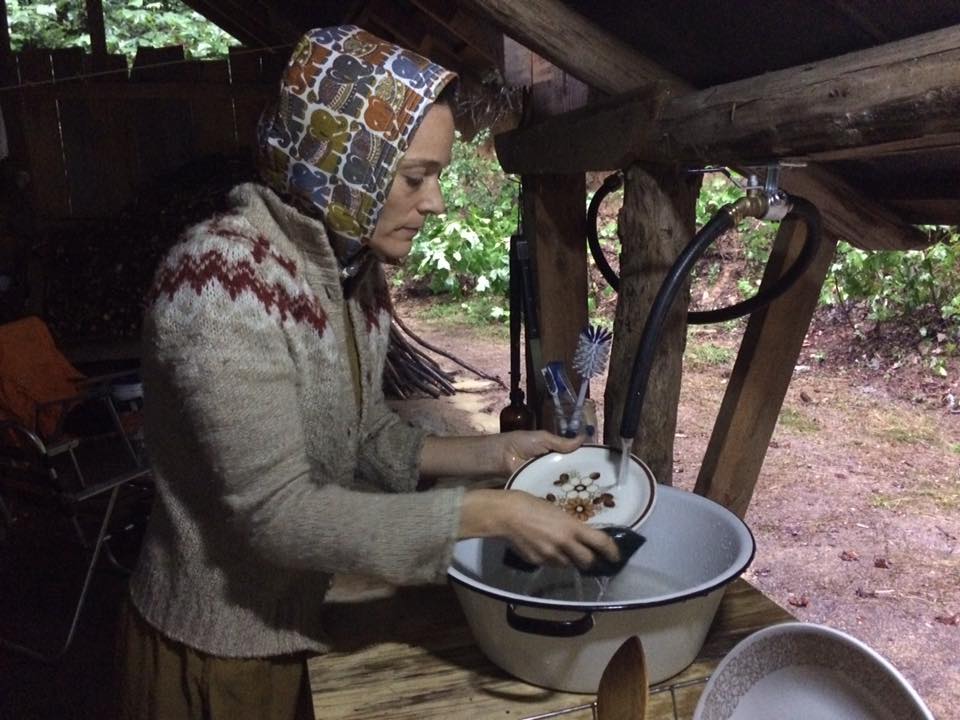
Off the Grid: week 6
Well-seasoned cast iron fry pans hang in a row above the outdoor kitchen counter. Breakfasts and dinners are cooked with our one burner Coleman camp stove, the propane lasting for at least a week of meals. Fruits, veggies and opened jars of food are stored in a latched metal cabinet and potatoes in a bread box. Outdoor wood shelves are lined with glass Mason jars of grains, wild rice, crunchy granola and nuts, all staying fresh with an oxygen pack. The jars can be opened and closed resealing themselves within four hours. This summer before moving to Turtle Island Rae dehydrated 12 onions, 32 ears of corn and 10 zucchini for warm winter soups which are also stored in canning jars with oxygen packs. The fall season camp fire has served well for a few dishes including delicious hot peach cobbler.
|
|
|

|
|
|
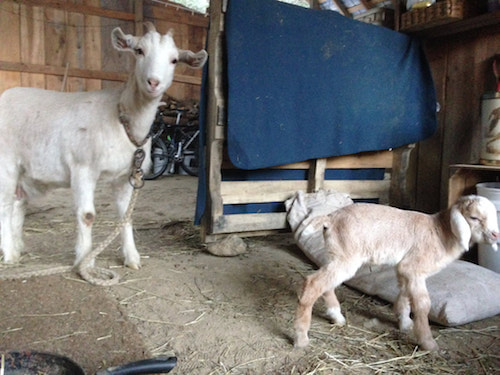
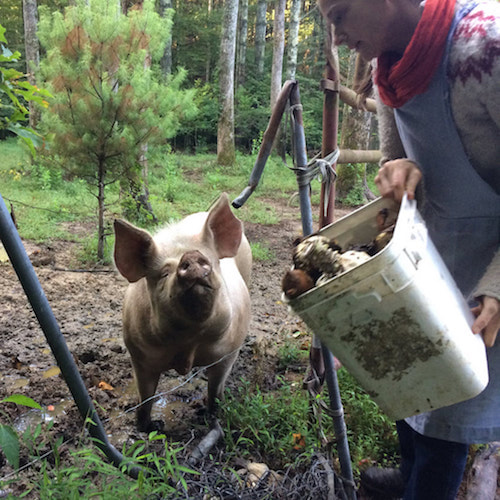
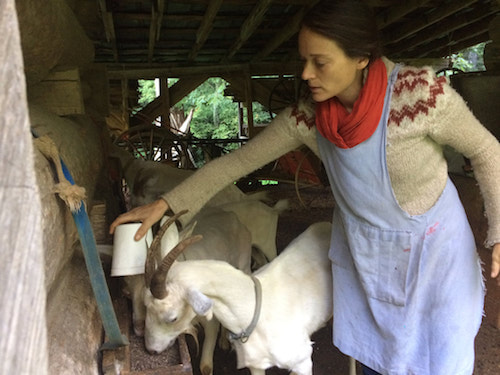
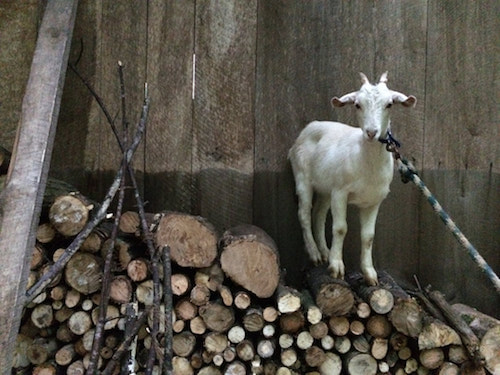
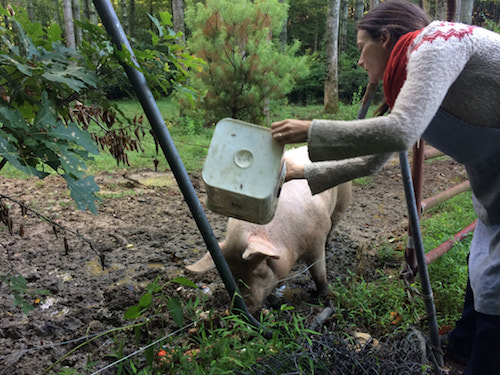
Off the Grid: week 5
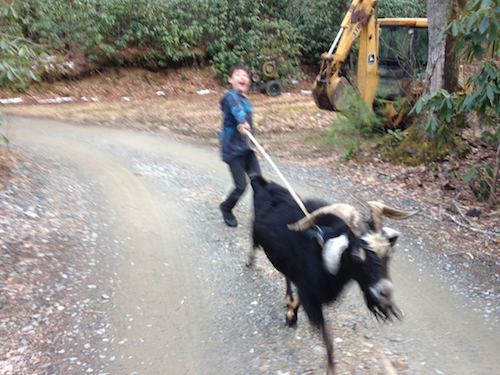
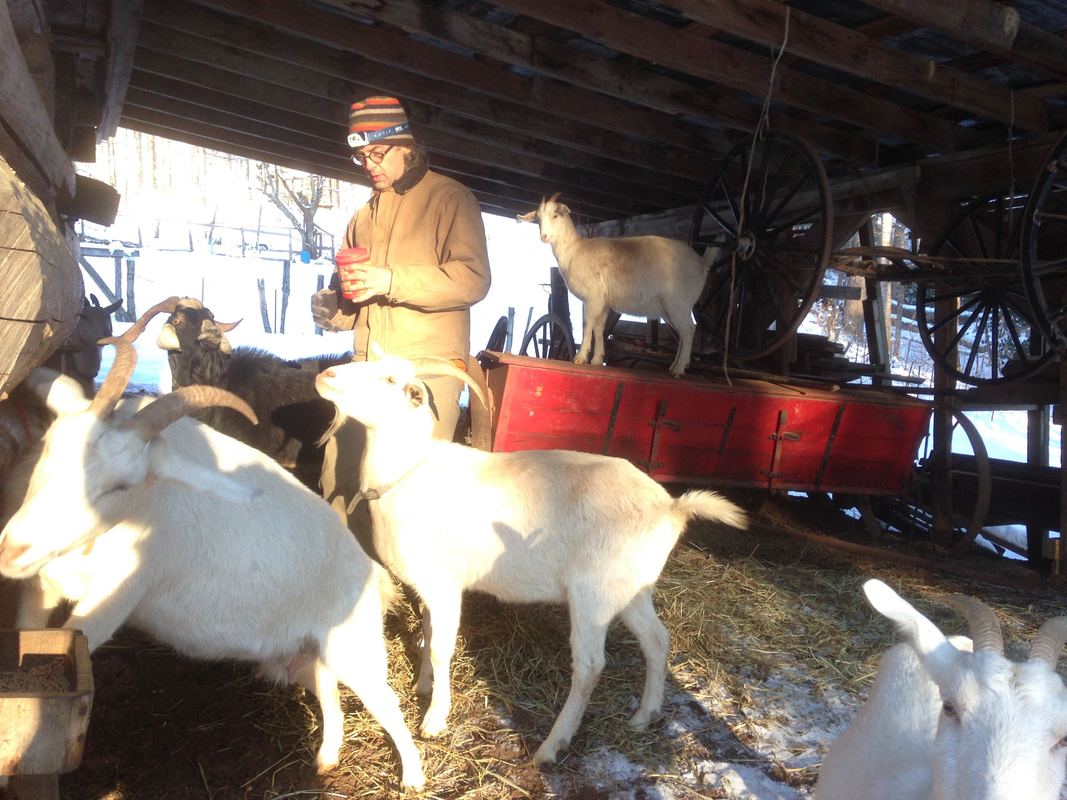
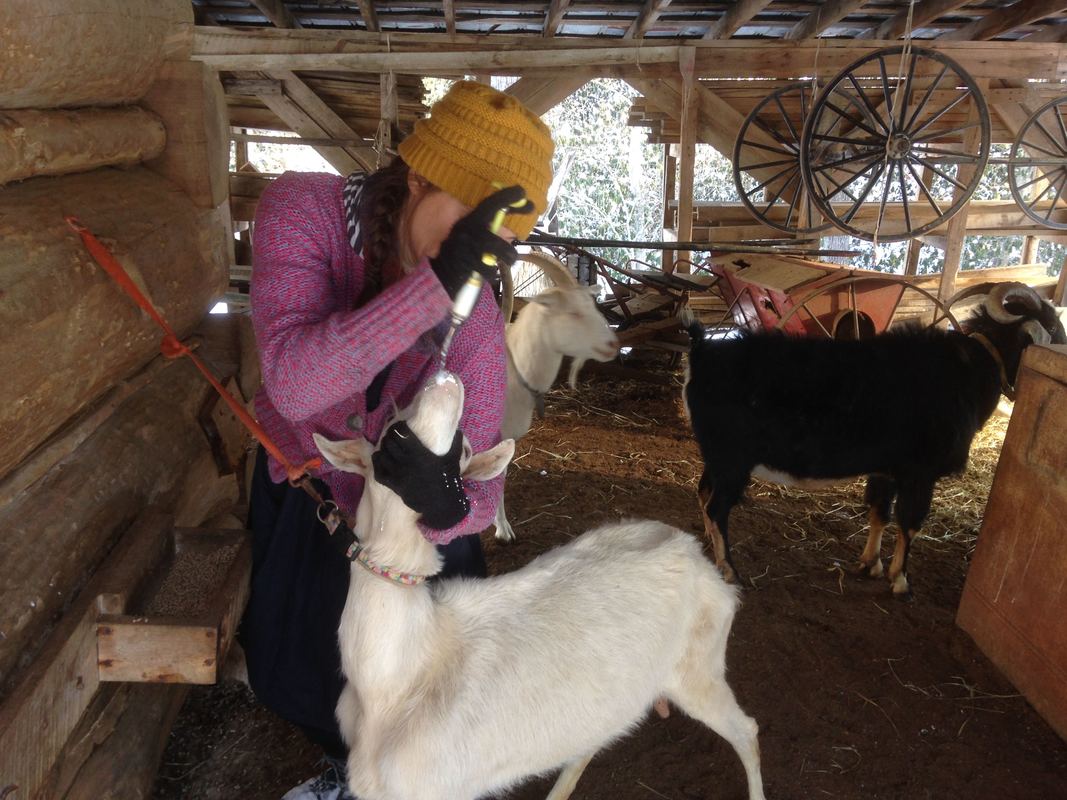
Naughty goats and pudgy pigs are now part of the rhythm of morning and evening. Rachael is doing the chores four days a week helping to feed six goats and three pigs. One of the young goats we enjoyed caring for up at our cabin while it started the weaning process. Rae named her, "Sis" and sung to her opera arias while stroking her ears and long straight nose to calm her fears.

|
|
|
|
|
|
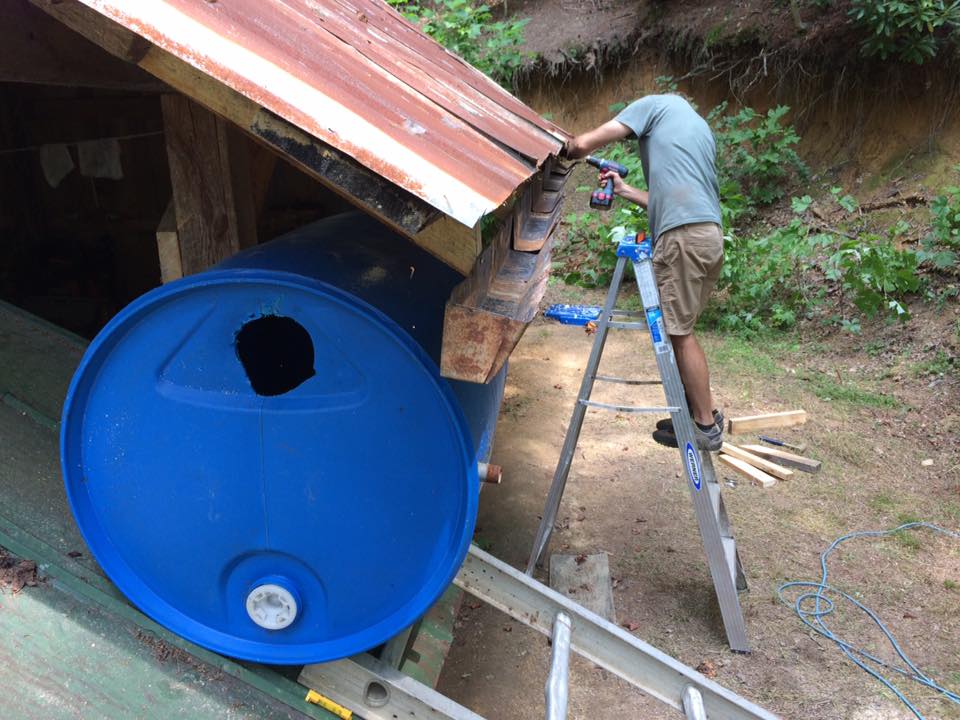
Off the Grid: week 4
Cameron engineered a rainwater collection system by strengthening the wood eaves and adding a hand built metal gutter. The gutter leads to a 40 gallon holding tank that is nestled in-between the two roofs. A hose has been attached to an on/off spigot that pours into the outdoor kitchen wash basin.

|
|
|
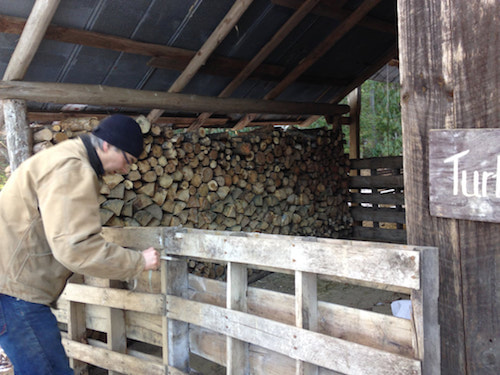
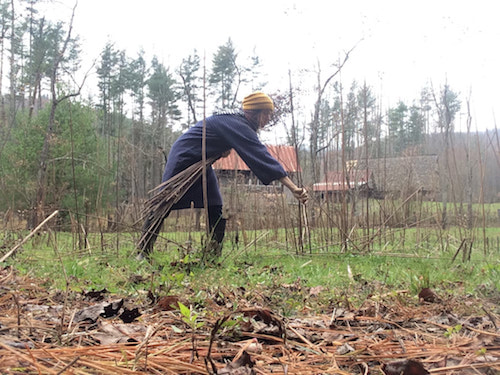
Off the Grid: week 3
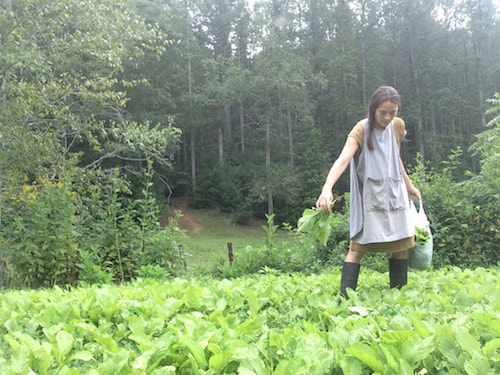
Winter preparation has begun. Collecting and chainsawing dead and fallen trees throughout the woods - local firewood right around our cabin. Dead Black Locust, a rot resistant tree, was used to create firewood racks and sturdy up the structure of the cabin. Rae has been gathering late summer greens from the garden and experimenting with cooking over coals.
|

|
|
|
|
|
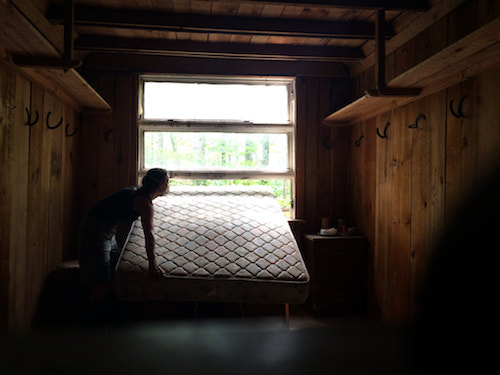
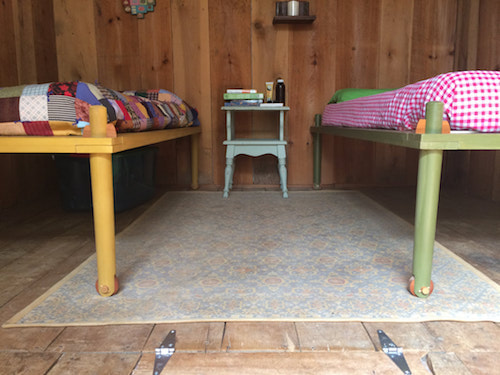
Off the Grid: week 1
Wearing our snake boots, we cleared a path to Winter Cabin where we cleaned out cobwebs, dusted floorboards, and removed a mildewed mattress and swivel office chair. We furnished the upstairs bedroom with Shaker replica milk painted beds made by Cameron and we also built an outdoor kitchen. The overgrown .25 mile trail was raked and widened and the drainage ditch around the perimeter of the cabin rerouted.

|
|
|
|

|
|
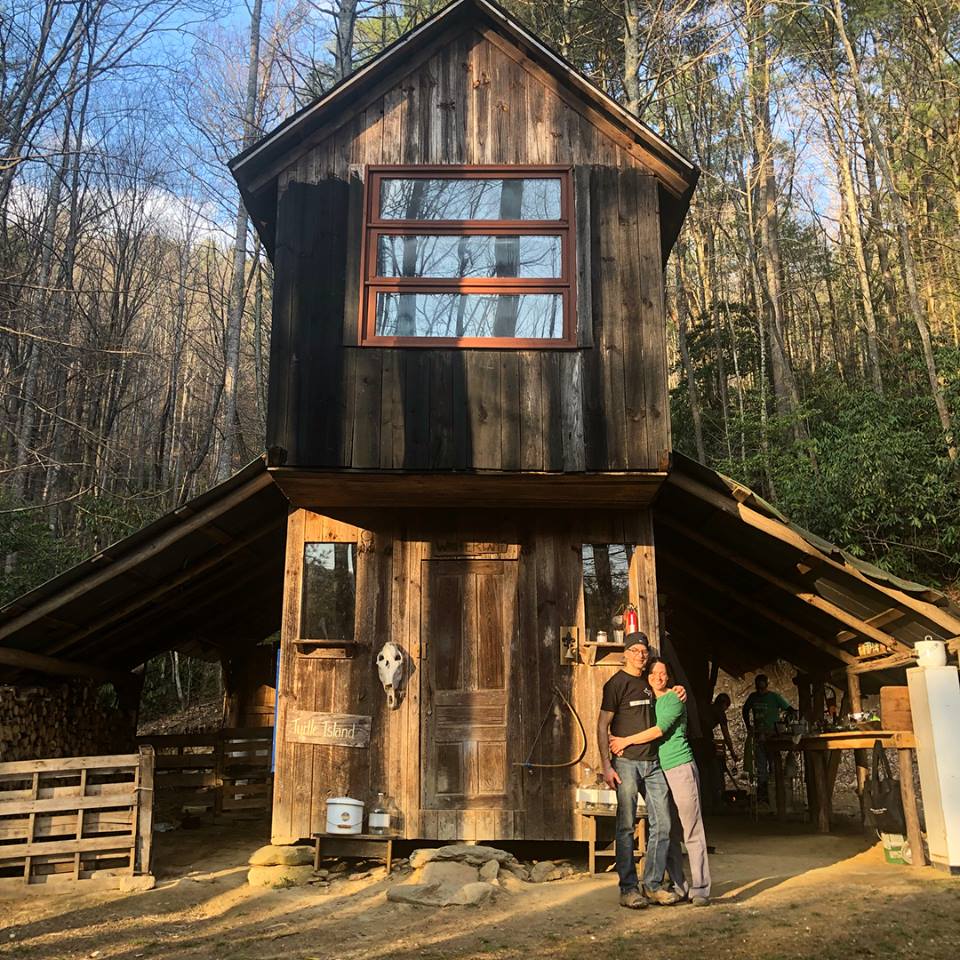
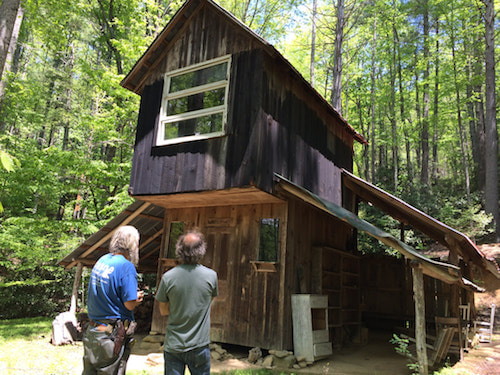
THE FUTURE PEOPLE move off the grid
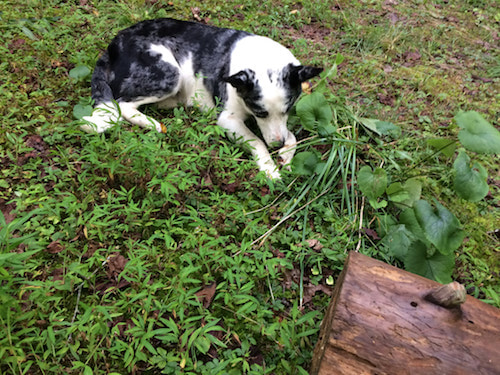
THE FUTURE PEOPLE have begun a new living experiment at the Winter Cabin at Turtle Island Preserve. The 200 square foot cabin is off the grid, with no running water and no electricity. The wooden structure is propped up on large stones, where underneath Simma, the shepherd dog that came with the territory, resides at night. The cabin was created years ago by volunteers of Turtle Island, and we are now participating in the community of this beautiful and remote preserve. We begin our nine-month stay at Turtle Island Preserve which is a 1000 acre wilderness preserve in the mountains outside of Boone, NC . The purpose of the project is to experience life in a closer connection with the natural world and to work to discover the overlooked luxuries of life without the distractions of modern conveniences. Our hope is to share these experiences with others that are seeking to find a more authentic and meaningful relationship with the natural systems that support life.
|
|
|
|
|

|
THE FUTURE PEOPLE lead bicycle tour for Chicago teens
In June of 2017 the Future People along with US History teacher Christian Altena led six Chicago high school students on a 333 mile bicycle journey from Pittsburgh to Washington, DC. Their history lessons were brought to life by traveling the Great Allegheny Passage and the C & O Canal tow path. This route, filled with sites related to the history of steel, transportation, immigration, the American Revolution, and the Civil War--has educational opportunities around every bend of the trail. On this 10 day trip the riders began at the site of the 1892 Homestead Steel Strike, rolled along the route of the Baltimore and Ohio Railroad and the Chesapeake and Ohio Canal, through the Antietam battlefield and ended their journey at the steps of the Lincoln Memorial.
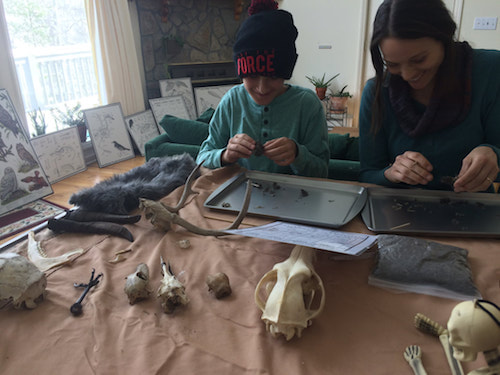
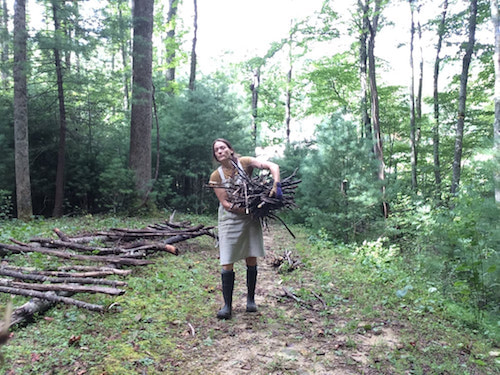
THE FUTURE PEOPLE volunteering with Turtle Island Preserve, Boone, NC
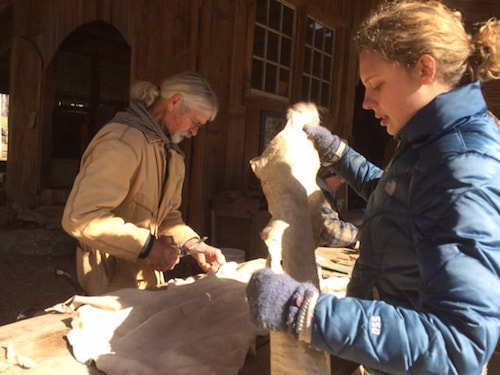
The enthusiastic vision of Eustace Conway in Elizabeth Gilbert's biography, Last American Man, inspired The Future People to become involved as volunteers at Turtle Island Preserve. During our first experience at the 1000 acre off-the-grid nature preserve Cameron assisted with fixing the micro hydro-electric generator and Rachael stacked firewood for the upcoming winter season. Volunteering during weekend workshops such as Blacksmithing and Deer Hide Tanning, Rachael and Cameron have enjoyed working in community with other volunteers as outdoor cooks using wood burning ovens, a cob oven, and two hearth fires. Evenings are spent gathered around the stone fireplace sharing stories and lessons learned from the day before retreating to the hand built rustic cabins.
THE FUTURE PEOPLE exhibit at the Smithsonian Cooper-Hewitt Design Museum, NYC
THE FUTURE PEOPLE exhibited The Orbit, at the Cooper Hewitt 2016 exhibition, By the People; REDESIGNING AMERICA. An exhibition of 60 collaborative designs from throughout the United States and across borders, By the People challenges the country’s persistent social and economic inequality. Curator of Socially Responsible Design Cynthia E. Smith conducted over two years of field research—traveling to shrinking post-industrial cities, sprawling metro regions, struggling rural towns, areas impacted by natural and man-made disasters, and places of persistent poverty—in search of design for more inclusive and sustainable communities. Presented in the Barbara and Morton Mandel Design Gallery and Process Lab, the exhibition delivers a powerful message of optimism for achieving a more just and equitable society for all Americans through design.
THE FUTURE PEOPLE at the North American International Auto Show
In our first major deployment THE FUTURE PEOPLE exhibited both the Cyclone and the Zeppelin at the 2015 International Auto Show in Detroit, MI. The deployment of the Future Cycles Project at the auto show was an opportunity to directly engage car culture in a conversation about energy efficiency, health, and the future of mobility. The Detroit auto show is 14 days long and over 800,000 people attend.
Wide Bike Feasibility Test in Ann Arbor, MI
The Wide Bike Feasibility test was conducted over a three-day period in October 2013 with three goals in mind. The first was to understand how people in cars react to large and slow bicycles on the roads; the second was to understand what elements in the built environment help or hinder the use of such a vehicle; and the third was to create a map that shows which roads in Ann Arbor work best for “wide bike” travel. Using an old “granny trike” Cameron constructed a tiny mobile home out of recycled materials and rode the wide bike through the city and made observations concerning these questions. Cameron's Wide Bike Feasibility Document can be downloaded below:
| wide_bike_.pdf |
Human Powered Vehicles and their Definitions
This paper explores potential legal definitions for the Cyclone.
| auto_report_compressed.pdf |
Bikes in The Netherlands
THE FUTURE PEOPLE went to the Netherlands in the summer of 2013 to research the bicycle culture of the Dutch and see if there are any lessons to be learned that could be applied to our future designs and any lessons that could be brought back to the US. We landed in Amsterdam, bought used bikes, and set out on a 3-week trip covering almost 500 miles.
In Amsterdam everyone rides a bike. The bike is faster, cheaper, and more convenient than any other mode of transport there. The reason - narrow streets and traffic congestion, the erratic design of the streets because of canals, slow public transportation, difficulty finding parking for cars, the high cost of car ownership and gas, the fact that everything is so close together, and the fact that it is fairly flat.
But perhaps one of the biggest reasons people bike in the Netherlands is that the government protects bike riders both physically and legally. Bikes have their own separate traffic lanes, traffic lights, and often have the right of way at intersections. Most of the time the bicycle lane is painted red - signaling to a car that he is crossing a bike lane. There are also many “Fietsstraat” or “Bike Streets” where bikes have primary right of way and cars are allowed only as guests. The bicycle is also protected legally by having the strictest penalties for injuring a bicyclist with a car.
This emphasis on bikes as the primary mode of transportation has made it logical to create many different kinds of bikes to suit many functions and multiple riders. On a Saturday morning you might see a whole family and groceries on two wheels. The classic “Bakfiet” or “Box Bike” has 2 or 3 wheels and a large wooden box on it for cargo and can be modified to do many things – including acting as a small bus to bring kids to school. The Dutch have even modified the “car” to shrink it down to bike size for use by the elderly on the bike paths. THE FUTURE PEOPLE test drove many of these bikes and met with several small manufactures discussing the possibility for new combinations of the bike/car.
IDIS
Instantly Deployable Insulated Shelter
THE FUTURE PEOPLE began hanging out with homeless people downtown in order to learn more about what it is like to be homeless and what some of the possible solutions might be. It began to get down into the 20’s at night and we became concerned for the warmth of those sleeping outside. As an experiment Cameron designed and built a small, insulated, collapsible shelter out of ridged foam board on a Saturday afternoon and then went downtown to see if any of the homeless people we had met would be interested in giving it a try. No one was interested in trying the shelter – they each had a system to keep themselves warm enough. We were disappointed at first until one of them suggested that Cameron join them under a nearby bridge to test it out. Sunday afternoon Cameron set up the IDIS shelter under the bridge next to the train tracks. He stayed for three nights – it got down to 18 degrees on his last night. On those three nights he had a chance to visit with Rick, Jack, and Mark - his new friends under the bridge and learned a lot about how they ended up there. The reasons are not what you may think; these guys are smart, hardworking people who had careers, homes, and families. Their welcoming and honesty encouraged him and we think they were encouraged by our interest in them and our concern for better times ahead. What we learned mostly is that these guys are not “homeless” they are “houseless”. They have created a home of sorts – pieced together between the bridge, the tents, the places they get meals, and the places they spend their day. What they lack is the physical permission and financing to be somewhere they can legally call their own.